How to Fix iPhone Gets Bricked After iOS 16 Update
The launch of iOS 16 has made many iFans so excited that many iPhone/iPad users are trying to update their iDevices to iOS 16 for new experience. However, when you try to jailbreak your iOS device or update the latest firmware like iOS 16, in most cases it goes fine but sometimes it might gets bricked. So what should you do to fix your bricked iPhone/iPad after iOS 16 update? This article will show you an easy way to fix the problem and how to recover data from bricked iDevice with ease.
2. How to Fix iOS 16 Bricked iPhone with iTunes?
3. How to Fix A Bricked iPhone without iTunes after iOS 16 Update? (Recommended)
4. How to Recover Data after Fixing Bricked iPhone?
Is My iPhone Bricked?
Generally speaking, your iPhone might get bricked for some firmware errors or uncompleted setup. So how to judge if your iPhone really gets bricked? You might refer to some bricked performances as below to confirm and decide whether you need to fix your iPhone/iPad with bricked problem or not.
* Your iPhone/iPad is stuck in Recovery Mode.
* Your iDevice becomes stuck on the Apple logo.
* Your iDevice cannot be turned on.
* The display is stuck on a spinning wheel.
* Your iOS device is stuck on a black/white screen.
* The display shows a battery logo with red line, even though your iDevice has been fully charged in fact.
If your iPhone/iPad meets one of the above performances, your iDevice is probably bricked. But don't worry, there is a simple way for you to fix the bricked iPhone/iPad after iOS update.
How to Fix iOS 16 Bricked iPhone with iTunes?
Since updating the latest firmware may cause bricked device, it is always recommended to backup all data from your iPhone/iPad before updating your iDevice to iOS 16. However, you might fix this issue by connecting to iTunes. What you need to know before fixing is your device data might be completely wiped away and you need to enable the Recovery Mode to fix it, or you might restore the data from the previous backup with iTunes afterwards. Now, please follow the steps below to restore your iDevice.
Step 1. First of all, you need to on your iDevice by connecting the lightning cable to your iPhone/iPad. And make sure that it is not connected to your computer for now.
Step 2. Long press the Home button on your iDevice for several seconds while connecting to the computer. Then run iTunes on the computer and a logo of iTunes will shows on your device, which means your device enters Recovery Mode.

Step 3. Once you run iTunes, the problem of your iDevice will be detected automatically. And a pop-up message from iTunes shows to ask to update or restore to fix the problem. Since the problem has been caused by updating iOS 16, it can be fixed by restoring your phone. So click the "Restore" button and wait for some time and your idevice will be fixed successfully by iTunes.

Step 4. Sometimes you might not get the message from iTunes to ask for restoration or update, then you need to restore the device manually. Choose your device on iTunes and visit the recovery section, you might get the message as below to ask to restore the device to factory settings or update. Just click "Restore" button to fix the problem.

Step 5. After fixing the bricked problem, you might also restore your backup from iTunes. Visit "Summary" on iTunes and click "Restore Backup" to start restoring.

How to Fix A Bricked iPhone without iTunes?
For many people, fixing a bricked iPhone with iTunes is complicated. So here another althernative software to iTunes is recommended here to help you fix your bricked iPhone with few simple clicks - iOS System Recovery. With it, you can easily and quickly return your iPhone to normal status, and the operation is really easier than iTunes.
Here is the details steps:
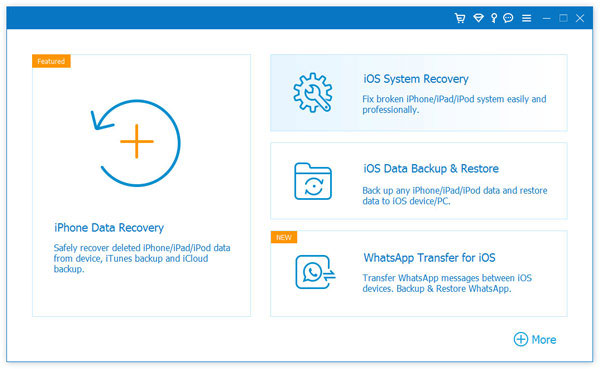
Step 1. Download and install the iPhone System Recovery software on your computer, then connect bricked iPhone to PC. Select "More Tools > iOS System Recovery" to enter the fixing process.

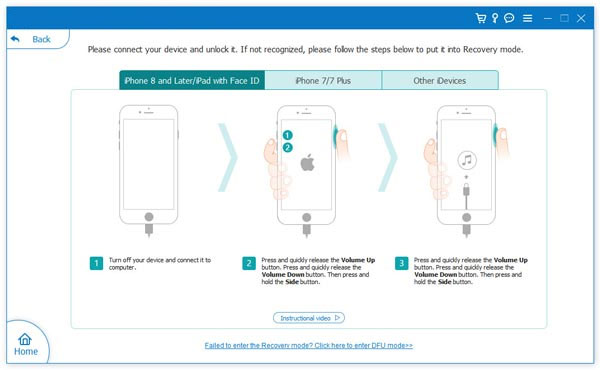
Step 2. Click "Start" and follow the instructions to enter the DFU mode.

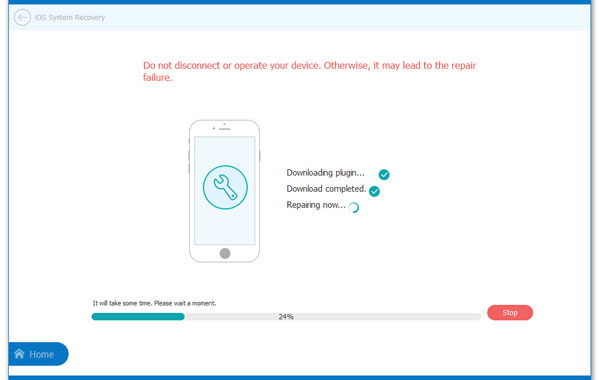
Step 3. Select the right iPhone model and click "Download" to download the device plug in. After downloading, it will start repairing the device and your iPhone will back to normal soon.

How to Recover Data from Bricked iPhone?
After fixing the bricked problem, you might lose all your data and need to recover or restore your data from your bricked iPhone/iPad. There is a professional iOS Recovery called MobiKin Doctor for iOS for you to achieve these goals. And this great program is compatible for almost all models of iPhone, iPad or iPod to recovery or restore the deleted, lost and formatted data as you like.
Key Functions MobiKin Doctor for iOS:
* Recover the lost or deleted data directly from iDevice without iTunes.
* Restore data from iTunes backup with the program by scanning automatically all iTunes backup files.
* Recover different contents from iDevice, including Contacts, SMS, Call History, Notes, Calendars, Photos, Attachments and etc.
* Restore Messages, Contacts and Call History and save as HTML format.
* Backup all the files of iDevice by 3 steps (Scan > Select > Backup).s
* Preview any data you like before recovery.
* Extract data from unreadable iTunes backup file and save them on your computer.
Learn more about MobiKin Doctor for iOS.
Now, please follow the steps below to start to recover lost, deleted or formatted data from iDevice directly.
Step 1. Download and install the program on your computer.
Step 2. Launch the program and connect your iDevice to your PC with a USB cable. On the top of the interface, there are two modes of the software, "Recover from iOS Device" and "Recover from iTunes Backup Files". And to use the "Recover from iOS Device" Mode, jailbreak is required for the connected iDevice, or the program might fail to detect the device. In this way, an interface might show as below.

Since the iPhone has updated to iOS 16, your iDevice will be detected by the program and all your iDevice data will be scanned automatically by it and show them as below.

Step 3. Click the items on the left panel to preview the files on the right. The deleted and existing will be distinguished in different colors. Tick the files you want to recover and click "Recover" button to start the process and save them on your computer.

Note: To check all the contents on the program, users need to register the program first.
Also, you might use the "Recover from iTunes Backup Files" mode to restore files from iTunes backup. To use the mode, you don't need to run iTunes or connect your iDevice to your computer, just launch the program and it will scan automatically all iTunes backup files on your PC and select the target files from the backup file to extract and save them on your device.
Related Articles:
How to Restore iPad Pro/Air/mini/4/3/2 from Backup [with or without Resetting]


