9 Easy Methods to Transfer Photos from Android to Computer/PC
"How to transfer pictures on Android phone to desktop PC running Windows 11. Photos app will not make the transfer." -- from Microsoft Community
Capturing precious moments on Android phones has become second nature, with these devices serving as personal galleries for photos. However, there are times when transferring these cherished images to a computer is necessary for backup, printing editing, or sharing. Today, we'll dwell on 9 easy ways how to transfer photos from Android to computer, helping you find the best method for your needs.
- Way 1: How to Transfer Photos from Android to Computer Conveniently
- Way 2: How to Transfer Pictures from Android to PC via Quick Share for Windows
- Way 3: How to Transfer Photos from Android to Computer Using USB Only
- Way 4: How to Download Photos from Android to Computer via Windows Photos
- Way 5: How to Get Photos from Android to Computer Using Google Photos
- Way 6: How to Transfer Photos from Android to Computer Windows 10/11 via OneDrive
- Way 7: How to Transfer Images from Android to Computer via Phone Link
- Way 8: How to Transfer Photos from Android to Computer via Bluetooth
- Way 9: How to Transfer Photos from Android to Computer over Gmail
Check out the video below to learn this topic in a vivid manner.
Way 1: How to Transfer Photos from Android to Computer Conveniently
If you are looking for a convenient and effortless method to copy photos from Android to PC, MobiKin Assistant for Android (Win and Mac) is highly recommended. This intelligent product allows you to easily preview and synchronize all or specific images from nearly any Android device to your computer with just a few simple clicks. Moreover, it offers additional features such as media file management and direct handling of other essential data on your computer.
Noteworthy Features of MobiKin Assistant or Android:
- Selectively transfer photos from Android to a computer.
- Easily and quickly copy data from a laptop/desktop to Android flexibly.
- Bulk back up and restore Android with one click.
- Move such files as contacts, call logs, text messages, music, pictures, videos, books, apps, etc.
- Manage Android pics and other items on a computer directly.
- Two connection modes: Wi-Fi and USB.
- Work well with 8000+ Android phones/tablets.
- It won't compromise your privacy.
Free download MobiKin Assistant for Android and learn how to send pictures from your phone to a computer with it:
Step 1. Connect - Install the program on your computer and launch it. Connect your Android phone to the computer using a USB cable. Follow the on-screen instructions to allow the utility to recognize your smartphone.

Step 2. Select - On the program's interface, navigate to the left panel and click "Photos". Then choose either "Camera" or "Library". This will display all Android images in the right column. You can now preview and select the desired pics for transfer.
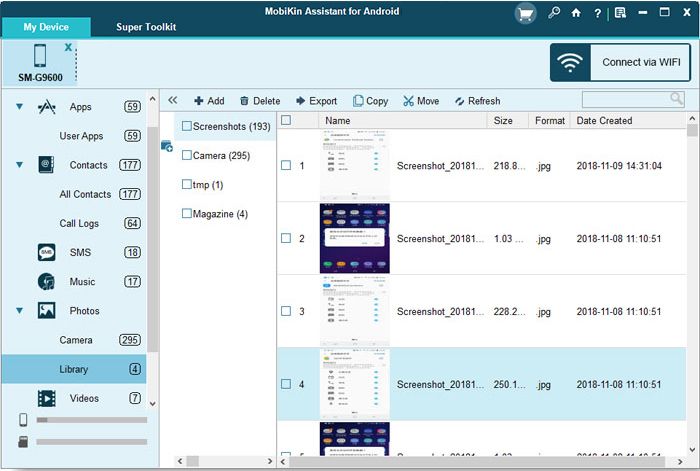
Step 3. Transfer - Once you have made your selection, click on "Export" in the top menu to instantly transfer the chosen photos from your Android phone to your computer. (P.S. Can I transfer photos from my iPhone to my computer?)
Video Guide:
Limitations:
- May involve a paid version for full features.
- Although it can help you manage your photos on your computer handily, it can't optimize them.
Way 2: How to Transfer Pictures from Android to PC via Quick Share for Windows
Requirements:
- Ensure your Android phone supports Quick Share (Samsung devices with One UI 2.1 or later).
- Install Quick Share on your PC (Windows 10 or later). You can download it from the official Samsung website or Microsoft Store.
- Make sure both your phone and PC are connected to the same Wi-Fi network.
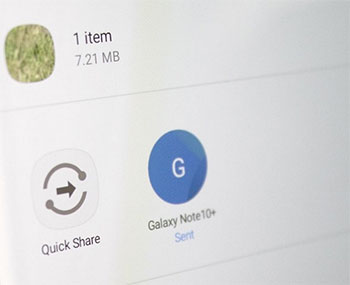
How to migrate photos from Android to PC with Quick Share for Windows?
- Go to your phone Settings > Connections > Quick Share.
- Toggle the Quick Share option to turn it on.
- Open the Quick Share app on your Windows PC.
- Sign in with your Samsung account if prompted.
- Open your Gallery app on your Android phone.
- Choose the pictures you want to transfer.
- Tap the Share icon (three dots or a share arrow) on the selected pictures.
- From the list of sharing options, select Quick Share.
- Your PC should appear in the list of available devices.
- Tap your PC's name to initiate the transfer.
- A prompt will appear on your PC asking you to accept the transfer.
- Click Accept to begin receiving the pictures.
- Once the transfer is complete, the pictures will be saved in the default folder (usually Downloads) on your PC.
Limitations:
- Only works with Samsung devices and specific versions of Windows.
- Both devices must be on the same Wi-Fi network.
What should I do if Quick Share isn't working? Here are the possible solutions: 1. Ensure both devices are on the same Wi-Fi network. 2. Restart both your Android phone and PC. 3. Check that Quick Share is enabled on both devices. 4. Ensure both devices are using the latest software updates.
Way 3: How to Transfer Photos from Android to Computer Using USB Only
File Explorer provides an alternative method to transfer photos from an Android phone to a PC. With this solution, you can manually copy pictures from your phone to your computer with ease and without encountering much difficulty.
How to import photos from Android to PC with File Explorer?
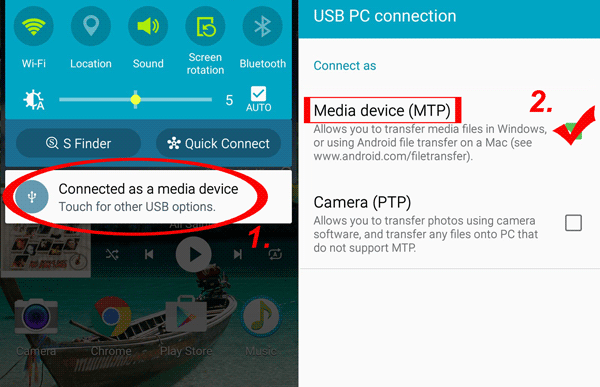
- Connect your Android phone to your PC and set it to MTP mode.
- Then, launch "File Explorer" on your PC and select "Find your device".
- Double-click to access your device and navigate to "Internal Shared Storage" or "SD Card Folder".
- Open the "DCIM" folder and proceed to "Camera", where your device stores all its photos.
- Alternatively, you can explore other folders to locate the specific photos you wish to transfer.
- Finally, select the desired photos and copy them.
- Paste the copied photos into a designated folder on your PC where you want to save them.
Limitations:
- Can be prone to connection issues.
- Limited transfer options compared to other methods (e.g., doesn't allow cloud syncing).
Way 4: How to Download Photos from Android to Computer via Windows Photos
To perform the photo transfer in this way, make sure your phone is unlocked and set to "File transfer" or "Transfer files" mode when connecting it to your PC. Also, ensure that you have the necessary USB drivers installed on your computer for proper device recognition.
How do I transfer photos from Android to PC using the Windows Photos app?
- Make sure your PC is operating on Windows 10/11 or a newer version.
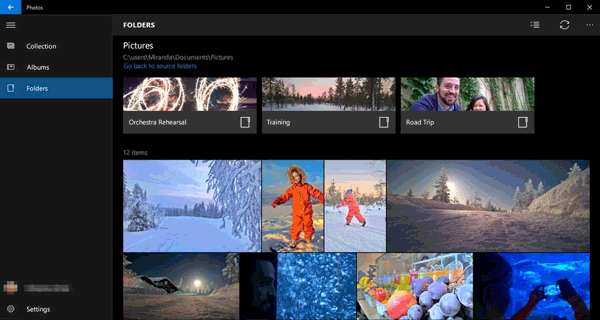
- Launch the Windows Photos app on your computer.
- Link your Android phone to the computer via USB.
- Locate and click the "Import" button and choose the "From a connected device" option.
- Select your Android phone from the available devices, granting the app permission to access and display all the photos on your phone.
- If desired, click the provided link to change the destination folder for the imported photos.
- In the drop-down menu "Select", opt for "All items" to import all photos.
- Once ready, click the "Import" button to initiate the transfer process. (To remove the photos from your phone after import, check the box for "Delete original items after import".)
Limitations:
- Limited to photo/video transfers only (no other files).
- Requires manual syncing.
- Can be slow for large numbers of photos.
Way 5: How to Get Photos from Android to Computer Using Google Photos
This service has implemented updates to its photo management system. Prior to initiating the transfer, ensure the photos on your phone are backed up and synchronized with this cloud storage.
How to put pictures from phone to computer using Google Photos?
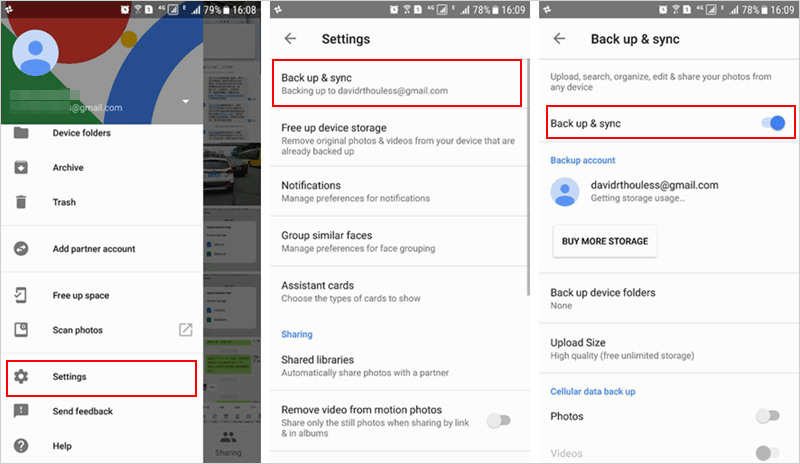
- Launch the Photos app on your Android phone. Tap your profile icon and select "Photos Settings".
- Choose "Back up & sync" and ensure the switch for "Back up & sync" is turned on.
- Verify you have sufficient space in your Google cloud storage to accommodate all your photos. If needed, adjust the "Upload size" settings to compress photos and save space.
- Open a web browser on your computer and visit the Google Photos website.
- Sign in to your Google account if prompted. You should be able to view the photos synced from Android.
- Assuming you want to download all the photos to your PC, click the first photo, hold down the "Shift" key, and select the last photo to select multiple pics at once.
- In the upper right corner, tap the three-dot icon and pick "Download" to download photos to your PC.
Limitations:
- Requires an internet connection for uploading and downloading.
- Photos may be compressed unless you choose the original quality option, which consumes more storage.
- May require a Google account setup.
You May Also Like: 5 Methods to Move Photos from Google Photos to Gallery [Android/iOS]
Way 6: How to Transfer Photos from Android to Computer Windows 10/11 via OneDrive
OneDrive lets you upload Android images to your computer directly on your phone. And you can also access your photos on your PC by signing in to the OneDrive website using your Microsoft account and downloading the photos from there.
How to move photos from phone to computer using OneDrive?
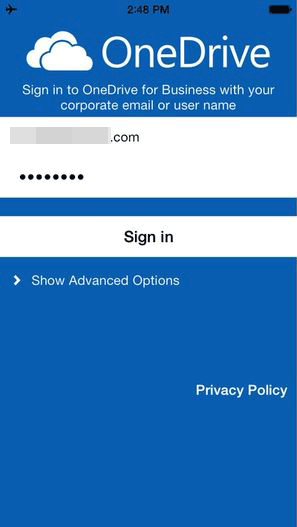
- Launch the OneDrive app on your Android device and log in using your Microsoft account.
- Tap the "Photos" icon at the bottom of the app interface.
- Select the option for "Camera upload" and tap on the "Turn On" button. (OneDrive doesn't sync?)
- Once the photos have been successfully synced, open the OneDrive folder on your computer.
- You should now be able to view and access all the synced images within that folder.
Limitations:
- Requires sufficient cloud storage space for large photo collections.
- Upload and download speeds depend on internet connectivity.
- Syncing can be slow for large volumes of photos.
Way 7: How to Transfer Images from Android to Computer via Phone Link
Microsoft's Phone Link offers an alternative for accessing and retrieving photos and various items from an Android phone. However, it lacks the capability to select and download multiple pics to your PC simultaneously.
How to upload photos from Android phone to computer with Microsoft Phone Link?
- Install the Microsoft Phone Link app (Known as Link to Windows) on your Windows PC.
- Install the Link to Windows app on your Android device.
- Connect your device to your Windows using a USB cable.
- Open the Microsoft Phone Link app on your computer.
- Select "Photos" from the left pane of the app.
- Choose "Import photos from phone".
- Pick the photos you want to transfer and click "Import".
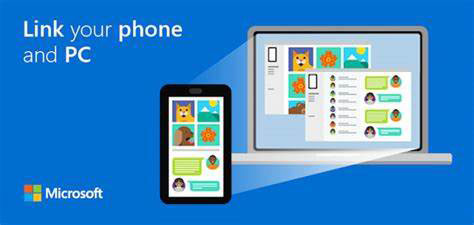
For troubleshooting purposes, you can also attempt the following steps: Close both the Phone Link app on your PC and the pre-installed Link to Windows app on Android. Then, reopen both apps. If your connection is functioning correctly, you should be able to see your recent messages, photos, and notifications within the Phone Link app on your PC.
Limitations:
- Only works with Windows 10/11 PCs and specific Android devices.
- Can experience syncing delays.
- Limited functionality for bulk photo transfers.
Way 8: How to Transfer Photos from Android to Computer via Bluetooth
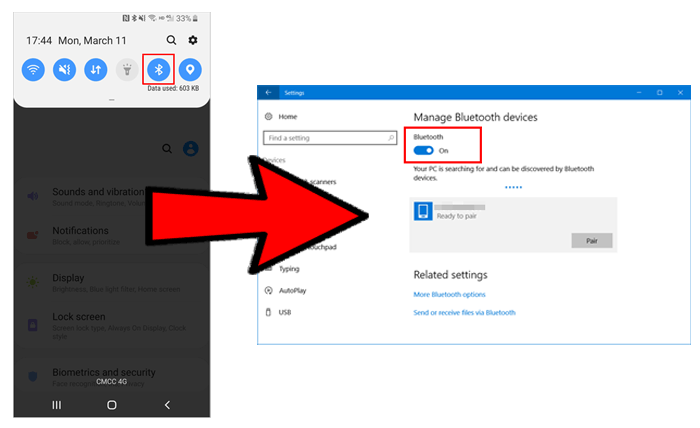
Despite the declining popularity of Bluetooth in favor of Wi-Fi, it remains a useful option for transferring data between Android devices and PCs. However, please note that not all computers are equipped with Bluetooth capabilities. If things go well, you can first pair the devices before proceeding.
How to get pictures off an old Android phone by Bluetooth?
- Access the Bluetooth settings on your computer.
- Ensure both your phone and PC have "Bluetooth" enabled and are discoverable.
- From the list of available devices, select Android and establish a connection with your computer.
- If prompted, enter the provided security code for pairing.
- On your computer, click the option to send or receive files through Bluetooth, typically at the right of the Bluetooth settings.
- It may be necessary to grant permission on your phone to receive files on your computer.
- Locate the file you wish to transfer on your phone.
- Pick the "Share" option and select "Share via Bluetooth".
- Follow the prompts and click "Finish" to save the transferred file from your phone to your PC.
Limitations:
- Slow transfer speed, especially for large photos.
- Both devices must be within close proximity.
- Connection issues can occur, especially with older Bluetooth versions.
Way 9: How to Transfer Photos from Android to Computer over Gmail
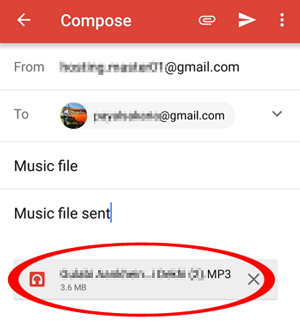
Email is an easy way to transfer small batches of photos (under 25 MB). Simply attach the photos to an email, send it, and then open and save them on your PC. Here's the complete guide:
- Launch the Google Gmail application on your Android device by selecting the Gmail icon.
- Tap on the "Compose" button to initiate a new email.
- Next, attach the photos you wish to send from your device's storage.
- Transmit them to your own email address by pressing the send icon.
- After that, access your Gmail account on your computer and log in using your credentials.
- Locate the most recent email you sent to yourself and download the attached photos by clicking the "Download" button.
Limitations:
- Limited to sending small batches of photos (under 25 MB per email).
- Bluetooth transfer requires an internet connection to send and receive emails.
- Can become cumbersome for transferring many photos at once.
Ending Words
OK, we just provided step-by-step instructions to help you make the most informed choice regarding Android to computer photo transfer. Whether you prefer using USB cables, cloud storage services, or specialized software, we have got you covered.
Concluding this article, we highly recommend utilizing MobiKin Assistant for Android to enhance your photo transfer experience. Its user-centric interface, selective transfer capabilities, and advanced management features make it an exceptional choice for handling your photos effortlessly.
Related Articles:
10 Best Photo Managers for Android: Manage Android Pictures with Ease
How to Recover Deleted Photos on Android with or without Backup? 8 Ways
5 Quick Ways to Delete Photos/Pictures from Android Phone Permanently
How to Transfer Photos from Android to Android? 8 Flexible Approaches


