How to Erase Contacts on Android Permanently
Android smartphone devices are being increasingly used to store sensitive private information like data, audio and video files, documents or even images. However, there comes a time when you may be forced to erase any of this data for security reasons or any other reason whatsoever. Normally you may be tempted to just erase the information you want to get rid of directly from your Android device or just perform a factory reset.
Despite this alone providing you with the much-needed peace of mind, you may be shocked to recognize that a malicious person can still obtain the deleted information on your android gadget simply by using an easy-to-find third party program. This informative article is a must read for you if you wish to know how to erase contacts from android permanently. By following the highly beneficial tips provided below, you are guaranteed to protect yourself from data identity theft among other potentially harmful vices.
Different Ways to Erase Android Contacts Completely
It is important for you to first backup all your contacts or any other information for that matter if you still wish to erase the private data on your Android smartphone or tablet. You can do this by storing your information on the cloud or directly backing up the data from your android gadget to your personal computer with 3rd-party program like MobiKin Assistant for Android. It is still possible for you to make a backup of your contacts directly on your SD card simply by opening the default stock "Contacts" app and using the "Import & Export" option. Now, let's us turn to learn how to wipe out contacts from Android phone easily.
Solution 1. Erase Android Contacts with 3rd-party Program
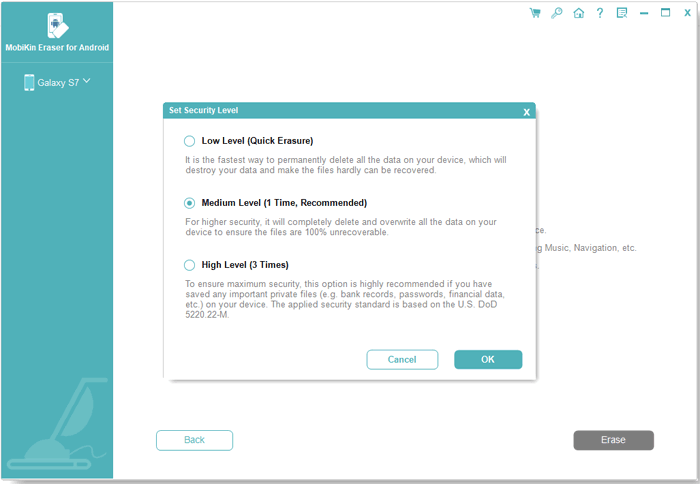
There are various highly effective, reputable third party programs that can be used to permanently erase all the data on your Android gadget. So, this tutorial will educate you on how to permanently erase the contacts on your Android phone or tablet using the "Android Data Eraser" software. To get started, please download and install this powerful program on your Windows or Mac computer, then follow the instructions to wipe out contacts on any kinds of Android devices as you like.
First of all, use a USB cable to connect your Android smartphone or tablet and then launch the Android Data Eraser application. Then install the MobileGo connector on your Android device. The program will then automatically detect the connected device on its own and display it on its main interface.

Secondly, once you have selected your Android device, you will be asked whether you wish to erase the entire private data stored on it. Choose the Erase All Data option according to your own needs.

(Note: The current version only allows you to erase all data, so you are suggested to make a phone backup of those important files beforehand. And it will be improved in the coming versions.)
Finally, type the word of "delete" on the box to confrim your action and then hit "Erase Now" option. This will then erase all the data on your Android device including your contacts.
Can't Miss:
How to Clean User Storage on Android Devices
Permanently erasing contacts directly by using "Settings" on Android
Step 1. Open the default "Settings" app and select the "Applications" section on your Android device. Once there, simply click on the "All" option to reveal a complete list of all the readily available apps.
Step 2. You can now scroll down the app list provided until you come across the "Contacts Storage" option. To now proceed with erasing your contacts, simply click on this option and then tap on the "Clear Data" option when prompted. Just click on "OK" to confirm.

At present, your private contacts will all be successfully deleted from your android gadget. However, you may be interested in following the other steps provided below if you wish to sell or donate your smartphone or tablet for even more guaranteed security.
Step 3. This process will scramble or the data on your Android device including your contacts in such a way that a specific key will be required to access such information. To achieve this, open your android device's stock "Settings" app, tap on "Security" and select the "Encrypt Phone" option.

Step 4. You can now easily proceed to carry out a factory reset once all the information on your Android phone or tablet has been successfully encrypted. This will ensure that no unauthorized personnel can access the contacts on your Android gadget even if they use a highly sophisticated data recovery program. You will also be at peace by knowing that all your confidential information even if obtained cannot be used in any way due to its scrambled nature.
Related Articles:


