How to Delete Google History on iPad Pro, Air, mini, 4
Summary: In this passage, you will know how to get rid of all unwanted Google history on iPad within simple clicks. Now, just read the passage to get more than one way to effortlessly clear Google history on iPad!
Google can keep track of everything you've searched with Google searching engine on your iPad, and it will inform you the related or latest searching orders in the drop down list when you type a keywords in the searching engine next time. So if you don't want the contents that you have searched in the Google be viewed by others, you'd better to delete the Google history on iOS devices timely. So this article is showing you how to delete Google history on iPad Air, mini, the new iPad and etc.
Method 1: Delete Google History from iPad through Settings
Safari is the built in browser on your iPad, and has welcomed by all iDevice users. So in this method, you'll know how to use Safari functions to delete your Google history on iPad devices easily.
1st - you can open Safari on your iPad Pro, iPad Air/mini, the new iPad or iPad 2 and open google.com. Then you can touch within the search box and see a list of your "Recent searches".
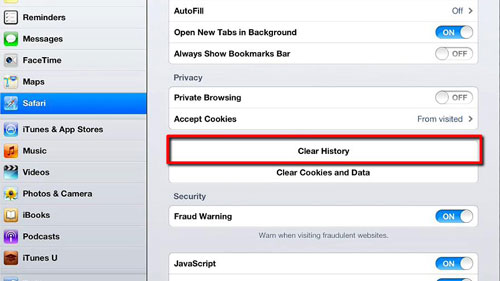
2nd - back to the Home screen and click "Settings"> "Safari" > "Clear History". Then a pop-up window will appear to make you confirm your action. Don't hesitate to tap "Clear" button in the dialog box. After that, all history on the Safari (including Google, Bing, etc.) will be deleted with one click.

Can't Miss:
How to Delete Safari History on iPhone/iPad/iPod touch in A Simple Way
Method 2: Delete Google Search History on iPad through Chrome
If you are using Chrome, you can delete the Google Search history on your iPad Pro/Air/4/mini through the Chrome app.
1st - Open Chrome app on your iPad.
2nd - Go to the top right corner of the screen and click the 3 bars button.
3rd - Choose "History" and select the items you want to wipe off.

4th - Click "Clear Browsing Data" and confirm again, then tap "Done" at the top right.
After above operations, you will be able to clear Google search history on your iPad.
Method 3: Clear Google History on iPad through Browser
No matter you use what types of browsers on your iPad, you can use this method to delete Google search history from iPad.
1st - Open the browser you use on your iPad.
2nd - Type "history.google.com" into the address bar of the browser and press the "Enter" key.
3rd - Log in your Google account and you will see "My Activity" list.
4th - You can click the right side 3 dots button to delete the history that you want and click "Delete" to confirm it. Or you can also go to the left side bar and click "Delete activity by" to delete history in batches.

5th - Select the Down arrow under the option of "Delete by date" and choose "All time". Finally, click "DELETE" button to erase them all .
Can't Miss:
Completely Delete Skype History on Android Phone
Method 4: How to Clear Google Browsing History on iPad Permanently
If you only need to delete history on iPad outwardly, then the above three methods can satisfy your needs completely. But if you need to leave no opportunity to restore the deleted Google history data, then you need to turn to a professional data erasing software for iPad - iPad Data Eraser. With it, you can completely and permanently erase iPad safari history and with no chance to restore. Thus, all your personal information will be saved in a security situation forever.
Apart from Google search history, iPad Data Eraser also supports to erase all deleted files, private data, system settings and other files on iOS devices with no chance to be recovered. It works perfectly on iPad Pro/Air/mini/4/3/2, as well as all versions of iPhone and iPod touch.
Now, just download the free trial version of the powerful program and follow the below steps to start your iPad Google history erasing journey.
Here is how to use the iPad Data Eraser to delete Google history on iPad:
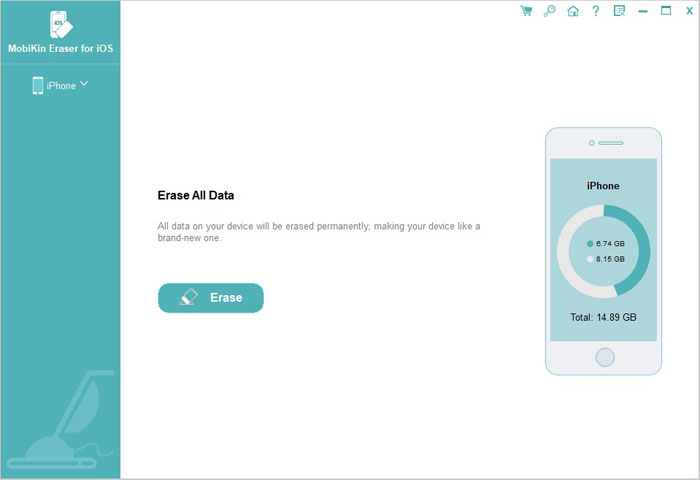
1st - Be sure iPad have been connected to your computer, and run the program. Here, the software will detect your linked device. Then you can tap on "Erase" button on the interface.

Here, please ensure that you have downloaded and installed the latest iTunes on your computer.
Step 2. Then you might get a new window where you should choose the proper data erasing level for you. You can try the recommended Medium Level directly and click "OK" to confirm it.
Step 3. After the operations above, you can simply type "delete" on the box to confirm your action and then hit the "Erase" button again to delete them permanently.

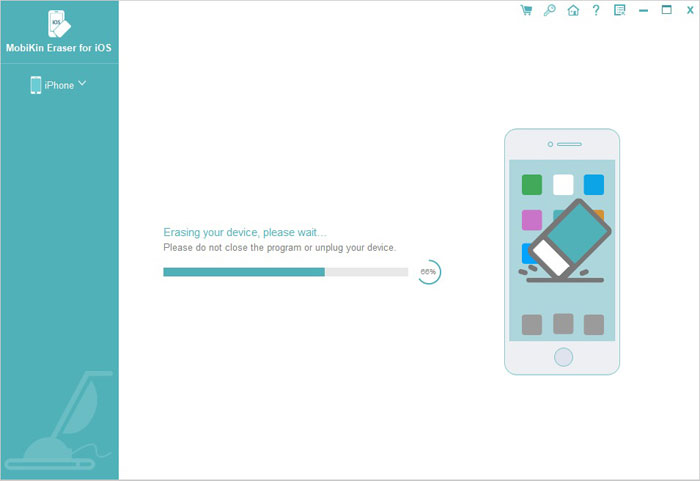
Now the program will begin to erase your iPad. Please do not plug out your iPad during the erasing process.
Conclusion:
Combining the above four methods of deleting Google browsing records from iPad, the fourth method is the most secure because it permanently deletes data and avoids secondary recovery. Therefore, for your privacy and security considerations, using iPad Data Eraser should be your best choice.
Related Articles:


