5 Best Ways to Permanently Delete Photos from iPhone or iPad
"I am having trouble getting rid of old photos on my iPhone. I have tried deleting photos from my Camera Roll, but they keep reappearing whenever I connect my phone to my computer. I want to permanently delete photos so that they are gone for good and don't take up space on my phone. Can anyone help me figure out how to permanently delete photos from iPhone?"
- From Apple Support Community
Over time, photos and videos can take up a lot of space on your iPhone, causing it to slow down or prevent it from downloading new apps and files. If you want to free up storage space or get rid of unwanted photos, permanently deleting them is the best solution. However, when you tap the trash can icon, your photos aren't deleted immediately. In this guide, we'll walk you through how to permanently delete photos on your iPhone, making sure they're gone for good.
- Method 1: Permanently Delete Photos from iPhone with Assistant for iOS
- Method 2: Permanently Delete Photos from iPhone Manually
- Method 3: Permanently Delete Photos on iPhone from iCloud
- Method 4: Permanently Delete Photos from iPhone in iTunes Backup
- Bonus: Permanently Delete Photos from iPhone with Eraser for iOS
- FAQs about Deleting Photos from iPhone
Method 1: Permanently Delete Photos from iPhone with Assistant for iOS
Deleting photos on iPhone is not a big deal if you have MobiKin Assistant for iOS program. This software is one of the smartest tools to manage the contents of your iDevice. It allows you to delete photos, music and other data from your iPhone without leaking the user's data. Moreover, Assistant for iOS gives you full control over your iOS data, you can delete the contents from your iPhone, backup iOS data to computer, or import contents from computer to iPhone. It enables you to move more than 10 types of iOS data with minimal effort.
Why select MobiKin Assistant for iOS?
- Permanently delete photos from iPhone in one click.
- Individually or bulk delete photos from iPhone.
- Allow you to easily preview and select various photos before deleting them.
- Transfer data from iPhone to computer, and vice versa
- Conveniently manage your iOS device on a computer.
- Manage contacts, text messages, photos, notes, music, videos, bookmarks, books, calendars, apps, and more.
- It won't disclose your privacy.
Step-by-step guide to permanently delete photos on iPhone using Assistant for iOS:
Step 1. Download Assistant for iOS on your computer (Mac or Windows PC). Launch it and connect your iPhone to this computer using a USB data cable.

Step 2. Click on Photos from the left column, this software will scan your device to find all the photos on your device.

Step 3. Preview and select any photo or select all, click on the "Delete" button on the upper navigation bar. Then all your selected photos will be deleted.
Video Guide:
Method 2: Permanently Delete Photos from iPhone Manually
The most direct way to clean photos from iPhone is to make use of the built-in Photos App. As we all know, this App allows you to delete pictures and videos from iPhone/iPad. However, this simple deletion only sends your unwanted images to the "Recently Deleted" album of your device. If you wish to permanently delete pictures from your iPhone/iPad, you should go on to empty the "Recently Deleted" album.
Luckily, this is easy to follow and you can complete the deleting process within a short time.
Now let's see how to permanently delete photos on iPhone/iPad in Photos App:
- Unlock your iPhone or iPad and continue entering the Photos App on the device.
- Choose the pictures that you don't want to keep and delete them. Here you have 2 options:
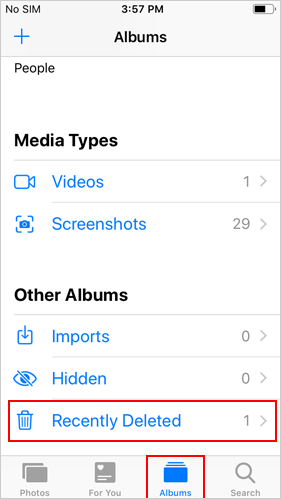
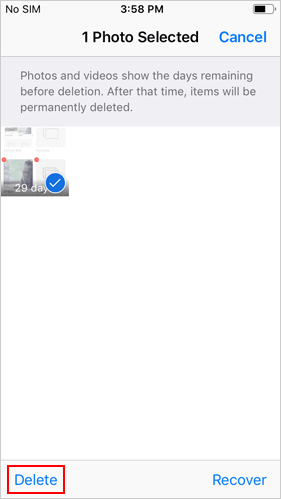
- After that, the selected pictures will be moved to the "Recently Deleted" album. So you need to go to "Albums" > "Recently Deleted" > "Select" > choose the pictures you want to permanently remove > "Delete".
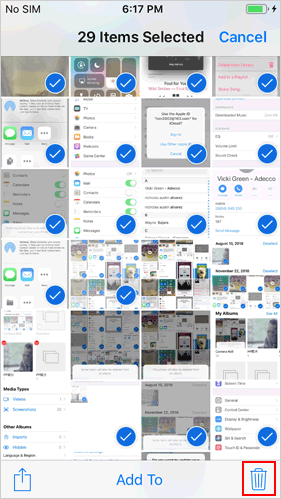
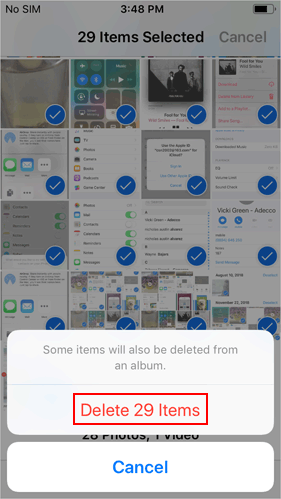
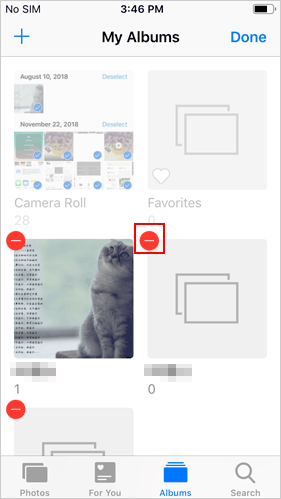
- Delete photos selectively: click on the option "Camera Roll" > "Select" > tick off the images you don't like > tap on the trash bin icon > "Delete XX (the number of your selected photos) Items".
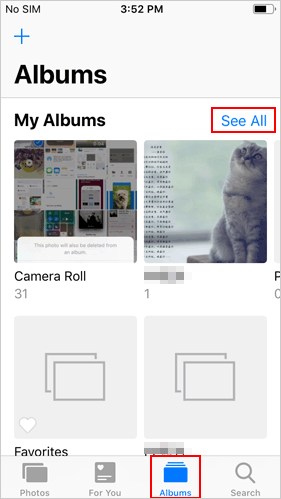
- Delete the whole album: go to "Albums" > "See All" > "Edit" > find out the album you want to delete > tap on the red circle button located at the top left corner of the album.
Method 3: Permanently Delete Photos on iPhone from iCloud
If your iPhone is set up to sync photos with iCloud, simply deleting the photos from the device won't permanently delete them. To ensure they're completely deleted, you'll also need to delete them from your iCloud storage.
- Open a web browser and go to iCloud.com.
- Sign in with your Apple ID and password. If prompted, enter your two-factor authentication code.
- Click the Photos icon to access all the images stored in iCloud.
- Browse and select the photos you want to delete.
- Click the Trash icon to delete them.

Once deleted, the photos will be moved to the Recently Deleted album in iCloud and stored there for 30 days before being permanently deleted. To delete immediately, clear the Recently Deleted folder.
Method 4: Permanently Delete Photos from iPhone in iTunes Backup
Just like iCloud, iTunes can also store your photos, but only if you've previously enabled photo syncing. If your iPhone is set up to sync with iTunes, you'll need to delete these synced photos from your backup to permanently delete them.
Follow these steps to delete photos using iTunes:
- Install and open the latest version of iTunes on your computer.
- Connect your iPhone to your computer using a USB cable.
- Click the "Photos" tab in the left sidebar.
- Check the box next to "Sync Photos" (if it's already checked, proceed to the next step).
- Under "Copy photos from", click the "drop-down menu".
- Select "Select Folder > All Folders" to ensure that no photos are left behind.
- Click "Apply" to sync changes to delete all stored photos from iTunes.
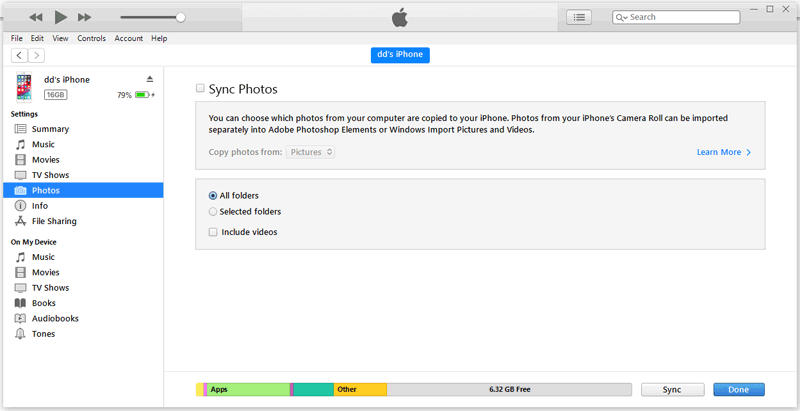
Once the process is complete, the synced photos will be deleted from both iTunes and your iPhone.
Bonus: Permanently Delete Photos from iPhone with Eraser for iOS
Want to erase everything on your iPhone/iPad in one click? Then you need the help of MobiKin Eraser for iOS. This is a professional iOS erasing program that can erase all files on your iOS device, including photos, with just one click, without leaving any chance of recovery. It currently only supports erasing all files on your iDevice, so you need to back up the required data before performing the erasure.
Below is the download link for this tool. You can click on icon to simply download and install it to your computer if you are interested in it.
Here's how to erase photos from iPhone/iPad using MobiKin Eraser for iOS:
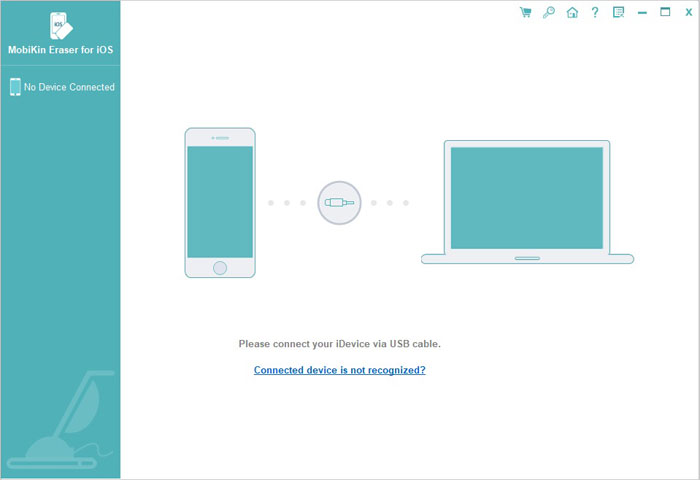
- Launch the iOS eraser software on your computer and use a USB cable to connect your iPhone/iPad to the PC.
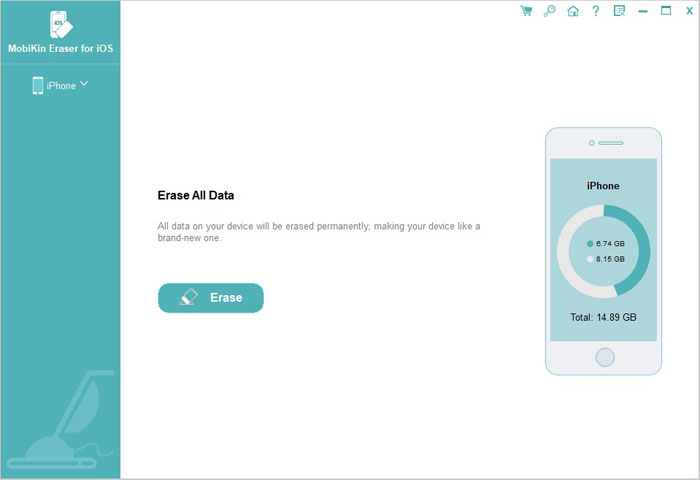
- Follow the prompts on the screen to make your device recognized. When the program detects your iDevice successfully, you will see the following interface:
- Click on the "Erase" button on the primary interface.
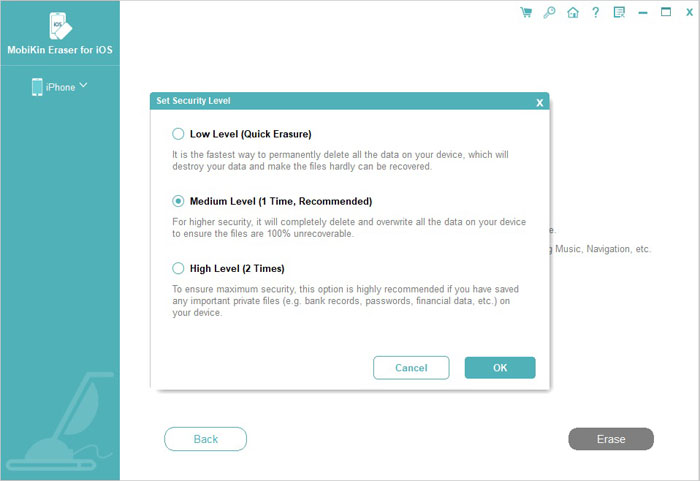
- Go on to tap on "Medium" to set security level and then confirm your option by clicking "OK".
- Type in "delete" on the "Erase All Data" interface and click on "Erase" to start erasing pictures and other files from your iPhone/iPad.
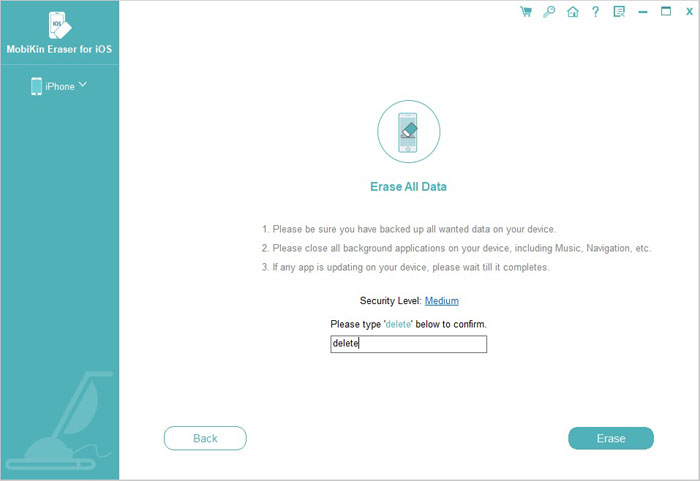
The erasing and overwriting process will take a few minutes so please wait patiently and do not disconnect your device during the process. And if you want to learn more ways about erasing all photos from iPhone/iPad, you can go to the page: How to Delete All Photos from iPhone/iPad?
FAQs about Deleting Photos from iPhone
Q1: Can I delete photos from my iPhone but keep them on iCloud?
Yes, you can. If your iPhone is set to "sync photos with iCloud", deleting photos from the device will also delete them from iCloud. However, if you turn off "iCloud Photos" before deleting them, they will still be stored in iCloud even if you delete them from your iPhone.
Q2: Why can't I delete photos from my photo library?
If you can't delete photos from your photo library, it may be due to one of the following reasons:
- Your iPhone is syncing with iTunes, which prevents manual deletion.
- The photos were received via a third-party app, which manages the files.
- Your storage is full, causing system problems that may affect photo deletion.
Q3: Where do permanently deleted photos on your iPhone go?
Once you permanently delete photos, they are completely removed from your device. However, they can be recovered using specialized tools. One of the most recommended options is MobiKin Doctor for iOS. This tool can recover more than 13 types of lost data on any iPhone model without compromising performance.
The Bottom Line
See, permanently deleting photos from iPhone or iPad is not a difficult task at all. The methods mentioned above can help you complete the task with ease. So if you are the one who really wishes to erase useless pictures from iPhone or iPad to free up the device, you can choose the applicable way from above and go with the tutorial to delete the pictures without hassles. Just take action now!
Related Articles:
12 Ways to Fix iCloud Photos Not Syncing to iPhone/iPad/Mac
[7 Ways] How to Transfer Photos from Computer to iPhone


