How to Back Up iPad to External Hard Drive? [4 Ways Included]
"I'm trying to back up my iPad to my MacBook, but there's not enough space. So I tried to back it up to my 5TB external drive, but it seems like there's only an option to back up to the laptop itself, not the hard drive that's plugged in... What am I missing here? Thanks!"
- From Apple Support Community
If you want to back up your iPad to an external hard drive, you've come to the right place! While backing up iPad data to a computer is simple, saving it to an external drive can be a little tricky. Don't worry, though! As long as you follow the right steps, you can easily back up your iPad to an external hard drive, whether you use a computer or not.
In this guide, we'll share four workable methods that will walk you through the steps to back up your iPad to an external drive.
- Way 1: Back Up iPad to External Drive with Assistant for iOS
- Way 2: Back Up iPad to External Hard Drive via USB-to-Lightning Adapter
- Way 3: Transfer Data from iPad to External Hard Drive via iTunes
- Way 4: Transfer Files from iPad to External Hard Drive Using Finder
- FAQs on How to Back up iPad to External Hard Drive
Way 1: Back Up iPad to External Drive with Assistant for iOS
A large variety of items are stored on your iPad device, which makes the device with little memory worse. So, it's wise to back up photos, videos, music, etc., from an iPad to an external hard drive. Well, can I keep a copy of my iOS device on any external storage flexibly? Honestly, this is a piece of cake for MobiKin Assistant for iOS (Win and Mac). As the leader in iDevice assistance tools, it has the following practical advantages:
An overview of Assistant for iOS:
- Back up iPad to external hard drive with a computer.
- Make it convenient for you to preview and select what you want for backup.
- Restore iPad backup to an iOS device in one click.
- Transfer files between iDevices and computer/iTunes.
- Manage iOS files on a PC/Mac directly.
- Supports a whole range of iOS data types, including Video, Photo, Music, Contacts, Messages, Notes, Safari Bookmarks, Voice Memos, etc.
- Work well with almost all iDevices, including iPad 10/9/8, iPad Pro, iPad Air, iPad mini, iPad 4/3/2, iPhone, iPod touch, etc.
- It won't reveal your privacy.


How to back up the iPad to an external hard drive with Assistant for iOS?
Step 1. Connect your iPad to a computer
Ensure you install and open the program on a computer after the free downloaded. Connect your iPad and the external hard drive to this computer with working cables. After the physical connection, follow the easy prompt to let the product recognize your device.

Step 2. Select the iPad data to back up
All accessible file types will be on the left sidebar of the interface. Go ahead to preview and choose the files you want to back up.

Step 3. Back up iPad to an external drive
Finally, click the "Export" button on the top screen and choose the hard drive as the output location. Then, all the selected files will be stored in the external storage automatically.
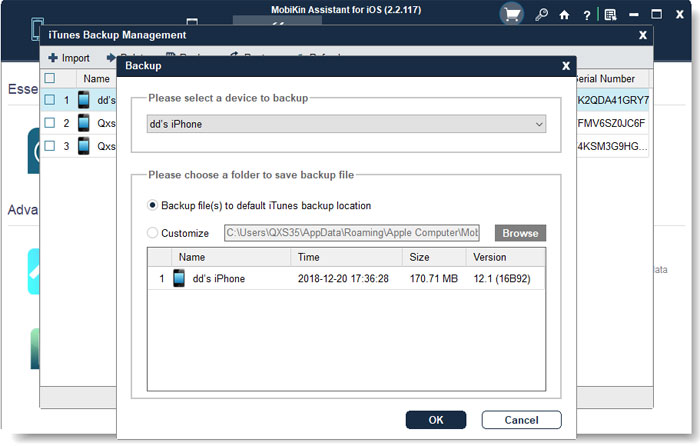
Here's another way to back up your iPad to your external hard drive using Assistant for iOS. (Quick Look: Create a connection between your iPad and the tool. Next, highlight "Super Toolkit" > "iTunes Backup & Restore" > "Backup" to back up the iPad to iTunes default location or even your customized one. Next, link your hard drive to this computer > go to the iTunes backup location > copy and paste the database to the linked storage.)
Video Guide:
Way 2: Back Up iPad to External Hard Drive via USB-to-Lightning Adapter
As mentioned in the previous method, the computer does not necessarily have to be a "transit station" for data transmission. Even if there is no third-party software, you can directly transfer some media files, such as photos and videos, between the iPad and the hard disk. But the premise of this operation is that you need a USB-to-Lightning adapter.
Back up an iPad to an external hard drive directly without a computer using a USB-to-lightning adapter:
- Link your iPad to your hard drive with a USB-to-lightning adapter.
- Connect your iPad to a computer via USB.
- Your external drive will soon be detected by your iPad.
- Go to the Files app on your iPad and check the connected external hard drive.
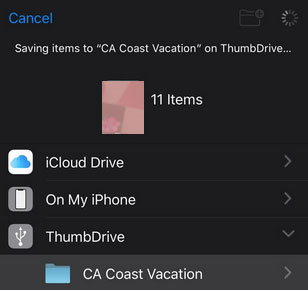
- Run the Photos app and select your desired images to save.
- Next, tap on the "Share" sign and go for the option to save the photos to the Files app.
- Choose the connected external drive to save the items there.
Way 3: Transfer Data from iPad to External Hard Drive via iTunes
iTunes is well-designed to back up or manage an iPad/iPhone/iPod, though you might suffer from data erasing afterward. (How to sync iPad to new computer without erasing?) Further, iTunes doesn't give you permission to change its default backup storage. And as you might know, it's not difficult to figure out the specific location where the backup is saved on your computer.
Subsequently, you can take the assistance of iTunes and Command Prompt to create a virtual connection between the system and external hard drive before moving data from your iPad to a separate drive.
How to transfer from an iPad to an external hard drive using iTunes?
- Connect your iPad and the external storage to your computer.
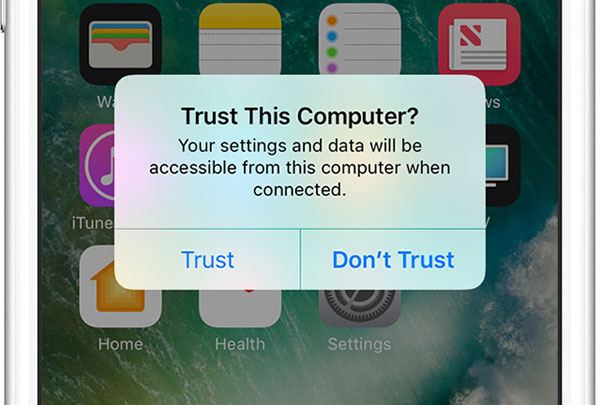
- If you are linking your device for the first time, tap "Trust" when prompted.
- Run the "Start" menu to launch "Command Prompt".
- Open the "Run" prompt and enter "cmd" before tapping "Enter".
- Enter the following content to get into the iTunes backup location:
mklink /J "C:\Users\Your user name\AppData\Roaming\Apple Computer\MobileSync\Backup" "E:\" (Now, C and E are the driver letters for Windows and the external disk.) - Similarly, the location the iTunes backup is saved varies from PC to PC, but it is most likely in the provided folder.
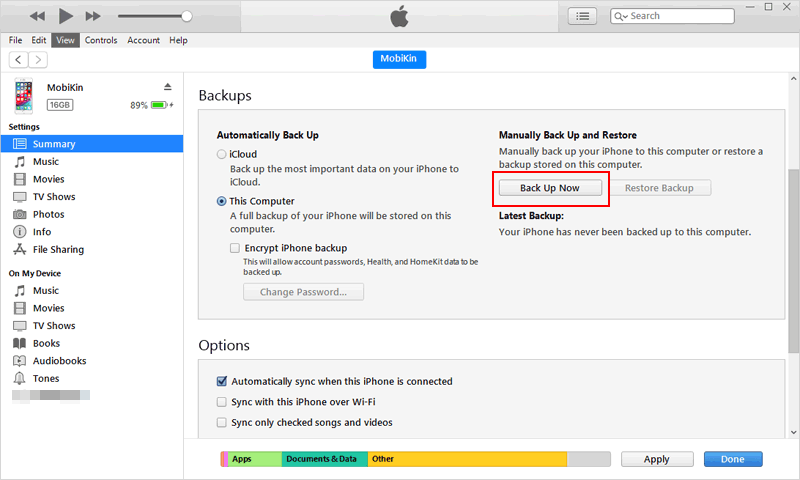
- Next, connect your iPad to your computer and launch iTunes.
- Select the "device" icon from the iTunes screen.
- Go to the "Summary" and set up the backup location as "This Computer" instead of iCloud.
- Click "Back Up Now", and all your iPad data will finally be stored on the linked external drive.
Extended Reading:
Way 4: Transfer Files from iPad to External Hard Drive Using Finder
iTunes was retired on macOS Catalina and up. But the good news is that Finder can take over the former in terms of hard drive backup for iPad. But it is a bit complicated to carry out the job. Precisely, you have to back up your iPad to Mac, locate the backup files, and move them to your external hard drive eventually.
How to transfer files from iPad to external hard drive with Finder?
- Plug your iPad into your Mac with a cable available.
- Select your iPad from the "Finder" sidebar on your computer.
- Click "General" at the top of the Finder window.
- Go for "Back up all of the data on your iPad to this Mac".
- Tap "Finder" on your Mac's Dock.
- Click on your device at the left menu of the Finder window.
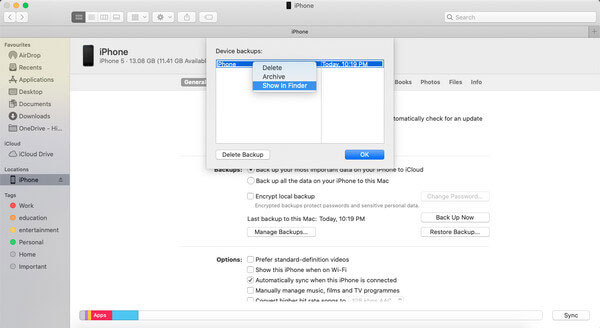
- Tap on "Manage Backups" under the "General" tab.
- Choose a specific device.
- Hold down the "Control" button and click the device.
- Select "Show in Finder" to view iPad/iPhone backup on this Mac.
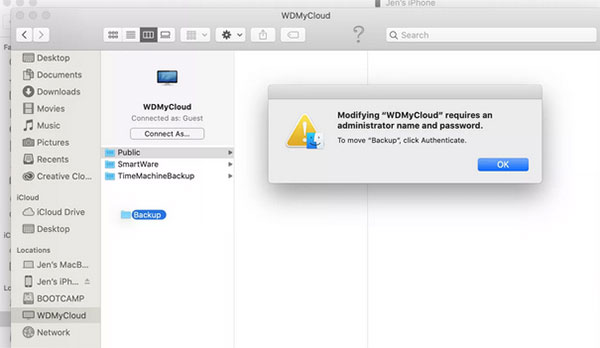
- Head to the Finder window that lists the iOS backup.
- Choose the Backup folder.
- Drag it to the hard disk from the Finder's sidebar.
- Change the iOS backup folder on the external drive to "ios_backup".
- Go back to the original finder window and change the name of the old backup to "old_backup".
In a Nutshell
Don't know which method to pick to complete the data transfer from your iPad to an external hard drive? Below we will bring you some references as a summary of this post:
- iTunes and Finder cannot directly transfer content from an iPad to an external hard drive. And the task may make you boring or even upset.
- No matter on Amazon or eBay, a USB-to-Lightning adapter does not have a friendly price tag.
- Instead of spending more dough on a cable, it's better to get a professional MobiKin Assistant for iOS, which can complete many other operations besides data transfer.
FAQs on How to Back up iPad to External Hard Drive
Q1: Can I back up iPad to external hard drive without iTunes?
Of course you can! You can use third-party software, such as MobiKin Assistant for iOS, which allows you to back up iPad to external hard drive directly without relying on iTunes. Check out Method 1 for more details.
Q2: How to back up iPad to external hard drive using Windows PC?
It's easy. Connect iPad and external hard drive to Windows PC via USB. Then, use File Explorer to copy iPad data and paste it on the external drive for backup.
Q3: Can I back up only specific files, such as photos or videos, from iPad to external hard drive?
Yes, many backup tools, such as MobiKin Assistant for iOS, allow you to select specific types of files to back up, such as photos or videos. However, iTunes does not provide this flexibility.
Related Articles:
5 Smart Ways to Unsync/Disconnect iPhone from iPad
4 Best Ways to Back Up iPad to Mac/MacBook
Locked out of iPad? 6 Easy Ways to Help You Unlock iPad without Password
What to Do If iPad Won't Restore or Update? Check the 7 Solutions Here
