How to Delete Temp Files on iPad Easily
Temporary files also go by the moniker for files. It so happens that every time your iPad is creating a file, a temporary version of that file is created and logged. This is a protective measure in case the permanent file being created somehow gets lost or cancelled or deleted accidentally. The common practice is to delete these files after a while, but most of us never get around to doing it. So at the end of a whole two years of using your iPad, you still have these little guys sitting inside your device, doing nothing.
There seems to be this big debate on how temporary files are harmless or not if they keep sitting on your device. Some of us think that these files are just sitting there without the slightest intention of harming. Well, the truth is that if over time, your device has been backing up files that do not help. Over time, these files become bulky, fragmenting your existing discs and impeding performance. Thus, in order to make sure the performance of your iPad, you'd better to delete these temp files on iPad regularly.
To reach it, you need to find a tool to help you wipe temp files from iPad devices effectively. In this case, we are going with MobiKin iOS Data Cleaner (Mac) because it works great with all Apple devices. With this software, you can delete internet files, app files, photo caches and just about everything else that comes across as temporary. Now, just click the below icon to get the free trial version of the powerful program, and follow the below steps to see how easy it works.
Steps on Clearing Temp Files on iPad Easily
Step 1. Install and launch the program on your computer, then connect your iPad to the computer. The program will now detect the device and show an interface with several options including deep clean and quick clean.The former is more thorough.

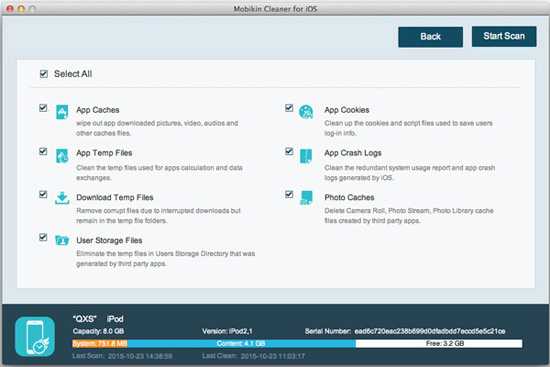
Step 2. There is a chance that you still want to retain a small amount of data in the temporary folders for whatever reason. At this point, you will find that the junk files have all been checked. Uncheck the ones you do not want deleted and leave the others untouched. Hit start scan to move to the next level.

Step 3. The software will go through the files, scanning them according to your selection. When that is finished, you can directly hit "Clean" button to remove the data from your device right now.
Related Articles:
3 Incredible Ways to Delete iPhone Photos from PC/Mac


