How to Transfer Photos from PC to iPad without iTunes [5 methods]
There are many reasons you might want to transfer pictures from PC to your new iPad. Maybe you want to set them as wallpapers, edit them on the go, or easily share them with others. iTunes is a common tool for managing photos, music, and videos on Mac, PC, iPhone, and iPad. It can help transfer photos between your computer and iPad, but what if you don't have iTunes installed or run into errors while using it?
No worries! This guide covers five free and easy ways to transfer photos from PC to your iPad without iTunes. Read on to find the best method for you.
- Way 1: Transfer Photos from PC to iPad without iTunes - iOS Transfer (Recommended!)
- Way 2: Import Pictures from PC to iPad without iTunes - Windows Explorer
- Way 3: Copy Photos to iPad from PC without iTunes - iCloud
- Way 4: Move Pictures from PC to iPad without iTunes - Google Photos
- Way 5: Transfer Pictures from PC to iPad without iTunes - Email
Way 1: Transfer Photos from PC to iPad without iTunes - iOS Transfer
First, you can use a professional data transfer tool that allows you to transfer photos from PC to iPad without iTunes, and vice versa. iOS Transfer can easily help you achieve this. This powerful tool allows you to transfer files between iPhone, iPad, iPod and computer without complicated steps or data synchronization. It can handle all the basic things that iTunes can do and offers even more features.
Why choose iOS Transfer?
- Easily move photos between PC and iPad without running iTunes.
- Transfer data from computer to iOS devices, from iOS devices to iOS devices, and from iOS devices to computer.
- Sync data from iPhone, iPad and iPod to iTunes.
- Supports 18+ types of data, including photos, videos, music, contacts, text messages, TV shows, ringtones, podcasts, documents and so on.
- Fully compatible with overall iPad models and iOS versions, including iPad 10/9/8, iPad Pro, iPad Air, iPad mini 1-4, the new iPad, iPad 2, iPad, and iOS 18/17/16, etc.


How can I transfer photos from computer to iPad with iOS Transfer?
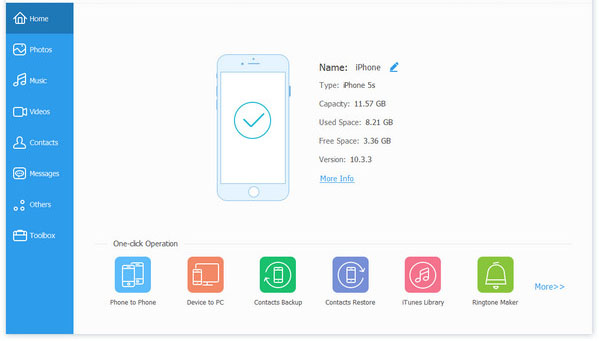
Step 1. Download and install iOS Transfer on your computer. Connect your iPad with a USB data cable and wait for it to be detected.
Step 2. On the home screen, click the "Photos" section in the left sidebar. Then, tap the "Add" button and choose "Add File" or "Add Folder".
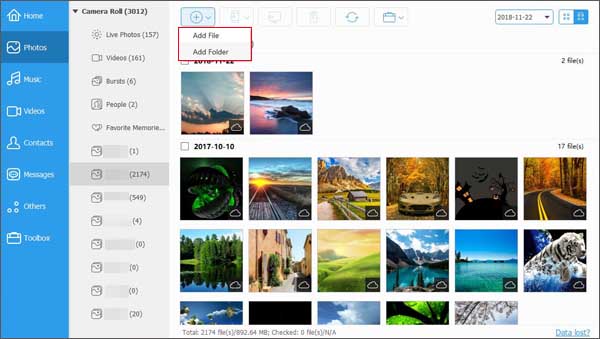
Step 3. Find the folder containing your photos on your computer. Select the images you want to transfer, click "Open", and they will be imported to your iPad.
That's it! Your photos are now saved on your iPad and you can view and share them. No iTunes or complicated setup required.
Way 2: Import Pictures from PC to iPad without iTunes - Windows Explorer
If you don't want to use extra software, you can transfer photos and videos to your iPad using Windows File Explorer (How to Put Videos on iPad?). This method lets you manually copy files from your PC to your iPad's DCIM folder. However, unlike dedicated transfer tools that offer quick, one-click solutions, this process requires more time and effort.
How to Transfer Photos from PC to iPad Using File Explorer:
- Plug in your iPad using a USB cable. If a prompt appears on your iPad asking you to "Trust This Computer," tap "Trust" to continue.
- Open "This PC" on your computer.
- Find and select your iPad (it will appear as "[Your iPad's Name]").
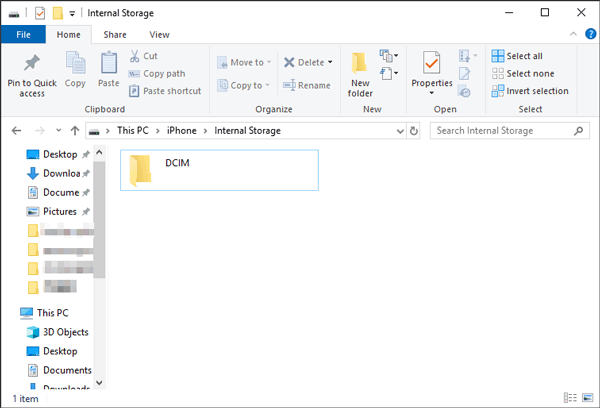
- Go to "Internal Storage" > "DCIM" to access your iPad's photo folders.
- Open the folder where your photos are stored on your PC.
- Select the pictures you want to transfer.
- Drag and drop them into an existing folder inside "DCIM" or create a new folder.
Once the transfer is complete, open the Photos app on your iPad to check if all the pictures have been copied successfully.
Way 3: Copy Photos to iPad from PC without iTunes - iCloud
If you want to transfer photos from your computer to your iPad, using iCloud Photos is a great option. It lets you sync images between your PC and iPad easily. There are two simple ways to do this:
Method 1: Using iCloud for Windows
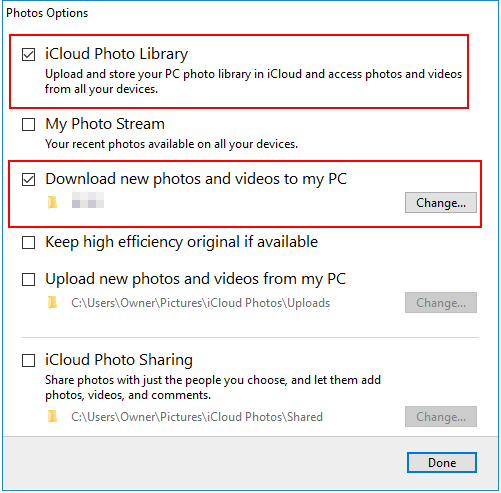
- Open iCloud for Windows on your PC and select "Photos".
- In the Photos Options window, check "iCloud Photo Library" and enable "Upload new photos and videos from my PC". Click "Done". (How to Upload Photos to iCloud?)
- On your iPad, go to "Settings" > "[Your Name]" > "iCloud", then turn on "iCloud Photos".
- Open the Photos app on your iPad to see the uploaded pictures.
Method 2: Using iCloud.com
- Ensure iCloud Photos is enabled on your iPad.
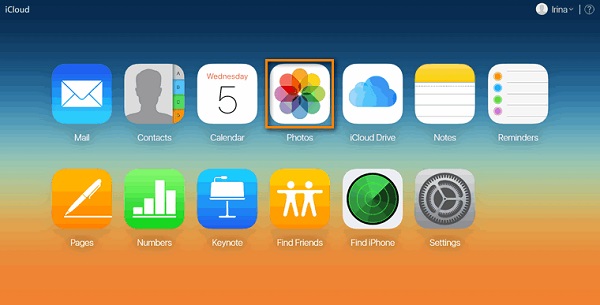
- On your PC, visit iCloud.com and sign in with your Apple ID.
- Click on "Photos", then tap the "Upload" icon to select and add images from your computer.
- The uploaded photos will sync to your iPad. Open the "Photos" app to find them.
Way 4: Move Pictures from PC to iPad without iTunes - Google Photos
Cloud storage services let you store different types of files and access them from any computer or mobile device. This means if you upload photos from your PC, you can easily view them later on your iPad.
Let's use Google Photos as an example. Here's how you can transfer images from your PC to your iPad:
- Open a web browser on your computer and go to the Google Photos website. Sign in to your Google account.
- Click on "Albums", then select "Create album". Give your album a name and click "Add photos" to upload pictures from your PC.
- On your iPad, download the "Google Photos" app from the App Store and sign in with the same account. Now, you'll be able to access and view your uploaded pictures anytime. (Google Photos Not Showing All Photos?)

Way 5: Transfer Pictures from PC to iPad without iTunes - Email
You can also transfer photos from your computer to your iPad using email. Here's how to do it with Gmail:
- Open Gmail on your computer and log in. Click the "Compose" button in the top left corner to start a new email.
- Click the paperclip icon to attach files, then select the photos you want to send. Click "Open" to confirm, then hit "Send".

Now, just open the email on your iPad and download the attached photos.
The Final Words
There are several ways to transfer photos from a PC or laptop to an iPad, and the best method depends on your needs. If you prefer using a USB cable, tools like iOS Transfer or Windows Explorer can help. If you'd rather transfer photos wirelessly, cloud services such as Google Photos, iCloud, or even email are great options.
No matter which method you choose, we hope you successfully move your photos to your iPad!
Related Articles:
[Full Guide] How to Transfer Videos or Movies from Mac to iPad?
Top 4 Methods to Transfer ePub Files to iPad in 2025
How to Transfer Photos from iPad to iPad? 5 Ways You Must Know!
How to Transfer Large Videos from iPhone to PC? (5 Ways Included)
