4 Ways to Transfer Voice Memos from iPhone to Computer without iTunes
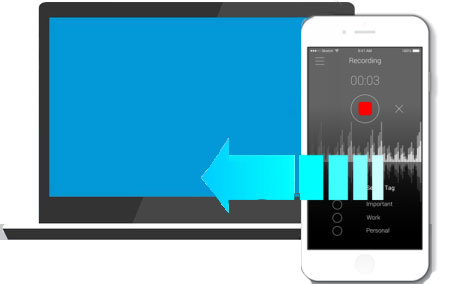
The Voice Memos app on your iPhone captures many important moments in both your daily life and work. To prevent losing these recordings, it's essential to back them up to your computer. Now, you can transfer voice memos from iPhone to computer without iTunes. After all, many people find iTunes frustrating, it's slow, complicated, and doesn't allow easy access to transferred voice memos. (How to Fix iTunes Keeps Crashing?)
If you'd rather skip iTunes, don't worry! This guide will show you four simple ways to transfer voice memos from your iPhone to your PC or Mac without using iTunes. Let's get started!
- Way 1: Transfer Voice Memos from iPhone to Computer without iTunes - Assistant for iOS
- Way 2: Get Voice Memos off iPhone to Computer without iTunes - Email
- Way 3: Import Voice Memos from iPhone to PC without iTunes - Cloud Drives
- Way 4: Transfer Voice Memos from iPhone to Mac without iTunes - Airdrop
Way 1: How to Transfer Voice Memos from iPhone to Computer without iTunes - Using Assistant for iOS
The easiest and quickest method to get voice memos off iPhone without iTunes is using MobiKin Assistant for iOS, which can make your task of exporting voice memos from iPhone to PC or Mac computer as easy as pie. It is able to transfer voice memos from iPhone to computer and vice versa. Before the transfer, you can preview these voice memos previously so as to perform the transfer correctly.
Core Features of Assistant for iOS:
- It is able to transfer voice memos from iPhone to computer in bulk or selectively.
- Supports in exporting over 18+ file extension formats such as contacts, text messages, photos, videos, music, notes, calendars, bookmarks, voice memos, books and more from iPhone/iPad/iPod to computer, and vice versa.
- Allows you to backup & restore data between iPhone, iPad or iPod and iTunes directly
- It supports almost all iOS devices, including iPhone 16/15/14/13/12/11/X/8/7/6, etc.
- It supports both Windows and Mac.


Steps to download voice memos from iPhone without iTunes but using Assistant for iOS:
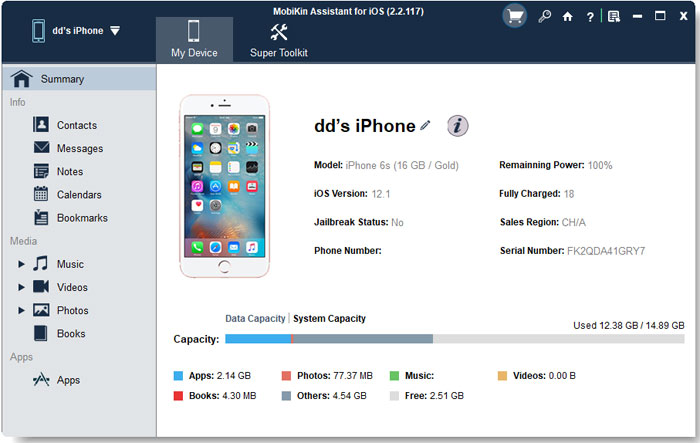
Step 1: Connect your iPhone to your computer and launch the installed Assistant for iOS. Once the program is opened, it will detect the connected iPhone and display its information. All manageable file types are listed on the left sidebar.
Step 2: Click on "Music > Voice Memos" category from the left sidebar and the program will scan out all voice memos on your iPhone. Have a preview of all voice memos choose the ones that you need.
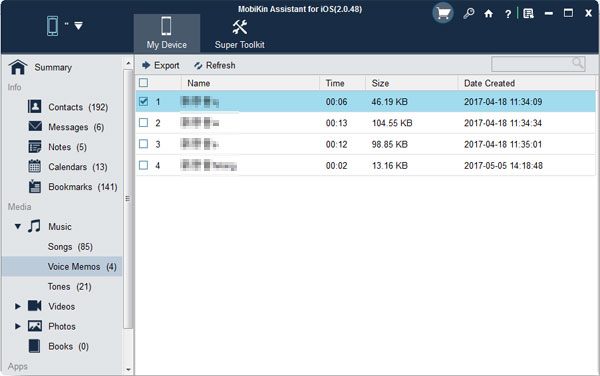
Step 3: After you have selected the voice memos you want to transfer, then give a click on the "Export" from the top menu to export them from iPhone to your computer. Or, you can click on "Check All" option to backup all voice memos at once.
Congratulations! You have successfully transferred iPhone voice memos to your computer using MobiKin Assistant for iOS. If you're a Mac user, you can get the Mac version and follow the same steps on your Mac computer by yourself!
Video Tutorial:
Check If You Need:
Way 2: How to Get Voice Memos off iPhone without iTunes - Using Email
iPhone users can send iPhone voice memos to their computers via email, all you need to do is connect your phone to a WiFi or cellular connection. The following guides detail how to transfer voice recording from iPhone to computer.
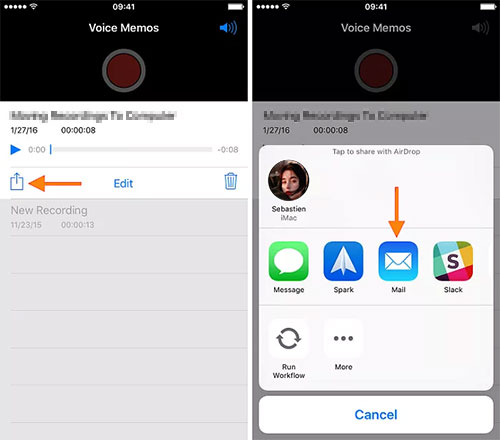
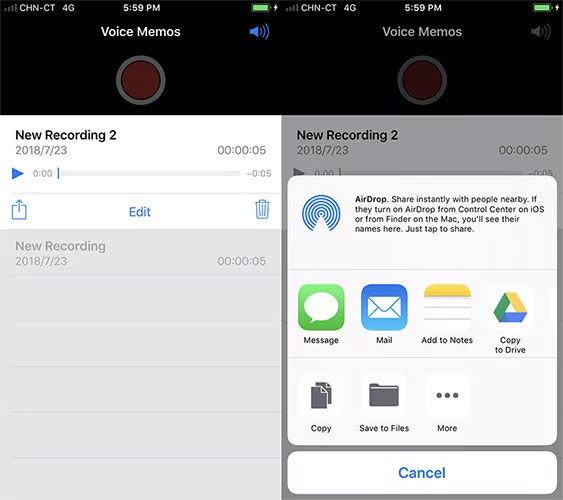
- Open a voice memos that you want to transfer and tap on the upload icon.
- Choose Mail option from the pop-up window.
- Enter an email address where you want to send the memo and tap on "Send" button.
- On your computer, login the email address and then you will be able to download the voice memo from the email to your computer.
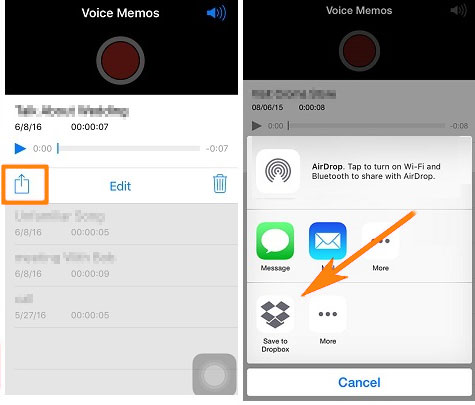
Way 3: How to Import Voice Memos from iPhone to PC without iTunes - Using Cloud Drives
Besides email, you can use cloud storage services like Google Drive, Dropbox, or OneDrive to transfer and back up your voice memos. These platforms make it easy to move your files between devices. Let's use Dropbox as an example. Follow these simple steps to get started.
- Open voice memos app on your iPhone and select the one you want to transfer.
- Click the upload icon and choose "Save to Dropbox" from the options appeared.
- Choose a folder to save the selected voice memos and then click on "Save" button.
- On your computer, open Dropbox and now you can transfer voice memos from the Dropbox to your computer.
Check If You Need:
Way 4: How to Transfer Voice Memos from iPhone to Mac without iTunes - Using Airdrop
In addition to using the Mac version of Assistant for iOS, we can also use Airdrop to complete the transfer of voice memos from iPhone to Mac. After the transfer is complete, you can easily listen to these voice memos on your Mac computer. However, this method is much more complicated than using Assistant for iOS. Please follow the steps below carefully to see how to transfer voice memos from iPhone to Mac without iTunes.
- First of all, you should enable WiFi and Bluetooth on your iPhone. Then, swipe down the phone screen to enter the Control Center and tap on Airdrop.
- Chose whether you want to send voice memos to everyone or only to your contacts.
- Turn to your Mac and click on Finder > Airdrop.
- Choose the option of "Allow me to be discovered by Everyone" if you want to receive voice memos from everyone's iPhone.
- Since you have enabled Airdrop on both iPhone and Mac, now you can turn to your iPhone, open voice memos app and choose the voice memos you want to send.
- Tap on the upload icon and you will see iOS devices or person photo on the Airdrop section. Tap on the one that you want to share the voice memos.
The Bottom Line
The above are top four ways to transfer voice memos from iPhone to PC or Mac. It is recommended that you directly choose to use MobiKin Assistant for iOS to move voice memos from iPhone to computer without iTunes, because of its high success rate and ease of use. In addition to voice memos, it can also transfer other types of iPhone content and manage your iPhone data on your computer. You must want to try it now, right? Don't forget to give us feedback in the comment section below after using it.
Related Articles:
How to Recover Voice Memos from iCloud Smartly [2 Ways]
[3 Ways] How to Recover Trimmed Voice Memos from iPhone
