How to Transfer Files from iPhone to Mac Without AirDrop: Top 5 Ways
Transferring files between iPhone and Mac is easy with AirDrop. It's a wireless service that can do more, like sending photos between iPhones or from Mac to iPhone. However, AirDrop only works when the devices are close to each other. If the two Apple devices are not together, AirDrop will not work.
In this article, we'll show you how to transfer files from iPhone to Mac without using AirDrop, by either doing it wirelessly or with a USB cable.
- Part 1: Transfer Files from iPhone to Mac with Assistant for iOS (Recommended)
- Part 2: Transfer Data from iPhone to Mac via iCloud
- Part 3: Transfer Files from iPhone to Mac via Finder
- Part 4: Copy Files from iPhone to Mac with Email/Text Messages
- Part 5: Move Files from iPhone to Mac via External Storage
Part 1: Transfer Files from iPhone to Mac with Assistant for iOS
First, let's introduce a powerful and reliable iPhone data transfer tool - Mobikin Assistant for iOS (Mac Version). This handy software allows you to easily and seamlessly transfer files between iPhone and Mac, or between iPhone and PC. It supports multiple types of file transfers, including contacts, text messages, videos, music, memos, and more. It offers a free version, but also a paid version with additional features.
Key Features of Assistant for iOS:
- One click to transfer your iPhone data to Mac/MacBook;
- Transfer iPhone contacts, text messages, music, movie, notes, calendar, etc. to Mac easily;
- All models of iPhone are supported by this program well, including iPhone 16/15/14/13/12/11/X/8/7/6, and etc.;
- Support to restore the backup file back to your iPhone without any data loss.
- It also comes with Windows version: MobiKin Assistant for iOS.


Steps to Transfer Files from iPhone to Mac/MacBook with Assistant for iOS (Mac):
Step 1:Connect your iPhone to Mac
After downloading and installing Mobikin Assistant for iOS, launch the program. Connect your iPhone to Mac using a USB cable. Remember to tap "Trust" on your iPhone to let the program recognize your iPhone.

Step 2: Select your target files
The files on your iPhone should now be displayed as different categories in the left column. You can tap the target category and Assistant for iOS will scan the device to find all the data under that category.
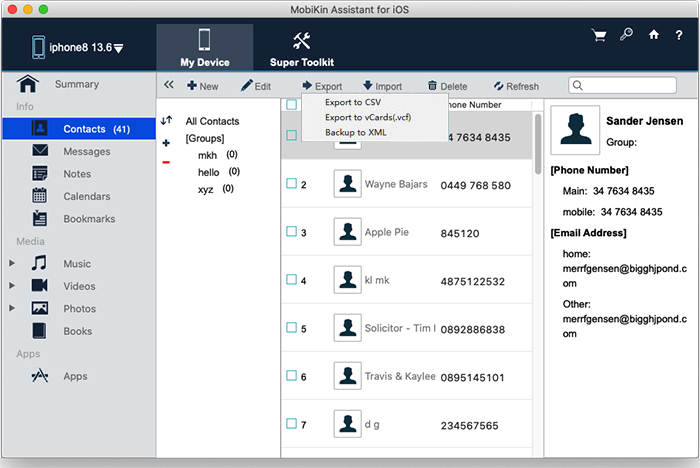
Step 3: Transfer iPhone data to Mac now
After selecting all the data to transfer, tap "Export" on the top menu to transfer it to Mac. Please wait for the process to complete. The time required depends on the number and size of the files you selected.
Video Guide:
Part 2: Transfer Data from iPhone to Mac via iCloud
iCloud is Apple's cloud storage service, closely linked with your Apple ID. It's commonly used by iPhone users to back up and sync important data. In this guide, we'll walk you through how to use iCloud Drive to transfer data from your iPhone to your Mac.
Important: iCloud offers only 5 GB of free storage, so make sure you check if you have enough space before transferring files.
Here's how to sync your iPhone data using iCloud:
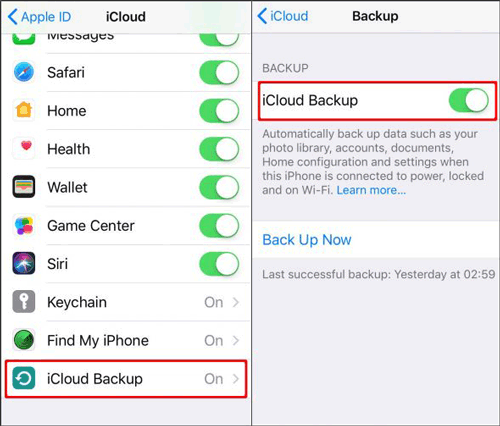
- On your iPhone, go to "Settings" > [your name] > "iCloud".
- Turn on the apps you want to sync.
- Tap "Backup" and turn on "iCloud Backup".
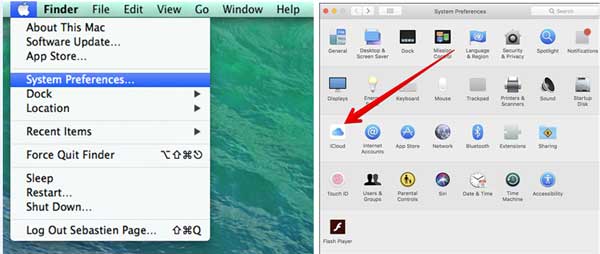
- On your Mac, open "System Preferences" > "iCloud".
- Download the synced data from your iPhone.
To transfer specific documents or files from iPhone to Mac, follow these steps:
- Open the file you want to transfer.
- Tap "Share" > "Save to Files" > "iCloud Drive" > "Save".
- On your Mac, go to "Finder" > "iCloud Drive", and download the file.
You can also use iCloud to transfer messages from your iPhone to your Mac or other content that's supported.
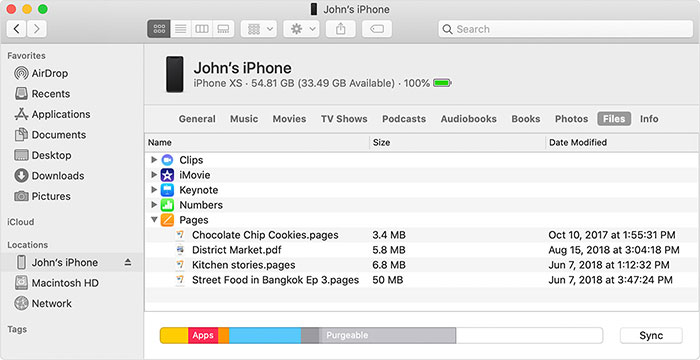
Part 3: Transfer Files from iPhone to Mac via Finder
If you're using macOS Catalina or later, Finder can be a great tool to transfer files between your iPhone, Mac, and other Apple devices. It lets you move things like music, movies, TV shows, podcasts, and audiobooks securely using a cable. This is especially helpful when transferring photos from iPhone to your Mac. If you try to do it wirelessly, you might run into problems, like photos not showing up or getting corrupted. To avoid that, it's best to use a cable.
However, keep in mind that Finder doesn't have advanced features like managing, editing, or backing up files before transferring. The process is similar to iTunes. Here's how you can do it:
- Plug your iPhone into your Mac using a USB cable.
- Open Finder by clicking on the Finder icon in the Dock.
- Find your iPhone listed under "Locations" and click on it.
- Select the type of files you want to sync (e.g., Music, Photos, Files).
- Check the boxes next to the specific files or folders you want to transfer.
- Click "Apply" in the bottom right corner, then click "Sync" to start the transfer.
Part 4: Copy Files from iPhone to Mac with Email/Text Messages
Besides the common methods mentioned earlier, we've put together two backup options that are a bit less efficient. You can use Email or text messages to move data between devices, though these methods are usually for transferring individual files or documents.
Here's how to do it:
- Find the files you want to transfer on your iPhone.
- Tap the Share button, then choose Mail or Messages.
- Send the file to yourself via email or text.
- Open the email or message on your Mac and download the files.

Part 5: Move Files from iPhone to Mac via External Storage
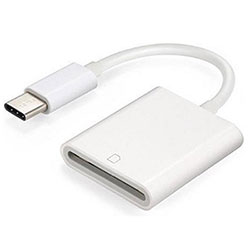
Using an external storage device is a great way to transfer files from your iPhone to a Mac, especially when you don't have access to the internet. It also works as a physical backup for your files. However, this method requires you to buy a compatible adapter and an external storage device like a USB drive or external hard drive, which might be less convenient compared to other options. Here's how to do it: (How to Transfer Videos from External Hard Drive to iPhone?)
- First, use an adapter to connect your external storage device (like a USB drive) to your iPhone.
- Open the Files app on your iPhone.
- Find the file you want to transfer, then press and hold it. Copy the file and paste it onto your USB drive.
- Unplug the USB drive from your iPhone and plug it into your Mac.
- Open Finder on your Mac, and you'll see your USB drive in the sidebar.
- Finally, copy the file from your USB drive and paste it onto your Mac.
Summary
AirDrop is great for transferring a few files, but when it comes to a large number of files, it's not the best choice. This is why many people want to know how to move files from an iPhone to a Mac without using AirDrop. There are several alternatives, each with its pros and cons. iCloud is convenient and works well, but it depends on having a good internet connection. If you prefer a wired connection for more stability, using Finder is a solid option, though it's not as flexible as Assistant for iOS (Mac).
Out of all these options, MobiKin Assistant for iOS stands out. It supports a wide range of file types, offers secure transfers, and even allows you to back up and restore your iPhone, making it the best tool for transferring files from iPhone to Mac.
Relative Articles:
3 Methods to Transfer Calendar from iPhone to Mac
Top 5 Ways to Transfer Photos from SD Card to iPhone
