[Easy Guide] How to Transfer Files from Mac/Macbook to iPad?
Applies To: iPad 10, iPad 9, iPad 8, iPad Pro, iPad Air, iPad 4, iPad mini, and etc.; MacBook, MacBook Air, MacBook Pro, iMac, and iMac Pro
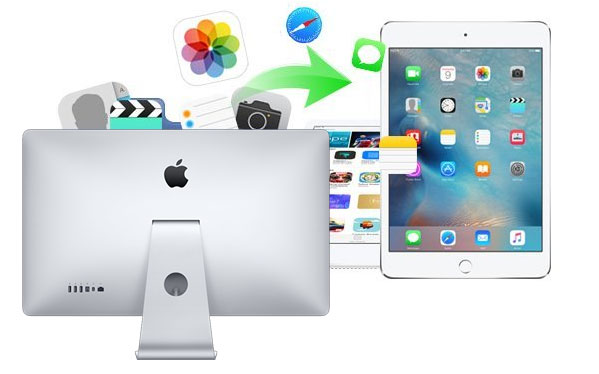
Due to the portability of iPad, many people use iPad instead of Mac for work and entertainment. In this case, we have to transfer files from Mac to iPad. iTunes or Finder on Mac can complete this transfer process. However, using iTunes/Finder will inevitably lead to data overwriting on iPad. That's why more and more users are looking for how to copy data from Mac to iPad in other ways.
In this article, we will show you all possible ways to transfer files from Mac to iPad. You can easily transfer all file types, including contacts, text messages, notes, calendars, bookmarks, music, videos, photos, and apps. You just need to choose the method that you are most satisfied with.
Way 1: How to Transfer Files from Mac to iPad with iTunes/Finder
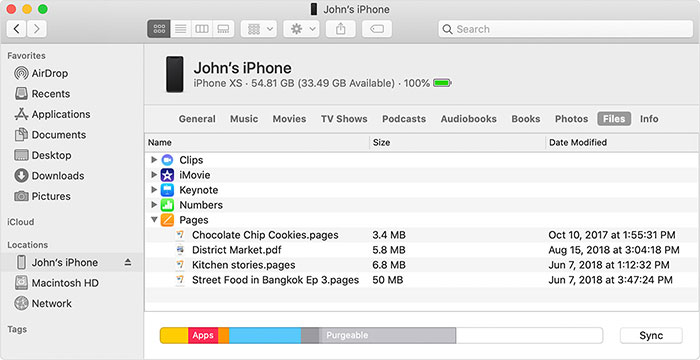
You can move music, movies, TV shows, books, photos, and documents between your Mac and iPhone or iPad. If your Mac is running macOS Mojave or later, Finder has replaced iTunes to do this job.
Below are the steps on how to copy files from Mac to iPad via Finder:
- Connect your iPhone or iPad to your Mac using a USB cable.
- Open Finder and select your device from the sidebar.
- Click on the "Files" tab to see a list of apps that support file sharing.
- Drag and drop files from your Mac into the app where you want to use them.
- Once synced, open the app on your iPhone or iPad to access the files.
Check If You Need:
Way 2: How to Transfer Files from Mac to iPad with Assistant for iOS
If you prefer to transfer files to iPad from Mac without iTunes or Finder to avoid data syncing, you can switch to MobiKin Assistant for iOS (Mac Version), which is a professional iOS management tool to help you transfer files between Mac and iPad without any hassle. It supports all models of Apple devices, including iPhone, iPad and iPod touch. Follow the steps below to get the details.
What can Assistant for iOS do for you?
- Transfer everything between the computer and your iOS devices..
- Manage files on your iPhone and iPad from computer. You can delete and edit iPhone/iPad/iPod data on PC/Mac freely.
- Uninstall apps with 1 simple click.
- Backup data from iOS device to iTunes default backup location and restore iTunes backup to your target device with ease.
- Support all available models of iPad, including the latest iPad 10/9/8, iPad Pro, iPad Air, iPad 4. iPad mini, iPad with retina play, etc.
What are the file types Assistant for iOS supports?
- Music: Songs, Voice Memos, Tones.
- Videos: Movies, TV Shows, Music Videos
- Photos: Camera Roll, Photo Library, Photo Stream and Photo Videos.
- Others: Contacts, SMS, Notes, Calendars, Bookmarks, Books and Apps.
Get the free trial version of the Assistant for iOS program by clicking on the buttons below. Then, follow the step-by-step instructions to see how to transfer data from Mac to iPad by using this tool. Don't hesitate to give it a try now!


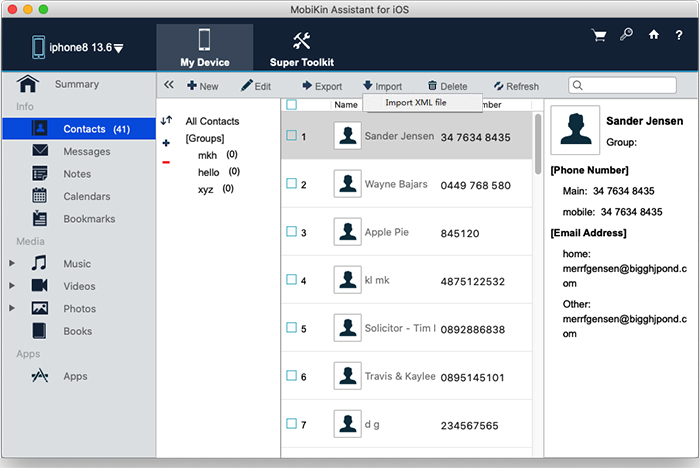
Step 1: Connect your iPhone to the Mac computer
Connect your iPad to your Mac via a USB cable. You will be popped up with a prompt on your iPad, asking you whether to trust this computer. Just click "Trust" to continue. Launch Assistant for iOS Mac on the computer and it will detect your iPad soon.

Step 2: How to transfer files from Mac to iPad
Select the items you want to transfer from the left side panel. For example, if you wish to import contacts from Mac to iPad, you can choose the "Contacts" tab from the left and then click the button of "Import" from the top menu to upload the contacts from Mac to your iPad.
If you want to transfer files from Mac to iPhone, you can click to read the article about how to transfer files from Mac to iPhone.
Check If You Need:
Way 3: How to Transfer Files from Mac to iPad Wirelessly with AirDrop
Whether you use Finder or Assistant for iOS, you need a USB data cable. If you don't have a USB cable at hand, don't worry, you can use AirDrop to wirelessly transfer files from your Mac to your iPad. However, the common problem with the wireless method is that the transferring speed is very slow. If you need to move a large number of files between the iPad and Mac, we recommend that you still use a USB cable.
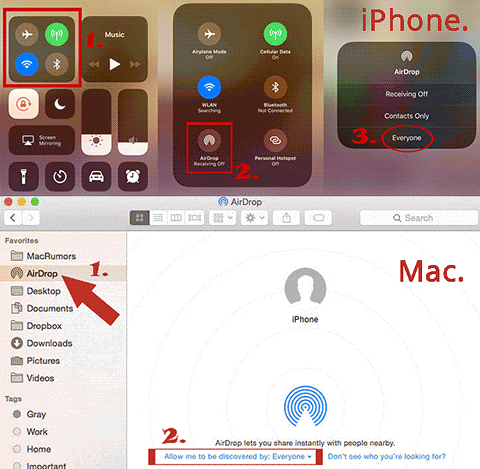
Step 1: Switch on AirDrop on your iPad:
- Swipe up from the bottom of the iPad screen to call out the "Control Center".
- Press deeply on the box featuring the airplane button, tap on the "AirDrop" button and set your iPad to be discovered by "Contacts Only" or "Everyone".
Step 2: Switch on AirDrop on your Mac:
- Go to "Finder" > "Go" > "AirDrop", and turn on Bluetooth and WiFi. This will launch AirDrop automatically.
- In the AirDrop window, set the option "Allow to be discovered" by "Everyone" or "Contacts Only".
Step 3: Transfer files from Mac to iPad via AirDrop
On your Mac, select the files you want to share and drag them to the image of the recipient (your iPad) and click the Send button. Or, you can also directly click on the Share button, choose AirDrop, select the recipient (your iPad) and then click Done.

With the help of AirDrop, we can also wirelessly transfer files from Mac to iPhone. Here is a guide telling you how to transfer photos from Mac to iPhone via AirDrop wireless without iTunes.
Way 4: How to Transfer Photos/Videos from Mac to iPad Using USB
If you have a USB flash drive designed for iPhones and want to move photos or videos from your Mac to your iPad or iPhone, you can do it easily, with no USB cable needed. However, you'll need a data transfer app on your iPad to access the files from the USB drive. The specific app required depends on the brand of your flash drive.
Steps to Transfer Photos from Mac to iPad/iPhone with USB drive:
- Insert your USB flash drive into your Mac.
- Drag and drop or copy the photos and videos you want to transfer onto the USB drive.
- On your iPhone or iPad, download the recommended app for your USB drive.
- Use a Type-C hub or the appropriate adapter to connect the USB drive to your device.
- When prompted, choose the option to import files from the USB drive.
- Pick the photos and videos you want, then follow the on-screen steps to complete the process.
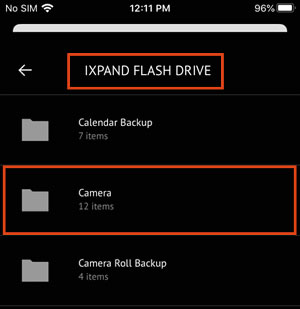
That's it! Your photos and videos will now be available on your iPad.
The Bottom Line
All four methods above can be used to transfer files from Mac to iPad. Each method has a different emphasis, so it is difficult to say arbitrarily which method is best for you. Our advice is that if you want to transfer a lot of photos, videos and audio from Mac to iPad, then MobiKin Assistant for iOS (Mac) is the best choice because it provides the fastest transfer. If you have only a small number of files, such as several documents, to copy from Mac to iPad, then we recommend you use AirDrop. We don't recommend using iTunes to switch data between Mac and iPad because it will cause data sync on your iPad, which may cause unnecessary data loss.
Related Articles:
6 Tips: How to Transfer Photos from Mac to iPhone? (#2 is Awesome)
How to Transfer Photos from iPhone to Mac (7 Ways Offered)
How Can I Send Messages from Mac to iPhone or Android Easily
