How to Transfer Files from iPhone to PC without iTunes: Top 7 Ways
Many people prefer not to use iTunes for transferring files from their iPhone to PC because it often comes with issues. For instance, iTunes doesn't allow you to select specific files for transfer, or it only supports transferring purchased music. Plus, files moved to a PC through iTunes may not be easily accessed or readable.
If you're also looking for better alternatives to iTunes for transferring or syncing files from your iPhone to your computer, you're in the right place. In this article, we'll show you 7 simple ways to transfer files from your iPhone to a PC without using iTunes.
- Part 1: Use Assistant for iOS for Transferring Files from iPhone to PC without iTunes [Hot!]
- Part 2: Copy Files from iPhone to Computer without iTunes by Email
- Part 3: Transfer iPhone Files to PC without iTunes by Google Drive
- Part 4: Copy Files from iPhone to PC without iTunes by Dropbox
- Part 5: Transfer iPhone Files to PC without iTunes by iCloud
- Part 6: Transfer iPhone Files to PC without iTunes by AirDrop-like Apps
- Part 7: Transferring Files from iPhone to PC without iTunes by File Explorer
Part 1: How to Use Assistant for iOS for Transferring Files from iPhone to PC without iTunes
If you want to complete the iPhone transfer files to PC without iTunes, then you can't miss the MobiKin Assistant for iOS, which can be used to transfer files securely between a mobile device and a personal computer. It can be your good helper on managing data on your iDevices. With smooth running on multiple iOS devices, it allows you to:
- Transfer up to 14 types of files from your iDevices (iPhone/iPad/iPod) to your PC with few clicks, including Video, Photo, Music, eBook, Contacts, Text Messages, Notes, Safari Bookmarks, Voice Memo, etc.
- Manage or control the transferred iOS contents on the local hard disk without any limitation, which means you can delete, remove, or add any file on your computer as you like.
- Backup and restore data between your iDevices directly and import iTunes backups from PC to your device, or delete any unwanted iTunes backups from your PC.
- Fully compatible with iPhone 6 to iPhone 16, as well as all generations of iPad and iPod touch.
Now let's put MobiKin Assistant for iOS into practice about the methods of transferring files from iPhone to PC without iTunes:
Step 1: Connect your iPhone to PC
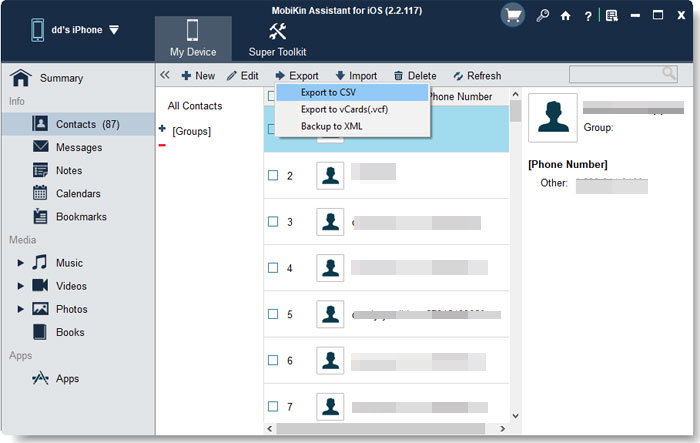
After the download and install of MobiKin Assistant for iOS are finished, run the program. Then, connect your iPhone to PC via USB cable. Once connected successfully, your iPhone will be detected and the main interface of the program should be shown as below.

Step 2: Select the files you need
At this main interface, you can find your different types of files by clicking on the different categories on the left, including "Contacts", "Messages", "Notes", "Calendars", "Bookmarks", "Music", "Videos", "Photos", "Books" and "Apps". Or you can also find them by searching their names in the searching box.
Step 3: Finish transfer files from your iPhone to PC
Select your needed files and click "Export" on the top to transfer your files from your iPhone to PC. You can specify the output location to save the transferred iPhone files. Wait until the transfer is done. Then you can find your files in your destination folder.
Video guide:
Can't Miss:
Part 2: Copy Files from iPhone to Computer without iTunes by Email
Using email is a practical method to handle your transfer job if you don't want to install any software or deal with drives. You can send many types of files such as documents, photos, videos and so on from your iOS device to your PC by using email. Please note that this method only works for a small number of files because email attachments have size limits.
Here is the necessary process of coping files from iPhone to computer without iTunes by Email:
- Open any email app on your iPhone and log into your email account.
- Send an email to transfer your needed files to yourself.
- Log in the same email account again on your PC. Open the email and download the files.
The process is simple, along with just keep a check on internet connect during the process, so that files get transferred and later on you would be able to download and access easily to your system. The most important thing, you can access your email account from anywhere on your chosen device with internet connection.
Part 3: How to Transfer iPhone Files to PC without iTunes by Google Drive
Google Drive ia an online drives for sharing files across multiple devices. It can save files like photos, stories, designs, drawings, recordings, videos and more. And your first 15 GB of storage will be free with a Google account.
- Download Google Drive from App Store and install it on your iPhone.
- Run the program, log in your Google account and click on the plus symbol at the bottom of the screen.
- Choose "Upload" and select your needed files to upload them to Google Drive.
- Download and install Google Drive on your PC. Log in your Google account.
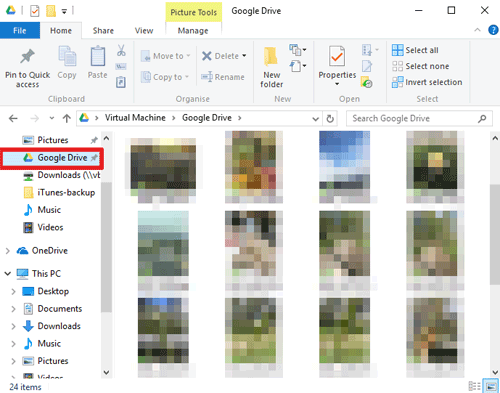
- Open the "Google Drive" folder that was created automatically on your PC and find your uploaded files in it.
Part 4: How to Copy Files from iPhone to PC without iTunes by Dropbox
Dropbox is popular software that allows you to back up files with 2 TB (2,000 GB) of space and move files you use less often off your computer and to the cloud. With Dropbox, you can transfer your pictures from iPhone to PC via LAN. And you can try Dropbox Business free for 30 days.
Steps to copy files from iPhone to PC without iTunes by Dropbox:
- Download and install the Dropbox app on your iPhone.
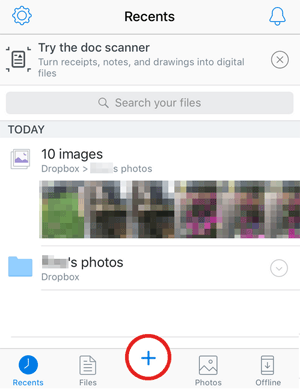
- Launch the Dropbox program. Tap on the "+" bottom of the screen.
- Choose the files you want to copy.
- Select an upload destination. Then it will start to upload.
- After enough time, the photos you selected will be waiting to be downloaded in your Dropbox folder on your pc.
Guess you like:
Part 5: Transfer iPhone Files to PC without iTunes by iCloud
iCloud is also another practical method to transfer your iPhone photos and videos wirelessly to your PC. Since the fact that iCloud program has been pre-built on your iPhone device, using iCloud means that there is no need to download additional software. However, iCloud can only allow you to sync limited types of files. And it offers to you only 5 GB storage. What's more, you can download 1,000 photos at most at a time.
- Open the "Settings" on your iPhone, and press "Apple ID/name", "iCloud", "Photos" and "iCloud Photos" in turn.
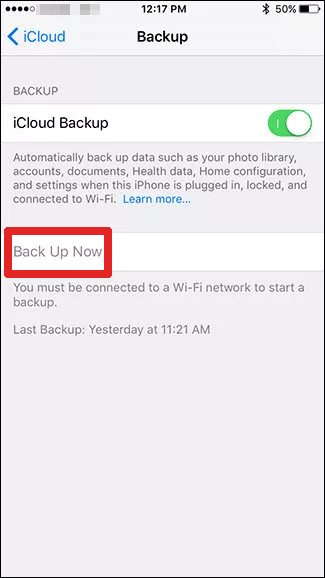
- Turn on "iCloud Backup" and the "Back Up Now" option below.
- Log in to iCloud.com by using your Apple ID credentials on your computer. You can download your data from the website. Using the iCloud Drive app will be more convenient.
Note:If your the system version of your iPhone is 10.2 or earlier, you need to go to "Settings" and then tap on "iCloud" to find your "iCloud Backup".
Part 6: How to Transfer iPhone Files to PC without iTunes by AirDrop-like Apps
While AirDrop isn't available on Windows PCs, you can use several apps that work similarly to AirDrop, allowing you to transfer files wirelessly between an iPhone or iPad and a Windows computer. Some of the top options include Snapdrop, Xender, SHAREit, and Zapya. These apps support the transfer of various file types, such as photos, videos, music, PDFs, and even apps.
Here's how you can use Snapdrop to transfer files from an iPad to your computer:
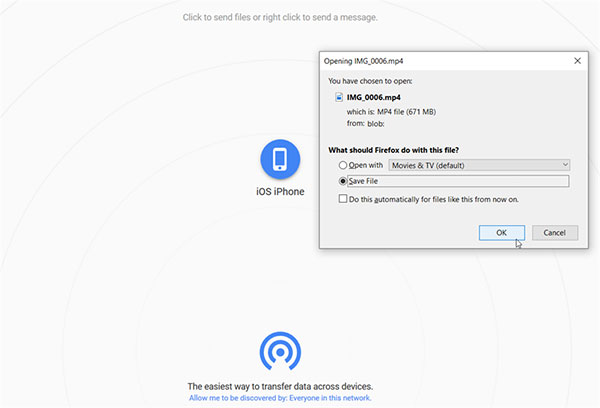
- Open the Snapdrop website (https://snapdrop.net/) on both your iPad and your computer.
- On your iPad, tap the Snapdrop icon. You'll see three options: Take Photo or Video, Photo Library, and Browse.
- Pick an option to select the files (like photos or videos) you want to transfer.
- After the transfer is complete, click the Download button on your computer to save the files.
Part 7: Transferring Files from iPhone to PC without iTunes by Windows Explorer
Windows Explorer is a built-in program in your Windows operating system. So you do not need to download any third-party software to transfer files with Windows Explorer. However, transferring files via Window Explorer makes the files in a chaotic sequence without any folder structure.
Note: Windows Explorer is called File Explorer in Windows 10.
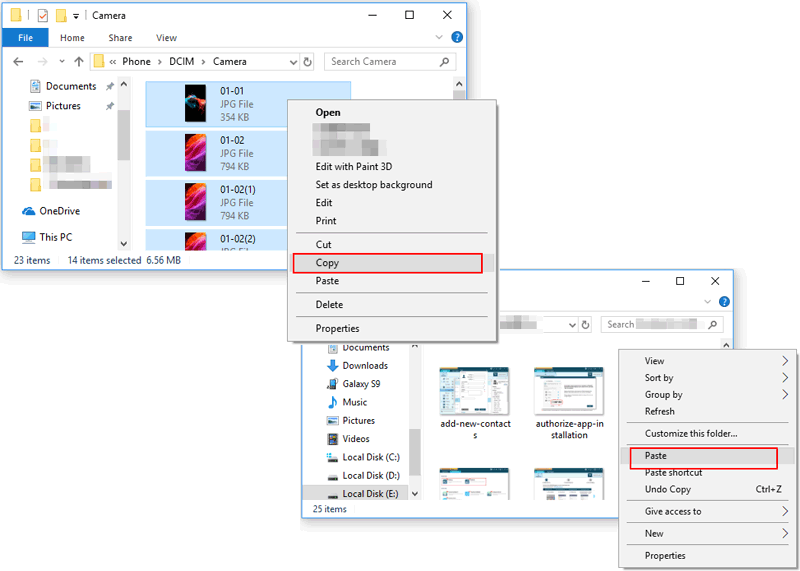
Steps about transferring files from iPhone to PC without iTunes by Windows Explorer:
- Using a USB cable to connect your phone to PC. Remember to click on the "Trust" to trust the computer on the pop-up window on your iPhone.
- There are 3 ways to open Windows Explorer:
- Find your iPhone's name on the left side and click on it. Then click on "Internal Storage" and "DCIM" in turn to find your needed files. Finally, you just need to drag your files out to transfer them to the desktop on your PC.
- Select the "Start" button and find it on the Start menu.
- Press the "Windows logo" key and "E".
- Select the folder icon on the task bar.
Conclusion:
So, you should now know how to transfer iPhone files to PC without iTunes. The 7 methods mentioned above each have their own uniqueness. Among them, the best choice is of course MobiKin Assistant for iOS. It can help you complete the whole process with ease, and transfer files from iPhone to PC with one click. It will save you a lot of time and effort. Please share this guide with your friends and let them know the different ways to transfer data from iPhone to PC.
Free download MobiKin Assistant for iOS to have a try now!
Relative Articles:
How to Transfer Large Videos from iPhone to PC
6 Ways to Transfer Photos from Computer to iPhone Effectively


