5 Ways to Restore iCloud/Google/iTunes Backup to New iPhone 14/13/12/11/X/8
The moment you open the box of the new iPhone, you will get excited and fresh for the most part. Then, if you plan to let this device take over the work of your old one, it is important to restore your original content to the new iPhone from the recent backup. For non-technical operators, recovering an backup is not always smooth, especially when system compatibility issues arise.
OK, this technical guide tells you efficient ways to restore backup to new iPhone. Specifically, you can fetch your backup for your new iPhone with iCloud, Google One, and iTunes. Next, we shall explain the methods in detail below.
Part 1: Restore Backup to New iPhone via iCloud
If you have an iCloud backup available and want to restore your iPhone from iCloud, try to make it from your iPhone settings directly. But bear in mind that the job will wipe the existing data on your device. Know how to restore the backup to new iPhone from iCloud:
- Locate iPhone "Settings" > "General" > "Reset".
- Choose "Erase All Content and Settings".
- Enter your passcode if prompted.
- Select "Erase iPhone" and confirm.
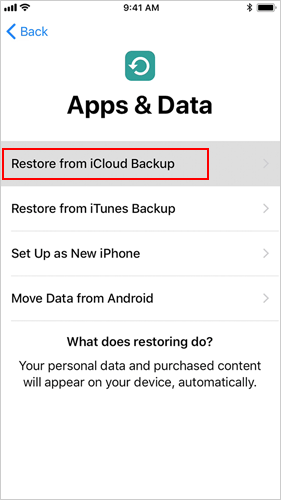
- Go through the setup assistant, and you'll be given "Restore from iCloud Backup".
- Choose the option and enter your Apple ID details.
- Tap on "Next", pick the latest backup from the list, and tap "Restore".
You Might Also Need:
- Hot Tips to Restore Android Phone from Backup [Informative Tutorial]
- Where Is My iPhone Backup Stored? A Detailed Guide You Should Never Miss
Part 2: Restore Backups to New iPhone from iCloud.com
Assuming you're to restore backups other than WhatsApp attachments, SMS, MMS, iMessages, voice memos, photo streams, etc., try to access and download your iPhone backup from the iCloud web. Here are the easy steps to restore the backup to the new iPhone 14/13/12/11/X/8/7 from iCloud.com:
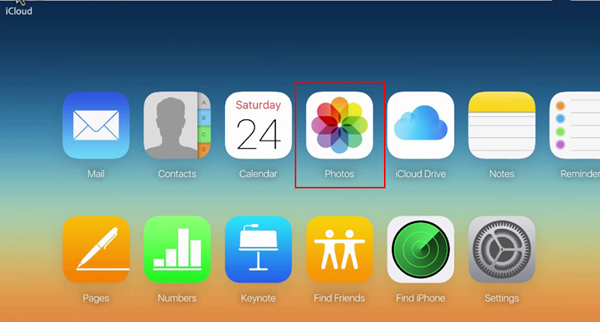
- On your computer, visit icloud.com from a browser.
- Log in with your Apple ID and password. (Apple ID is disabled?)
- You'll see all the backup files will available on the site.
- Access any file type by clicking on it.
Part 3: Restore Backup to New iPhone with Google One
Did you save a backup of your iPhone on Google One? Well, this service helps maintain backups for iPhone contacts, photos, videos, calendars, etc., on Google service. To make a data backup, run Google One > tap "Set up data backup" > choose the data types to back up > click "Back up now". After that, follow the steps below to learn how to restore the backup to a new iPhone via Google One:
- To start with, open the "Settings" app on your iPhone.
- Scroll down and tap "Google" > "Google One" > "Backups".
- It should show how the data was allocated across Google services.
- Press "Storage" > "Backup settings".
- Choose the backup you want to restore.
- Tap on "Restore" to begin the iPhone backup restore.
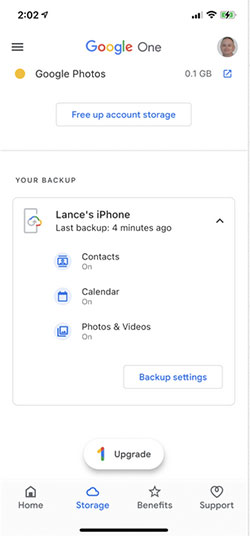
Your Google storage is shared across Google Drive, Google Photos, Google One, and Gmail. Therefore, you can manage the memory to get more storage for Google One by freeing up space.
Further Reading:
- How Can I Transfer Phone Number to New iPhone? [5 Methods You'd Better Know]
- How to Fix Photos Disappeared from iPhone after Update? [2022 Updated]
Part 4: Restore New iPhone from Previous Backup on Computer
iTunes retired on macOS Catalina and above, replacing itself with Finder. So, when you have the most relevant backup of your iPhone using iTunes or Finder, try to restore the backup from the tool. Now, here are the two options to restore your new iPhone from the previous backup on PC/Mac.
Option 1: Restore iPhone from Old Backup on Mac via Finder
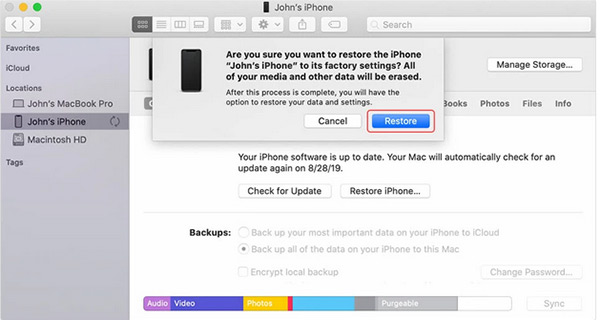
- Launch Finder on your Mac and connect your new iPhone to it via USB.
- If your iPhone asks to "Trust" the device, do it as prompted.
- Choose the iPhone that appears in the left menu in Finder.
- Click "Restore" and check the backup date.
- Pick the backup that seems relevant to you.
- Tap "Restore" and enter the backup password before restoring it to your new iPhone.
Option 2: Recover iPhone from Backup on Computer via iTunes
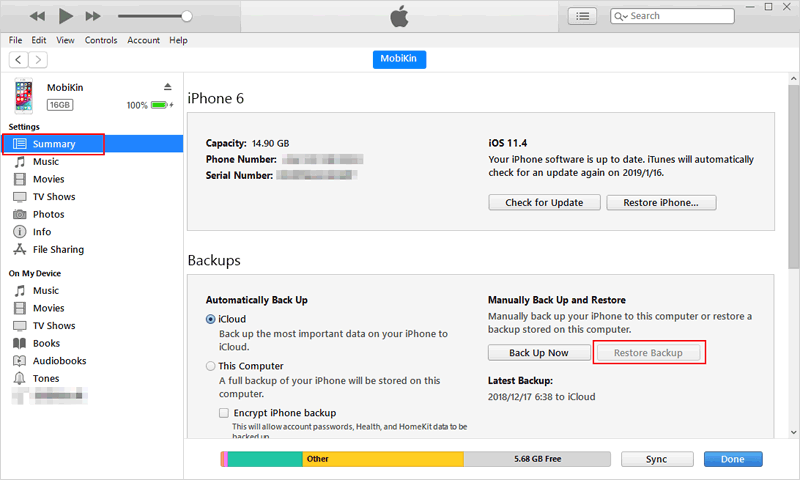
- Visit iPhone's "Settings" and toggle off "Find My iPhone".
- Connect your iPhone to the computer through USB.
- Launch the latest version of iTunes on that PC.
- Tap your iPhone's name when it is recognized.
- Click "Summary" > "Restore Backup".
- Select the most relevant backup as per the size and date.
- Hit "Restore" and enter the encryption password, if any.
Part 5: Selectively Restore iPhone from Backup without Resetting
Neither iTunes nor iCloud allows you to selectively restore the content you want, and the current content on your phone may be lost. So, some would like to restore an iPhone from backup files and retain them on a computer for safekeeping. For that matter, MobiKin Doctor for iOS is your best bet. As the most reliable utility for iOS data recovery, it applies itself to restoring data from an iPhone directly or from an iTunes backup in a flexible manner.
Main features of MobiKin Doctor for iOS:
- Selectively restore iPhone from iTunes backup without overwriting.
- Recover deleted iPhone text messages, contacts, etc., without backup.
- Restore such items as contacts, call history, messages, camera roll, photos, videos, Safari history, calendars, notes, note attachments, voice memos, and others.
- Clean interface, quick restoration, high success rate, etc.
- Work for almost all Android phones/tablets, including iPhone 14/14 Plus/14 Pro (Max), iPhone 13/13 Pro (Max)/13 mini/12/12 Pro (Max)/12 mini, iPhone 11/11 Pro/11 Pro Max, iPhone X/XR/Xs/Xs Max, iPhone 8/8 Plus, iPhone 7/7 Plus, iPhone 6/6S/6 Plus, iPod touch, iPad, etc.
- It won't let out your privacy.
How to selectively restore the iPhone from the iTunes backup via Doctor for iOS?
Step 1. Select "Recover from iTunes Backup File"
Install and open the iPhone recovery program on your computer. Then pick the "Recover from iTunes Backup File" section from the left menu. Then, you'll see all iTunes backups on this computer.
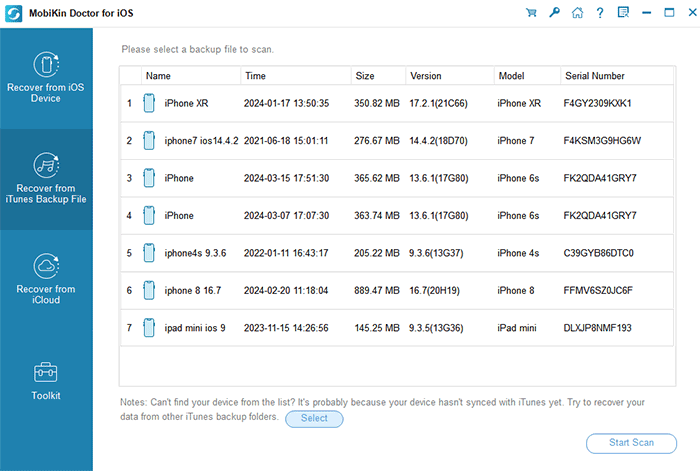
Step 2. Run a deep scan on iTunes backups
Choose an iTunes backup file of the iPhone and press "Start Scan" to perform a thorough scan on the backup. Next, all file types that are recoverable will be displayed. Select the data categories you want and click "Start Scan".
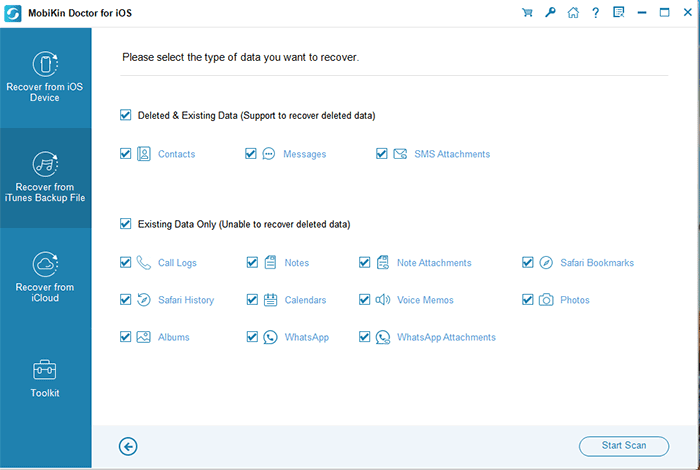
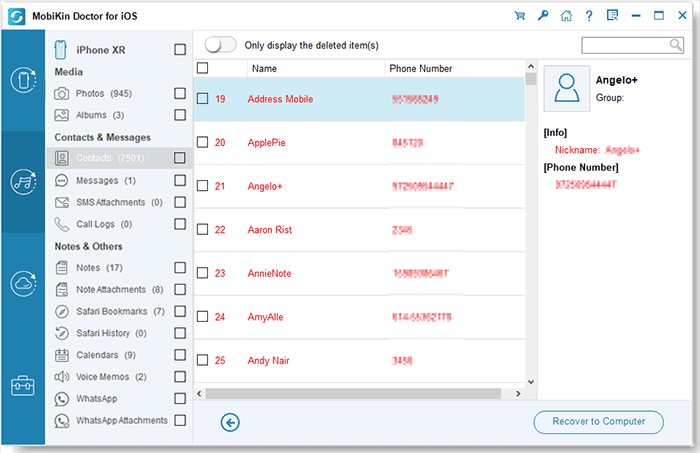
Step 3. Selectively restore the backup from iTunes
After scanning, you can preview and choose the files you'd like to restore. Finally, press "Recover to Computer" to put them on your computer.
The End
When many Apple users upgrade their iOS systems, the backup with the higher version of the upgraded system cannot be restored to the one with an older system. Thus, it is generally recommended that you back up the device before upgrading the OS. And if you'd like to selectively restore your iPhone from the iTunes backup without resetting, just pick MobiKin Doctor for iOS for convenience. Finally, please share this post with your friends or family if you find it beneficial.
Related Articles:
How to Recover Data from iPhone without Backup? 3 Ways Are Offered
How to Fix Restore from iCloud Paused in 12 Reliable Ways? [SOLVED]
Apps Didn't Transfer to New iPhone 14/13/12/11/X/8/7? Try the 7 Solutions Here
What If Your iPhone Won't Restore? Try the 9 Proven Methods Here!
[Step-by-Step Guide] How to Transfer iCloud to New iPhone Instantly
Does Factory Reset Delete Everything on iPhone? What Happens If I Do It?


