Top 8 Methods to Transfer Photos from Samsung to Samsung
Photos are essential for phone users, storing memories and important information like business cards, screenshots, and downloads. Android users, especially Samsung owners, often need to transfer photos from Samsung to Samsung. Phone transfer might seem like a challenging task especially if it involves large volumes of data. However, the transfer process can be made easier using the following methods:
- Part 1: How to Transfer Photos from Samsung to Samsung with Mobile Transfer (Quick)
- Part 2: How to Do Samsung Photo Transfer with Android Assistant
- Part 3: How to Transfer Photos from Samsung to Samsung with NFC
- Part 4: How to Move Photos between Samsung Phones with Dropbox
- Part 5: How to Share Photos between Samsung Phones with Bluetooth
- Part 6: How to Copy Photos from Samsung to Samsung with File Explorer
- Part 7: How to Transfer Photos from Samsung to Samsung with Smart Switch
- Part 8: How to Transfer Pictures from Galaxy to Galaxy with Google Photos
Check out the video below to learn this topic visually.
Part 1: How to Transfer Photos from Samsung to Samsung with Mobile Transfer (Quick)
Using MobiKin Transfer for Mobile is one of the easiest and fastest means of transferring photos and other files from one Samsung device to another. Another advantage of using this Samsung Photo Transfer software is that it does not require any professional skills.
Main features:
- Fast since files are transferred with just a simple click.
- Allows Android and iOS users to selectively move data between devices.
- Supports different brands of mobile phones, including Samsung, Huawei, Xiaomi, Sony, etc.
- Supports the transfer of photos, apps, music, videos, contacts, text messages, call logs and documents.
- Ensures a secure transfer process since it does not have adware, malware, or any other type of virus.
- For Samsung devices, it is compatible with almost all Samsung models.
When using MobiKin Transfer for Mobile, you can follow three significant steps:
Step one: Install and launch it on your computer. You might see the primary interface of it.


Step two: Use a USB cable to connect the two Android devices to the Mac or the personal computer at the same time. The connection can also be created by connecting the two devices to the same WiFi network in case the USB option is not successful.
- Ensure the source phone is on the left and the destination phone on the right; use the "Flip" button to adjust if needed.

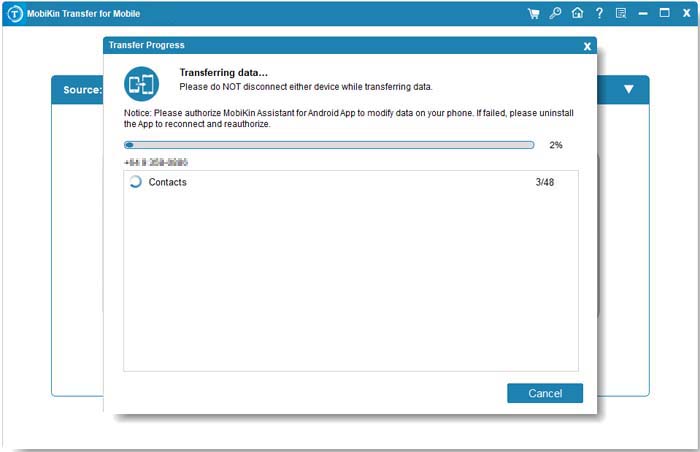
Step three: On the middle panel of the program, different files are listed. Tick the "Photos" folder, and click the "Start Copy" option to start moving the files. Once the data transfer process is complete, a notification will appear on the screen.
Cons:
- While effective, it's not free, and you may need to purchase the full version for full functionality.
- You need to connect both phones via a USB cable, which limits wireless flexibility.
Part 2: How to Do Samsung Photo Transfer with Android Assistant
The MobiKin Assistant for Android can also be used to transfer photos from one Samsung to a different Samsung phone. One of the best things about the Android assistant is that it has a backup and restore feature that allows Samsung phone users to back up their pictures in the source phone and restore them in the destination phone.
Additionally, the transfer program also supports moving or managing contacts, apps, music, messages, and other files. The following are the steps involved in moving photos from one Samsung gadget to another.
Here's how:
Step one: connect the Samsung phone to the computer
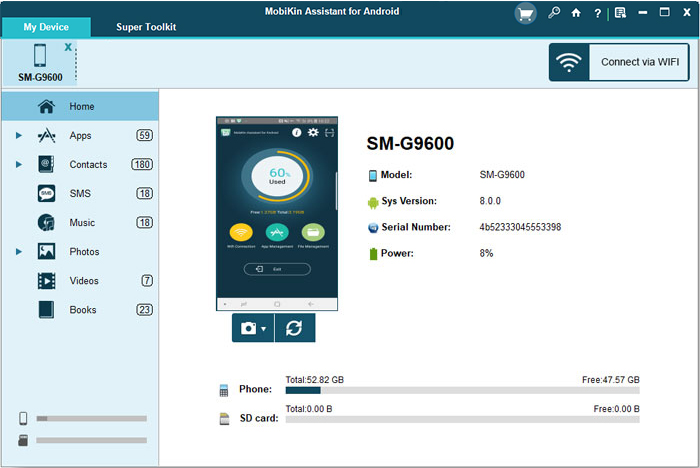
- Ensure that you have downloaded, installed, and launched the Android assistant (the Android version) on your computer.
- Use a USB cable to connect the destination phone to the personal computer.
- The program will automatically detect the device.
Step two: backup the photos in your Samsung phone
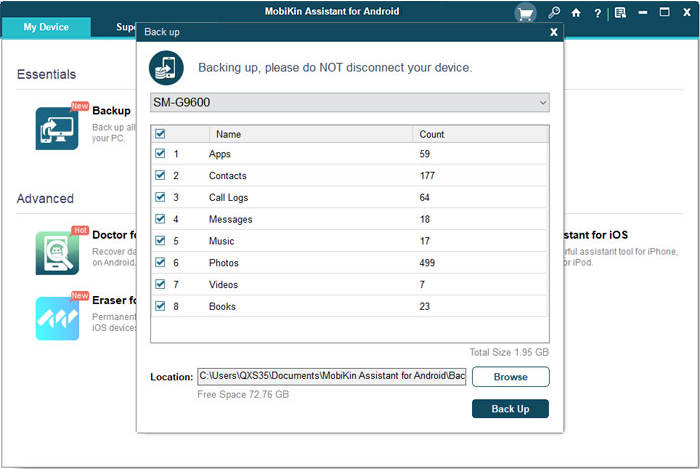
- On the interface that appears on the screen, select the "Super Toolkit" option.
- Click on the "Backup" icon.
- Select the "Photos" option on the pop-up window.
- Choose the preferred storage location for the backup files on the computer.
- Hit the "Back Up" button, and the backup process will begin.
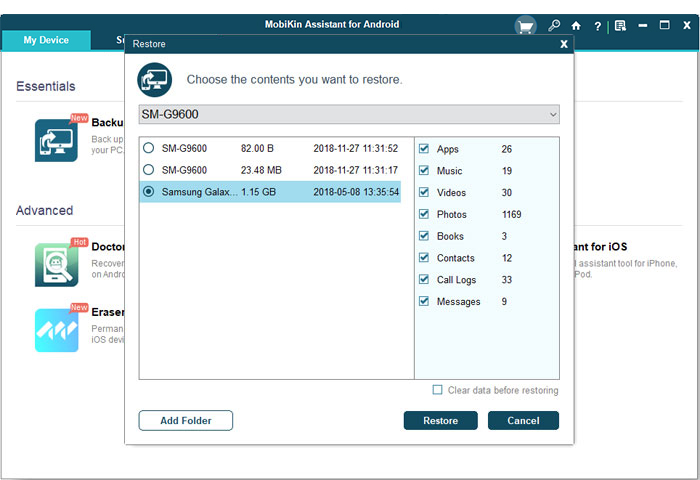
Step three: restore the photos in your destination phone
- Once the backup process is complete, disconnect the source phone and connect the destination phone to the personal computer.
- Click "Super Toolkit" and then the "Restore" option to select the photos you backed up.
- Click the "Restore" button to restore the pictures in the preferred phone.
More to Explore: If needed, here are more ways on how to transfer pics from Samsung to computer.
Cons:
- Like the Transfer tool, this requires a computer for managing data.
- The free version has limitations, requiring you to upgrade for full functionality.
Part 3: How to Transfer Photos from Samsung to Samsung with NFC
The S beam is an innovative feature that helps Galaxy users to move photos between phones. For this feature to be more effective, one must combine Near-Field Communication (NFC) and Wi-Fi Direct. The role of the NFC is to initiate the transfer process which involves the following steps. Here's how:
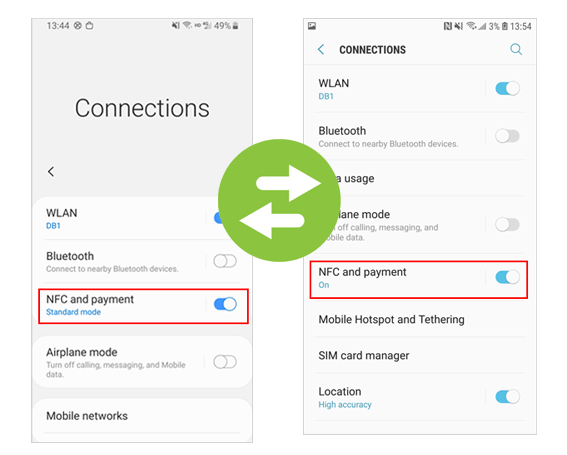
- Go to Settings on both Samsung phones.
- Tap Connections > NFC and payment, then toggle NFC to On.
- Launch the Gallery app on your old Samsung phone.
- Select the photos you want to transfer.
- On the old phone, tap the Share icon, and select Android Beam (if supported).
- Hold both phones back-to-back so the NFC sensors are touching.
- The new phone will prompt you to accept the transfer.
- Tap "Accept" to start the transfer.
Cons:
- NFC works only within very short distances (a few centimeters).
- Both devices must support NFC, and not all apps or files are transferable via NFC.
- NFC is slower compared to other wireless methods like Wi-Fi Direct.
Part 4: How to Move Photos between Samsung Phones with Dropbox
Dropbox is a cloud storage service for moving photos to the cloud. Once you have transferred the images to Dropbox, you can access them from anywhere as long as you have an internet connection. The entire process is made easier by the camera upload feature found on the Dropbox app. Check how to do it:
- Download and install the Dropbox app on both Samsung phones from the Google Play Store.
- Sign in with your Dropbox account or create a new one.
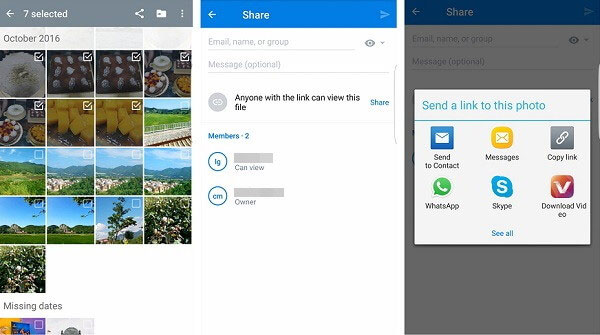
- Open the Dropbox app on the old phone.
- Select the photos you want to transfer and tap Share > Dropbox to upload them.
- Open Dropbox on the new phone.
- Locate the photos in Photos or the folder you uploaded to. Tap to download them to the new phone.
- Turn on Camera Upload in Dropbox settings to automatically back up future photos.
Cons:
- Free accounts come with limited storage, which may not be enough for large photo transfers.
- You need a stable internet connection to upload and download photos.
- Depending on your internet speed, the process can take time for large photo collections.
Part 5: How to Share Photos between Samsung Phones with Bluetooth
With a Dropbox alternative like Bluetooth, you can transfer data within a short distance freely and without using cellular data. Both mobile phones must have the Bluetooth feature. Follow these steps:
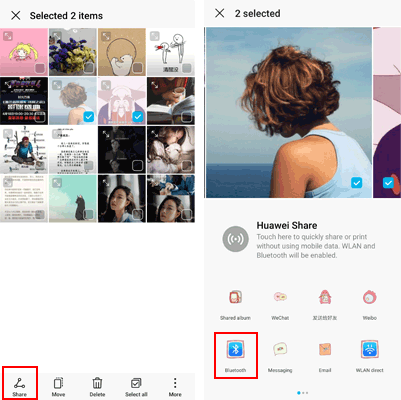
- Enable Bluetooth: Go to Settings > Connections > Bluetooth and turn it on for both devices.
- Pair Devices: Select the other phone under Available devices and confirm pairing.
- Send Photos: Open Gallery, select photos, tap Share > Bluetooth, and choose the paired phone.
- Receive & Save: Accept the transfer on the receiving phone; photos will be in Gallery or Downloads.
Cons:
- Bluetooth is relatively slow compared to other methods, especially for large photo batches.
- You need to keep both phones relatively close to each other.
- Some older devices may have trouble with Bluetooth compatibility.
Part 6: How to Copy Photos from Samsung to Samsung with File Explorer
File Explorer is a built-in tool on Android devices, including Samsung Galaxy S25/S24/S23/S22/S21/S20/S10, that allows you to manage, browse, and transfer files between different storage locations. It provides a straightforward way to navigate your phone's internal storage, SD card, and connected devices. Here are the instructions:
- Use a USB cable to connect both Samsung phones to your computer.
- Ensure both phones are in File Transfer (MTP) mode.
- Open File Explorer on your computer.
- Locate both Samsung phones under This PC.
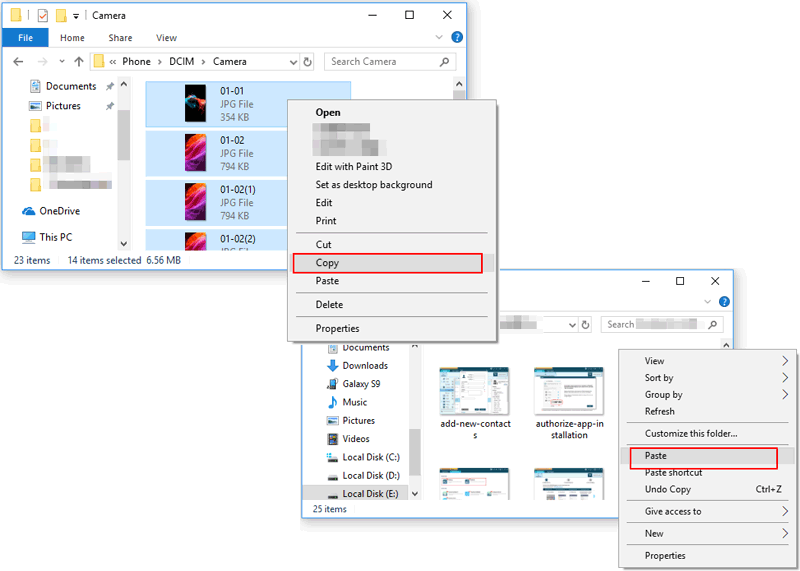
- On the source phone, navigate to the DCIM folder (where photos are stored).
- Select the photos you want to copy.
- Copy them (right-click > Copy or press Ctrl + C).
- Open the DCIM folder on the destination phone.
- Paste the photos (right-click > Paste or press Ctrl + V).
Cons:
- Requires a computer to connect both phones and manually transfer files, which is inconvenient without one.
- You need to manually locate and copy photos, which can be time-consuming for large quantities.
Part 7: How to Transfer Photos from Samsung to Samsung with Smart Switch
These days, transferring photos from one Samsung phone to another does not require USB cables. Using the Samsung Smart Switch Mobile app is an easy and fast method of completing the process. All you need to have is a Google account. The following are the steps involved:
- Ensure Smart Switch is installed on both Samsung phones (it's pre-installed on most Samsung devices).
- If needed, download it from the Google Play Store.
- Wired method: Use a USB cable to connect the two devices.
- Wireless method: Ensure both phones are connected to the same Wi-Fi network.
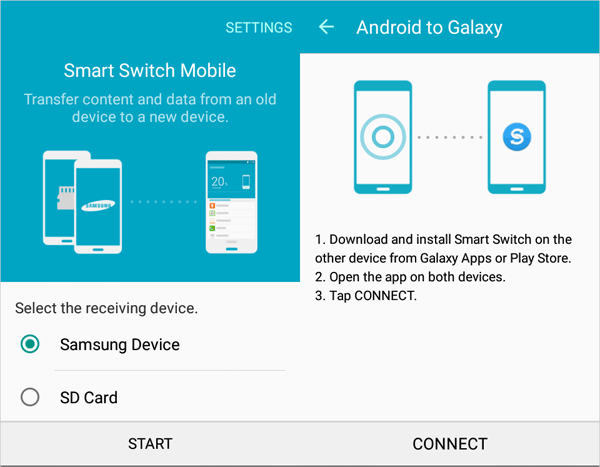
- Open the Smart Switch app on both phones.
- On the new phone, select Receive Data and choose Galaxy Device.
- On the old phone, select Send Data.
- On the old phone, choose Photos (or select Gallery) as the data type to transfer.
- Tap Transfer to start the process.
Cons:
- Smart Switch needs to be installed on your PC or both phones.
- While great for transferring photos, it may not handle all types of data (e.g., app data, messages) as smoothly.
- It may not work well with non-Samsung devices or older Samsung models.
Part 8: How to Transfer Pictures from Galaxy to Galaxy with Google Photos
Google Photos is a cloud-based service that allows you to store, manage, and access your photos and videos across multiple devices. It syncs your media to your Google account, making it easy to transfer photos between devices, including Samsung devices. Here's how:
- Make sure Google Photos is installed on both Galaxy devices from the Google Play Store.
- Sign in with your Google account.
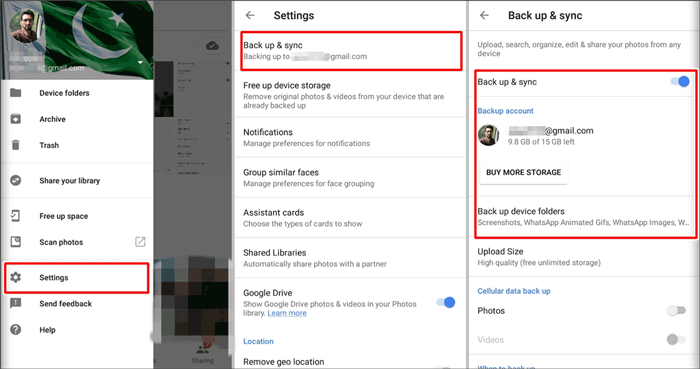
- Open the Google Photos app on the old Galaxy device.
- Ensure Backup & sync is turned on in Settings. This will automatically upload all photos to your Google account.
- Allow time for the photos to upload to the cloud. You can monitor the upload progress in the Google Photos app.
- On the new Galaxy device, open Google Photos and sign in with the same Google account.
- All uploaded photos should appear in the app.
- To save photos to your device, select the photos and tap Download.
Cons:
- You need to upload photos to Google Photos and download them to the new phone, requiring a stable internet connection.
- Offers limited free storage; you may need to pay for additional space for large photo libraries.
- May compress images when uploading in free mode, affecting quality.
Summary
There are many situations that might force you to transfer your photos from one Samsung phone to another. For example, you might be upgrading to another new phone, or your old gadget might be running out of space. The above are some solutions that can make the process easier. Choose the one that suits you best.
Related Articles:
6 Optimal Strategies Transfer Photos from Mac to Samsung Galaxy
How to Sync Google Photos with/to Samsung Gallery in 4 Easy Ways
Samsung Gallery Not Showing All Pictures? 15 Troubleshooting Tips
5 Means to Delete Photos from Samsung Galaxy S25/S24/S23/S22/S21/A32