Sony Xperia Broken/Dead Screen Data Recovery: 4 Solutions & Extra Tips
"I've had a terrible car crash with an open thigh fracture; my femur broke the phone, as you can see. There are a lot of pictures on the phone. I would like to recover from my Xperia 10V, but it doesn't turn on anymore - does anyone see any chance to do so?" -- from Reddit
When faced with a broken screen on a Sony Xperia device, some vital resources can suddenly become inaccessible, prompting the urgent need for data recovery. Whether the damage is due to an unfortunate drop, a mishap, or wear over time, the challenge remains: how can one secure Xperia data before repairing - for security-related reasons - through Sony Xperia broken screen data recovery?
This guide aims to address precisely that question, offering 4 practical solutions to recover data when the screen is damaged beyond use.
- #1: Recover Data from Sony Xperia with Broken Screen via Xperia Companion
- #2: Access Sony Xperia Data with Broken Screen Using AutoPlay
- #3: Retrieve Data from Broken Screen Sony Xperia via ADB Command
- #4: Access Sony Xperia Broken Screen for Data Recovery via OTG Adapter
- Extra: Recover Data from Broken Screen Android Phone
#1: Recover Data from Sony Xperia with Broken Screen via Xperia Companion
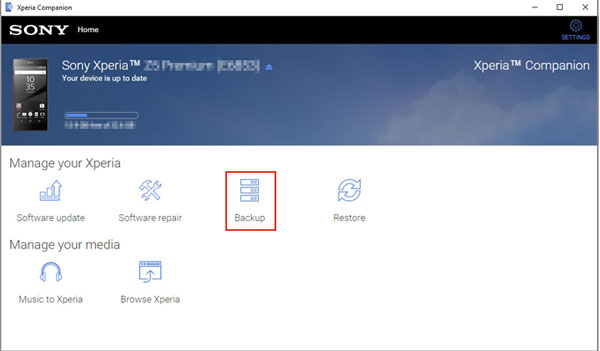
If you have backed up your Sony Xperia using the Xperia Companion software to save your data securely on a computer and the broken screen is still responsible, you can perform a swift restoration to retrieve your data on your Xperia device. To back up contacts, photos, SMS, etc., from Sony Xperia to PC with broken screen in this way:
- Begin by downloading and launching the Xperia Companion software on your computer.
- Connect your Sony Xperia to the PC using a USB cable.
- When the pop-up window appears, choose the transfer files or MTP mode.
- Next, select the "Restore" option from the main interface of the app.
- Select the backup data from the PC.
- Confirm the action, and the files will be backed up on the computer.
You Might Also Need: After accomplishing the data recovery, you can transfer files to your new Xperia phone as required.
#2: Access Sony Xperia Data with Broken Screen Using AutoPlay
When using the built-in AutoPlay feature, you should have a working USB cable and a computer with USB ports. Next, USB debugging must have been enabled before the screen broke, and the device must be set to file transfer mode (MTP). How to retrieve data from broken screen Sony Xperia 1V/10V/5IV/1IV, Xperia Z7/Z6/Z5/Z4/Z3/Z2/Z1, XZ/X with AutoPlay?
- Connect your broken Xperia phone to the computer using a USB cable.
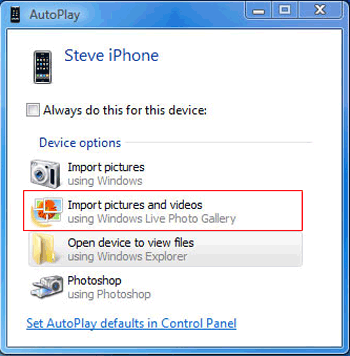
- Once your phone is detected, select "Open device to view files" from the AutoPlay prompt on your computer screen.
- Select the media files you want to recover and drag or copy them to your computer.
Note: 1. You can't retrieve contacts, SMS, call logs, and other data using AutoPlay from an Android with a broken screen. 2. USB debugging must be enabled before the screen is cracked. 3. Some Sony Xperia models may require unlocking to extract data.
You Might Also Enjoy:
#3: Retrieve Data from Broken Screen Sony Xperia via ADB Command
ADB is crucial for data recovery from devices with broken screens, such as a Sony Xperia phone. When the screen is damaged and unresponsive, ADB can connect the phone to a PC for data retrieval. By enabling USB debugging first and then configuring the device with specific ADB commands, users can access the phone's file system and back up data to cloud storage or a hard drive. Learn how to make it:
- Open the ADB tool on your PC by clicking its shortcut on the desktop.
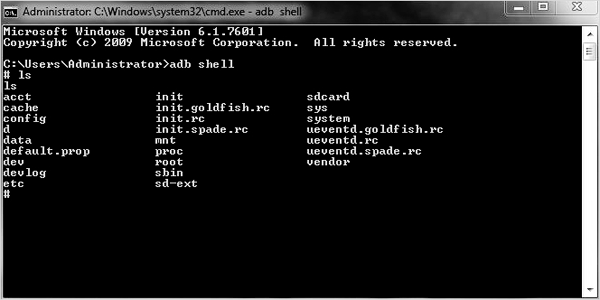
- In the command prompt, either type or copy and paste:
Adb shell
echo "persist.service.adb.enable=1" >> /system/build.prop
echo "persist.service.debuggable=1" >> /system/build.prop
echo "persist.sys.usb.config=mass_storage,adb" >> /system/build.prop - Restart your PC. After your PC has rebooted, connect your Android phone to your PC.
- Once the connection is established, the Android Control Tool screen should open, allowing you to control your locked smartphone from your PC.
Important: If you haven't previously enabled USB debugging, you may need to first boot your device into recovery mode or use hardware buttons to enable it.
#4: Access Sony Xperia Broken Screen for Data Recovery via OTG Adapter
If your Sony screen is unresponsive due to damage from a drop, you can still access it using a mouse and an OTG adapter. Here's how to access Sony Xperia with broken screen using an OTG adapter:
- Charge your device to more than 80%.
- Plug the USB mouse into the OTG adapter securely.
- Connect the OTG adapter's micro USB port to your Sony Xperia phone.
- When the phone screen turns on (press the "Power" button if needed), you'll see a mouse pointer icon.
- Use the mouse to navigate and enter your phone's lock code, PIN, password, or pattern.
- Once unlocked, access and back up your data using a cloud storage service.
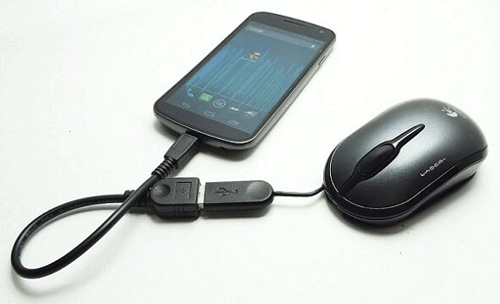
Make sure the OTG adapter and mouse are compatible with your Sony Xperia model. Further, ensure you remember your lock code or pattern, as you'll need it to unlock your phone using the mouse.
Extra: Recover Data from Broken Screen Android Phone
Conducting data recovery on an Android device can pose challenges, particularly when the device is damaged. Fortunately, there's a solution available! Consider utilizing Broken Android Data Extraction for retrieving content from your disabled phone without prerequisites.
This product enables direct recovery of a variety of device information from both phone memory and SD cards, even in the absence of a backup. It thoroughly scans your phone, securely retrieving contacts, call logs, SMS, WhatsApp data, and media files. Currently, it supports data restoration from most Samsung Galaxy devices.
How to make Android data recovery when the phone screen is broken using Broken Android Data Extraction?
- Start by downloading and installing the utility on your Windows PC.
- After installation, connect your phone to the computer via USB.
- Then, navigate to "Broken Android Data Extraction" in the left menu and click on "Start".
- In the next step, enter your "Device Name" and "Device Model".
- Check the box next to "I agree" and click "Confirm".
- Follow the instructions to enter Download mode on your phone.
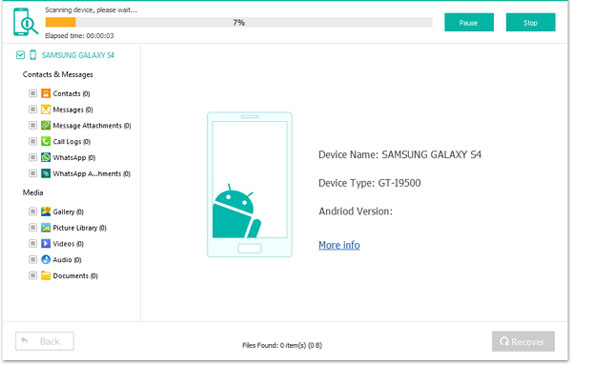
- Once in Download mode, initiate the scanning process by clicking "Start".
- After the scanning is complete, preview the recoverable files.
- Select the files you wish to restore from your device and click "Recover" to save them onto your computer.
Additional Tips
That's all for Xperia broken screen data recovery. Finally, here are some extra tips for how to fix the broken screen on your Sony Xperia:
- Determine if it's just the glass or if the display is affected.
- Find a replacement screen or assembly online and follow guides specific to your Xperia model.
- Consider a certified technician for complex repairs or if unsure.
- If applicable, explore repair options covered under warranty.
- Use clear packing tape to prevent further damage if needed for temporary use.
- Invest in a screen protector and protective case to avoid future issues.
Related Articles:
The Latest 11 Best Android Data Recovery Software/Tools [Free & Paid]
Top 4 Ways to Retrieve Deleted Messages from Sony Xperia Phone
10 Best Android Phone Repair Software and Apps to Fix Android System Issues
Tutorial to Help You Transfer Photos from Sony Xperia to Computer Easily
3 Tested Ways to Wipe Android Phone Permanently before Selling It [with Hot Tips]
How to Recover Data from a Broken iPhone Easily? [4 Proven Ways]


