[Guide 2025] How to Transfer Photos from iPad to SD Card?
Photos take up a lot of iPad storage space. After all, the iPad has a good display that allows you to enjoy photos and videos. The large number of photos makes the storage space more and more narrow, and the iPad runs slower and slower (How to speed up iPad?). In order to solve this problem, users thought of transferring photos from iPad to SD card. This is a good choice. We can store photos as we wish without worrying about taking up space on the iPad.
However, iPad does not allow SD card to be inserted directly. How do I transfer files from iPad to SD card? Here, we will show you four effective ways to transfer photos from iPad to SD card.
Way 1: Transfer Photos from iPad to SD Card via Windows Explorer
If you want to quickly transfer a few photos, using Windows File Explorer is an easy way to do it. You can transfer photos from iPad to SD card using Windows File Explorer by following these steps:
- First, connect the SD card and iPad to your computer using a USB cable. Once the iPad folder appears, open it.
- Go to "This PC" or "Computer" on your computer and double-click the iPad icon.
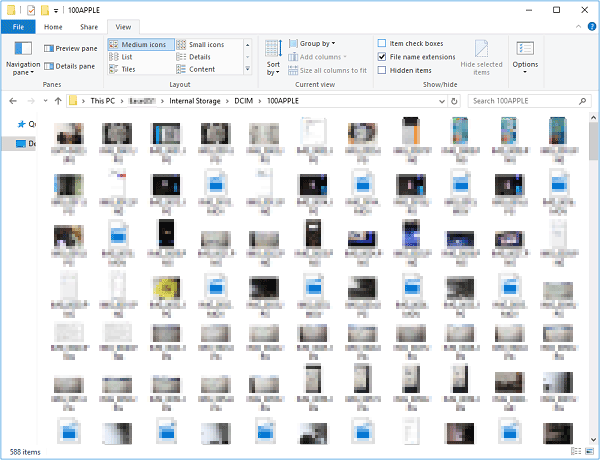
- Open the "Internal Storage" folder and find the "DCIM" folder. Now you can copy the photos you want and paste them into your SD card.
Further Reading:
Way 2: Download Pictures from iPad to SD Card with iCloud
Another way to download pictures from iPad to SD card is to use iCloud. You can upload photos from iPad to iCloud first, and then copy them from iCloud to SD card. The next few steps will show you how to use iCloud Photo Library to export photos from iPad to SD card. Be sure to connect your iPad to a stable WiFi.
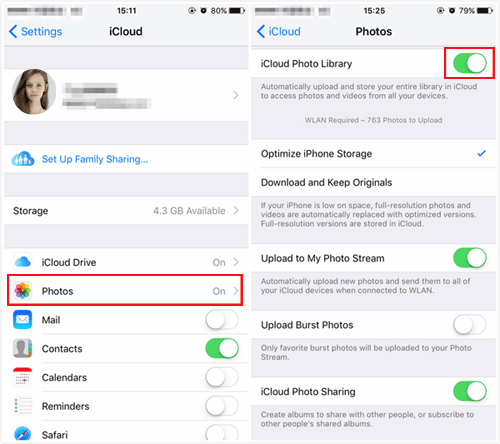
- Go to "Settings" > "iCloud" on your iPad, and log in with your Apple ID.
- Tap "Photos" and then enable "iCloud Photo Library" in the next page. After that, all the photos on your iPad will be uploaded to iCloud.
- On your computer, visit icloud.com and log in with the same Apple ID.
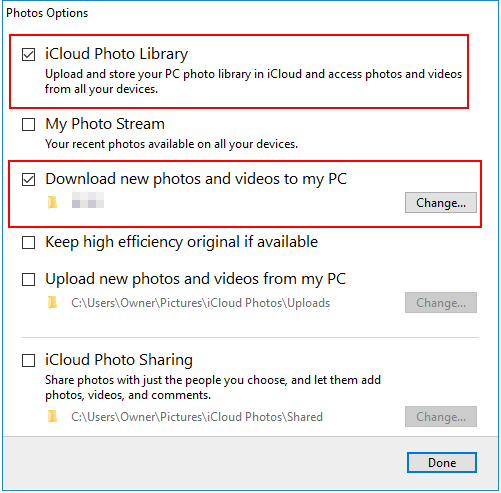
- Click "Photos" and enter the "Options" button to the right of it.
- Click "Change" in the new page and choose the output source to download these photos from iCloud to your computer.
- Connect your SD card to the computer via a SD card reader.
- Copy and paste the photos you just downloaded from iPad to the SD card.
Way 3: Export Pictures from iPad to SD Card with Professional Tool
Another great way to export files from iPad to SD card is using MobiKin Assistant for iOS (Win and Mac). As the best iOS data manager, it is capable of transferring and managing iPhone, iPad and iPod touch data without any hassle. It allows you to export photos from iPad to the SD card as a backup. You can also use it to transfer photos from iPad to computer, and vice versa.
Why choose MobiKin Assistant for iOS:
- Transfer photos from iPad to SD card/computer/external hard drive/flash drive without quality loss.
- Transfer, manage, export/import your photos, video, music, eBook, contacts, text messages, notes, Voice Memo, etc.
- Back up your iOS data to computer or iTunes, and restore them easily.
- View and delete iOS device data and files on computer directly.
- Ad-free, clean interface, easy to handle, etc.
- Fully compatible with all iDevices, including iPad 10/9/8/Pro/Air/4/mini/2, as well as all generations of iPhone and iPod touch.


How to transfer photos from iPad to SD card via Assistant for iOS?
Step 1. Insert your SD card into a SD card reader, and plug it into your computer. Then, launch Assistant for iOS and connect your iPad to this computer with a USB cable. Wait until it is detected by the Assistant for iOS program.

Step 2. Select "Photos" from the left panel and the program will display all photos on your iPhone. View and tick on the photos you want to transfer.
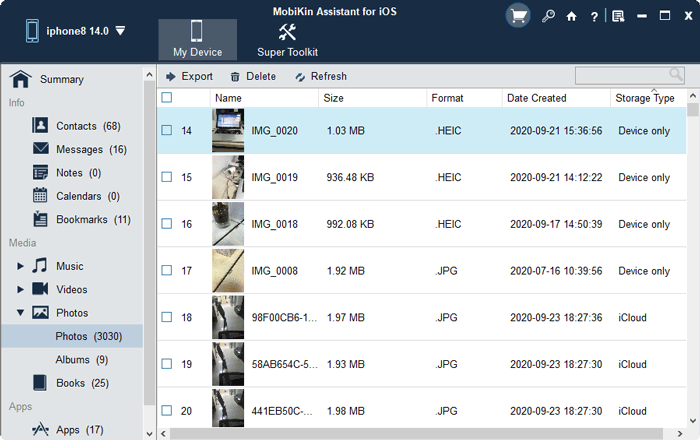
Step 3. Finally, tap "Export" from the top screen and set your SD card as the output path. Then, the photos transfer will begin and you can soon have iPad photos on the SD card.
Read Also:
Way 4: Move Photos from iPad to SD Card with SD Card Reader
Can we export photos from iPad to SD card without computer? Of course. With the help of SD card reader for iPad or iPhone, you can transfer photos from iPad to SD card without a computer. However, there are so many card readers on the market, you need to buy a reliable card reader that supports exporting photos from iPad to SD card. The general steps are as below. Please note that for different brands of card readers, the operating steps may be slightly different.
- Insert your SD card into the SD card reader, and connect the card reader to your iPad.
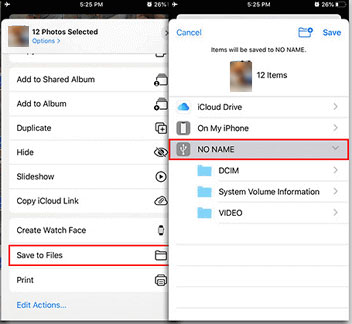
- On your iPad, open the "Photos" app and choose the photos you want to export.
- Tap the "Share" button and choose "Save to Files".
- Choose the SD card (generally called "NO NAME") as the destination path to store the photos.
Summary
These are the four methods of how to easily transfer photos from iPad to SD card. Whether you want to export photos from iPad to SD card without computer or without iCloud, you can use the corresponding solution to successfully achieve your goal. If you want to transfer photos from SD card to iPhone/iPad someday in the future, you can click on the link to go to the dedicated guide to learn more.
Related Articles:
How to Transfer Photos from iPhone to External Hard Drive? [6 Ways]
How to Transfer Photos from iPhone/iPad to PC Windows 10/11?
How to Transfer Photos from iPhone to iPad Easily
Best 5 Ways to Transfer Photos from Android to iPhone/iPad in Minutes
