How to Delete Backed-up Photos on Google Photos? 4 Flexible Methods
"I backed up some photos in my Android device to Google Photos. I want them to stay only internally on my device. But if I delete photos from the app, it deletes them also from my device". -- from Reddit
Like digital cameras, some of our cherished moments are captured through the lens of our smartphones; cloud storage solutions like Google Photos have become common to save these photos. With the convenience of backing up images to the cloud, we ensure our images remain safe and accessible from anywhere. However, as our photo libraries grow, knowing how to delete backed-up photos on Google Photos is a common question. This is where the urgency to customize deletion, free up space on Google Photos, and sort out content on the cloud storage arises.
This preface acts as a comprehensive guide that explores four flexible ways to delete photos from Google Photos. Now, move ahead to learn how to manage your photo library efficiently.
- Way 1: How to Delete Backed Up Photos on Google Photos Web from Computer
- Way 2: How to Delete Photos from Google Photo Backup Directly
- Way 3: How to Delete Backed Up Google Photos Permanently
- Way 4: How to Recover Accidentally Deleted Photos on Google Photos
- Frequently Asked Questions about Google Photos
- Extra Tip: How to Back Up Android Photos to Computer Before Deletion
Way 1: How to Delete Backed Up Photos on Google Photos Web from Computer
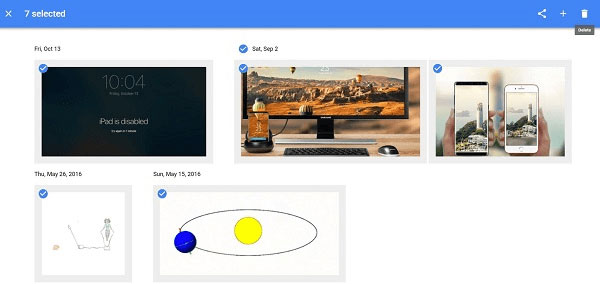
Deleting images on Google Photos Web is just as easy as on mobile. You can access and manage all your photos and videos, whether from your computer or phone, on the Google Photos website. How to delete photos on Google backup from a computer?
- Access photos.google.com using your desktop browser.
- Choose the photo you want to remove to view it.
- Hit the "Delete" button located in the upper-right corner of the screen.
- You'll be prompted to confirm the deletion.
- Opt for "Move to trash". The item will be swiftly removed from the gallery.
- Head to the Trash section in the left sidebar.
- Select the recently deleted photo.
- Click on the Delete button once more from the upper-right corner. This will permanently delete the picture.

Have you ever made an album on Google Photos? To delete photos from within, please follow the guide: Visit photos.google.com. Click on "Albums" in the left sidebar. Open the desired album. Select the photo you want to delete. Tap "More options" in the upper-right corner. Choose "Move to trash".
Click to Access:
Way 2: How to Delete Photos from Google Photo Backup Directly
This method is user-friendly for both iOS and Android users. Deleting a photo saves storage space in your Google account, with a storage estimate shown. Deleted backed-up items remain in your trash for 60 days. For Android 11 and up, deleted items without backup stay in the trash for 30 days. Here's how you can make it:
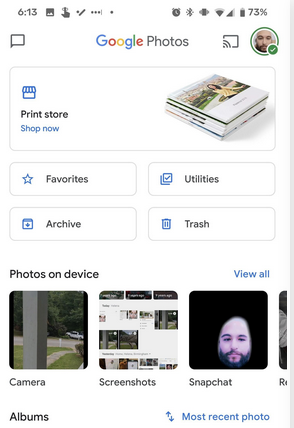
- Open the Google Photos app on your phone and sign in to your Google account.
- Tap and hold on to a photo you wish to remove, or just select multiple items.
- Tap "Delete" at the top to move them to the trash.
Optionally, you can use your device's gallery app to delete photos from removable memory cards. If prompted to "Delete permanently" due to full trash, you can choose to do so. Again, you're enabled to empty Google Photos trash on Android by opening the app, signing in, and tapping "Library" > "Trash" > "More" > "Empty Trash".

Way 3: How to Delete Backed Up Google Photos Permanently
If you encounter "Delete permanently" when trashing items, it indicates full trash. You can opt to permanently remove them. Deleted items persist in the trash for 60 days before automatic removal. Permanently deleting from Google Photos is simple and consistent across platforms.
How to have Google Photos remove backed up photos completely?
- On your Android smartphone, launch the Google Photos app.
- Log in to your Google account.
- Navigate to the bottom and select "Library > Trash > Select".
- Pick the photo or video you wish to permanently delete.
- Go to the top and tap the "Select" icon.
- Press "Delete" and opt for "Delete permanently".
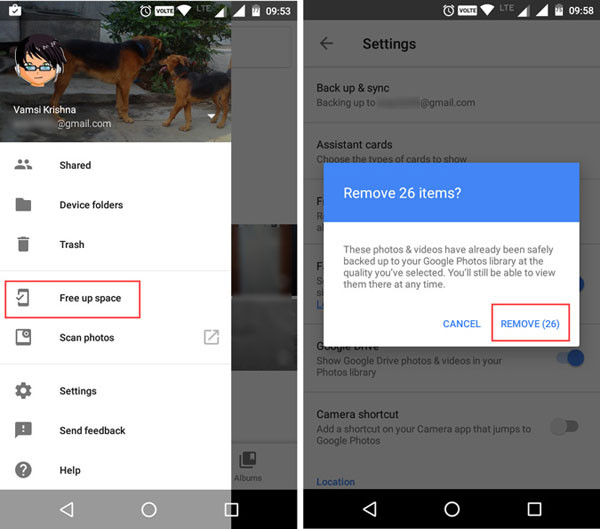
Google Photos stores copies on both your device and in the cloud, consuming device space. To free up space by removing synced photos from your device only, you can delete device copies while retaining cloud backups. Quick Guide: Open Google Photos, tap your profile icon, then "Backup & sync." Once synced, disable "Backup & sync" and go to "Free up space".

Know More:
Way 4: How to Recover Accidentally Deleted Photos on Google Photos
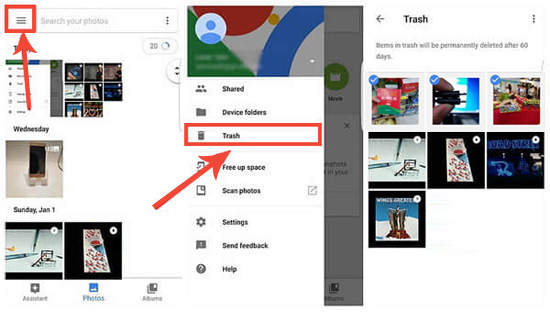
If you deleted something by accident and wish to retrieve it, check your trash to see if it's there. (The steps provided might differ based on your device. For further assistance, reach out to your device manufacturer.) Here's how to restore the stuff from Google Photos:
- On your cell phone, open the photo gallery app.
- At the bottom, tap the "Menu" icon and select "Trash".
- Choose the pictures you want to retrieve.
- Tap "Restore" at the bottom to return the images to your phone's gallery app.

Frequently Asked Questions about Google Photos
Q1: How do I disable sync on Google Photos?
- Open the Google Photos app on your Android or iOS device.
- Tap on your profile picture in the top right corner to access settings.
- In the settings menu, find and select "Backup & sync".
- Toggle the switch next to "Backup & sync" to turn it off.
Q2: How to set Google Photos as a Gallery app?
- Open the Google Photos app.
- Click the profile picture or initials.
- Tap the downwards-facing arrow next to your account.
- Select "Use without an account".
Extra Tip: How to Back Up Android Photos to Computer Before Deletion
When deleting pics from Google Photos, you may accidentally delete what you need. Or you might have synced and deleted photos from your phone but not the cloud storage because of a mistake. From a security point of view, keeping a copy of Android phone images on a private platform like your computer can avoid possible troubles. Therefore, you can choose a professional and easy-to-use Android data backup tool - MobiKin Backup Manager for Android (Windows and Mac) (Android Backup & Restore), to minimize this risk.
Concise Features of MobiKin Android Backup & Restore:
* Easy Backup: Back up your Android phone to a computer without a hitch.
* Simple Restoration: Restore your device from a prior backup easily.
* Quick Transfer: Swiftly copy files between Android phones/tablets.
* Extensive Data Type Supported: Support to transfer files like contacts, messages, call logs, docs, photos, music, videos, and apps.
* Highly Compatible: Play functions on overall Android devices.
* Other Features: 100% privacy friendly, free trial, instant technical support, etc.
How to back up your Android data on your computer with MobiKin Android Backup & Restore?
- Start the program on your PC/Mac and connect your Android phone via a USB cable.
- Enable USB debugging if needed to get your phone detected.
- After the detection, navigate to the "Backup" option.
- Select the data types to back up and choose a location on your computer.
- Tap "Back Up" to keep a copy of your Android data on your computer.

Closing Remarks
Whatever the purpose of deleting your backed-up images, think twice before doing so; for example, you can carefully select the specific pictures you want to remove. Think carefully about permanently deleting certain items, as you may lose them permanently if you choose to delete them forever, especially when you don't have a copy on your phone. Finally, it is recommended that you use MobiKin Backup Manager for Android to back up your Android photos before deletion so that you can ensure you have an extra chance to restore photos if you delete them by mistake.
Related Articles:
Google Photos Not Showing All Photos? Causes & 13 Simple Solutions
How to Transfer iCloud Photos to Google Photos? 3 Ways & Some Hot Tips
How to Empty Trash on Android? 8 Ways to Clean Your Phone Thoroughly
4 Ways to Download HEIC as JPG in Google Photos [Step-by-Step Guide]
4 Techniques to Recover Photos from Old Google Account on Android [2024]
Top 4 Means to Move Photos/Pictures from Google Drive to Google Photos


