[7 Methods] How to Batch Convert HEIC to JPG/JPEG with High Quality?
"Anything to do with the phrase - batch convert HEIC to JPG - has been Google bombed to stupid paid sites and shitty tools. I need a simple batch software to convert HEIC images to JPG for the photobook program. Any recommendation would be great." -- By u/Bonobo77 from Reddit
HEIC, an efficient image format, facilitates creating and preserving smaller-sized images without compromising quality. While iDevices easily handle HEIC photos, compatibility issues arise on other platforms without conversion tools. Wondering if there's an HEIC to JPG bulk converter for converting multiple HEIC to JPG/JPEG/PNG? Delve into this article to discover how to perform batch HEIC to JPG conversions on PC, Mac, iPhone, and Android devices. Uncover the methods to seamlessly transform your HEIC files into widely compatible formats for a more versatile viewing experience across various devices.
- Part 1: Batch Convert HEIC to JPG with the Best HEIC to JPG Converter
- Part 2: Batch Convert HEIC to JPG on Windows 11 via Photos App
- Part 3: Bulk Convert HEIC to JPG on Mac via Finder
- Part 4: Convert Multiple HEIC to JPG on Mac via Preview
- Part 5: Batch Convert HEIC to JPG with Free Online Converter
- Part 6: Mass Convert HEIC to JPG on iPhone
- Part 7: Bulk Convert HEIC to JPG on Android
Part 1: Batch Convert HEIC to JPG with the Best HEIC to JPG Converter
As the classic tool for HEIC image conversion, MobiKin HEIC to JPG Converter does well in converting iPhone, iPad, iPod photos from HEIC to JPG/JPEG/PNG. This professional program helps resolve compatibility issues in no time. Further, it provides you with multiple options to edit and adjust your photos to better meet your needs.
Outstanding features of HEIC to JPG Converter:
- Convert iOS photos from HEIC to JPG/PNG/JPEG on computers.
- Empower you to keep Exif data and keep file quality during the conversion.
- Load unlimited images for conversion at a time.
- Enable you to adjust photo quality optionally before converting.
- It won't interfere with your privacy.
How to convert multiple HEIC to JPG on PC and Mac with HEIC to JPG Converter?
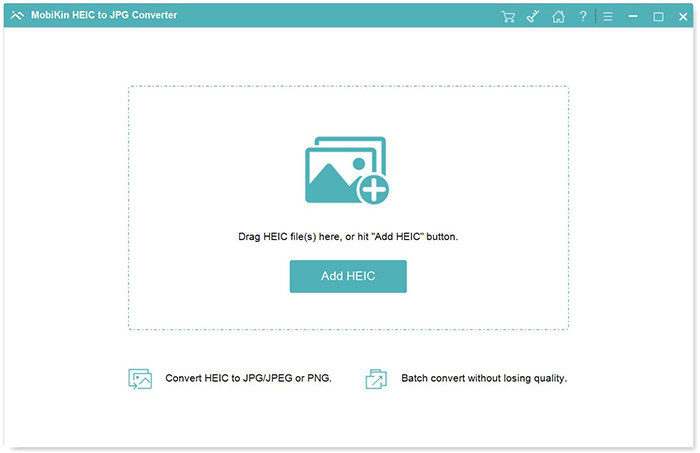
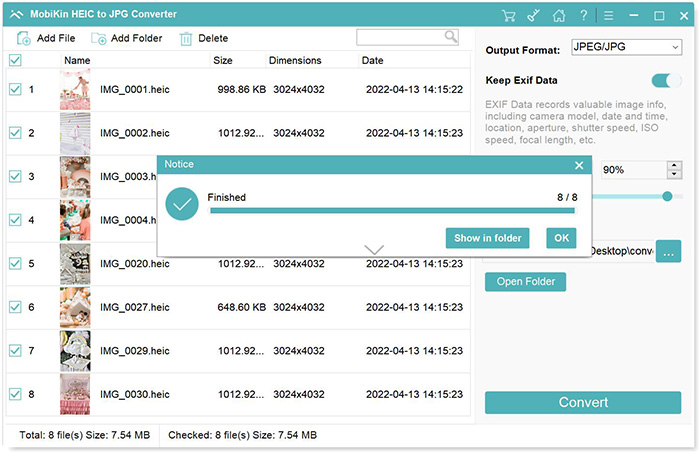
Step 1. Download and install the HEIC to JPG bulk converter on your computer. Run it and you will get its main interface like the picture below.
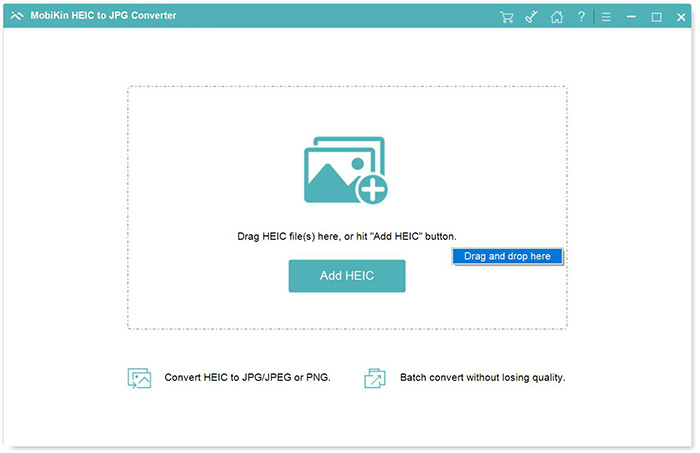
Step 2. Click "Add HEIC" to import the target HEIC files from your computer. You can also drag and drop the HEIC images to the interface directly.
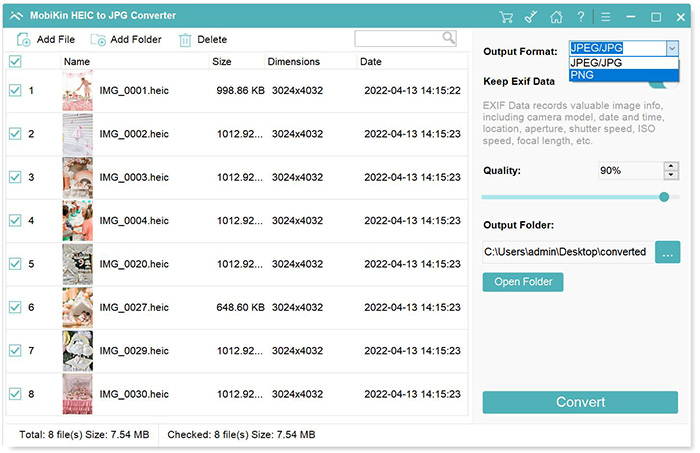
Step 3. Choose your desired HEIC photo to convert, select the output format (JPG, JPEG, or PNG), check or uncheck "Keep Exif Data", and set the output path.
Step 4. Click "Convert" to convert HEIC to JPG/JPEG/PNG. After the conversion, click "Show in folder" to view your photos.
Pros:
- Support both Win and Mac platforms.
- Work for such file extensions as .heif, .heic, .jpg, .jpeg, .jpe, .jif, .jfif, .jfi, and .png.
- You can choose to include or exclude Exif metadata.
- Allow you to adjust image quality.
- Quick conversion.
- Ad-free and risk-free.
- One-click to locate the converted photos.
Cons:
- Allow you to convert only 10 HEIC files for free.
You May Like:
Part 2: Batch Convert HEIC to JPG on Windows 11 via Photos App
To efficiently bulk convert HEIC to JPG on Windows 11 computer, you can adhere to the subsequent instructions for utilizing the inherent features of Windows 11:
- Navigate to the folder containing your .heic images.
- Highlight all the .heic files you wish to convert (use Ctrl + A for a comprehensive selection).
- Employ a right-click on one of the chosen files and opt for "Open with" > "Photos" to launch them within the Windows Photos application.
- Within the Photos app, locate and click the "..." (Additional options) icon situated in the upper-right corner. Subsequently, opt for "Export" > "JPEG" as the designated format. This action will initiate the conversion process and store the chosen .heic files as .jpg in a distinct folder.
Pros:
- The method utilizes the inherent features of Windows 11, eliminating the need for third-party applications or tools.
- The process allows for the efficient bulk conversion.
Cons:
- Specifically tailored for Windows 11, potentially excluding users with older Windows versions.
- The conversion is limited to .jpg format.
- The process relies on the Windows Photos application.
Part 3: Bulk Convert HEIC to JPG on Mac via Finder
If you're using a Mac with macOS Monterey, this method is tailored for you. The latest macOS Monterey introduces a novel feature within the Quick Action menu called "Convert Image," enabling users to seamlessly transform images from one format to another without launching them. See how to quickly convert HEIC to JPG via Finder:
- Launch the "Finder" application on your Mac, locate the HEIC file(s) you wish to convert, and use the Command button for selection. Right-click on the selected files.
- Choose "Quick Actions" from the ensuing pop-up list on your computer screen, and then select "Convert Image."
- Opt for "JPEG" as the desired format for converting your HEIC photos. Adjust the image size by clicking the drop-down icon next to Image Size.
- Ensure the "Preserve Metadata" checkbox is selected. Subsequently, click the "Convert to JPEG" button to finalize the process.
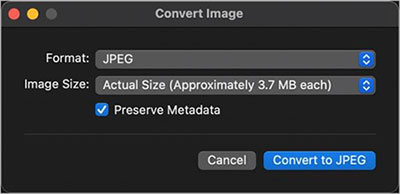
Your HEIC files are now in JPEG format!
Pros:
- No need for additional app installations.
- The process is uncomplicated.
Cons:
- This method is exclusive to macOS Monterey and later versions.
Check if You Need:
- Different Ways to Download HEIF Images from iPhone to Mac/PC
- How to Transfer Photos from iPhone to Android? - Top 5 Ways
Part 4: Convert Multiple HEIC to JPG on Mac via Preview
The Preview application on Mac serves more than just document viewing; it also provides the capability to convert images to various formats. However, this functionality is exclusive to Mac systems running macOS High Sierra or a newer version. Explore the steps below to understand how to leverage the Preview app for changing HEIC to JPG:
- Initiate the Finder app on your Mac > utilize the Command key to choose multiple HEIC files for JPG conversion > right-click and opt for Preview (the default selection).
- Within the Preview window, click on Edit in the top toolbar and opt for Select All.
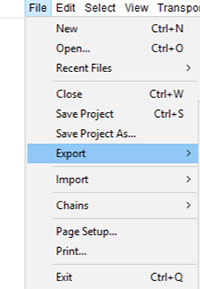
- Head to the top toolbar, click on File, and choose Export Selected Images from the ensuing pop-up list.
- Click "Options," designate JPG as the preferred format for your images, and select a storage location on your Mac.
Pros:
- Exclusive compatibility with macOS High Sierra and newer versions.
- Eliminates the need for third-party app installations.
Cons:
- Limited sharing options.
- The conversion process is confined to a few images at a time.
Part 5: Batch Convert HEIC to JPG with Free Online Converter
Windows browsers offer a range of online HEIC to JPG batch converter tools for converting HEIC to JPEG. The HEIC to JPEG Free Online Converter is a web application enabling the conversion of up to 100 images concurrently into JPEG, PNG, or BMP formats. The steps for transforming HEIC images into JPEG alternatives using this web HEIC batch converter app are as follows:
- Launch the HEIC to JPEG Free Online Converter web application.
- Click the Add HEIC files button.
- Select a HEIC image for conversion and click Open. Since only one image can be chosen at a time, you must repeat steps two and three to add additional files.
- Expand options by clicking (Select output format).
- On the Convert to drop-down menu, choose JPEG.
- Specify a value in the Quality box.
- Select the I consent checkbox. For additional details on fCoder Solutions' data-sharing policy, click the Privacy Policy link.
- Execute the conversion by clicking Convert.
- Save the JPEG files by clicking Download all.
This tool can also be employed for batch-resizing images. To do this, click Set image size, choose to remove all EXIF information, and input values into the new width and new height text boxes.
Pros:
- Supports the conversion of up to 100 images concurrently.
- Batch-resize images, providing added functionality beyond simple format conversion.
- No need for users to install any software or application on their devices.
Cons:
- Requires users to manually select HEIC images one at a time for conversion
- Users are required to consent to data-sharing policies.
- Potential performance issues.
Part 6: Mass Convert HEIC to JPG on iPhone
Converting HEIC to JPG on your iPhone is a straightforward process, and there's no requirement for any external app or tool. Utilize the Files app to effortlessly convert multiple HEIC photos to JPG by following the steps outlined below:
- Choose the images you wish to convert to JPG.
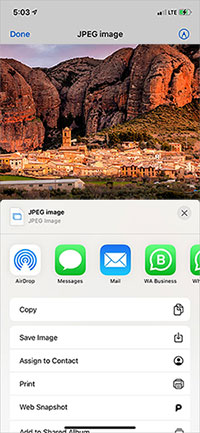
- Tap on the Share icon located at the bottom left corner and select Copy from the ensuing pop-up.
- Open the Files app, press and hold your screen, then tap Paste to transfer the copied photos. This action automatically converts the HEIC photos to JPG.
- Finally, press and hold to select the photos, and then tap Save Image to store them in your phone's Photos app in JPG format.
Pros:
- No technical expertise is required.
- The process is free of charge.
Cons:
- Manual selection of photos is necessary, one at a time.
- It's not efficient for bulk HEIC to JPG conversion.
Part 7: Bulk Convert HEIC to JPG on Android
While Android 9 and later versions have the capability to display HEIC photos, the conversion of HEIC to JPG for editing and sharing still necessitates the use of a third-party application. Luma, a specialized HEIC to JPG mass converter app, facilitates the bulk conversion of HEIC files to JPG on Android.
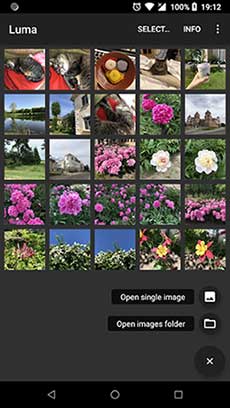
- Navigate to the Google Play Store on your Android device and install the Luma app.
- Initiate the Luma app, tap "From HEIC" at the bottom of the screen, and then use the + icon to add the HEIC photos you intend to convert to JPG.
- Once the HEIC files are added, tap "Save As JPG" to prompt Luma to initiate the HEIC to JPG conversion process. Subsequently, you can store the converted image on your phone.
Pros:
- Intuitive and user-friendly interface.
- Completely free of charge.
Cons:
- Manual selection of photos is necessary.
- Users have reported frequent lagging issues with the tool.
Roundup
Granted, some of the several methods introduced in this article are completely free, but they are often inefficient at batch conversion, and the quality of the converted files cannot be guaranteed. So, wouldn't it be great if there was a fast and safe way to convert large amounts of HEIC images to high-quality JPG/JPEG/PNG? In this regard, just download MobiKin HEIC to JPG Converter and use it immediately.
Additional Tips:
How to batch convert HEIC to JPG with Photoshop (CC 2019 and 2020)?
- Open Adobe Photoshop > click File > Scripts > Image Processor.
- Select Folder > choose the folder that includes HEIC images > click OK.
- Click Select Folder > aim at a specific location > go for a folder to save converted JPEG images to > press "OK" again.
- Select "Save as JPEG" > enter 12 in the Quality box > hit the Run button.
Related Articles:
How to Turn Off HEIC on iPhone & Convert HEIC Photos to JPG/JPEG/PNG
[Solved!] How to Convert HEIC to PNG on Windows, Mac, and iPhone
Check the 10 Best HEIC Viewers/Readers for Windows 11/10/8/7/macOS Here
[Solved] How to Permanently Delete HEIC Photos on iPhone or iPad?
How to Transfer Photos from Mac to iPhone? (6 Easy Ways Included)
3 Easy Ways to Recover Deleted Photos from iPhone without Backup


