How to Convert HEIC to JPG on Mac [Full Guide 2024]
As the HEIC file format gains traction as Apple's standard for photos on iPhone and iPad, users often encounter compatibility challenges with non-Apple devices and platforms. Although HEIC adoption is evolving, the need to convert HEIC to JPG on Mac persists. In this guide, we explore seamless methods using native applications like Photos and Preview, and third-party software, ensuring users can effortlessly navigate through this conversion process.
Part 1: What Is HEIC?
HEIC stands for High Efficiency Image Format. It is a file format for still images and image sequences, which was developed by the Moving Picture Experts Group (MPEG). HEIC is designed to provide a more efficient compression method for high-quality images compared to older formats like JPEG.
The key advantages of HEIC include:
- High Compression Efficiency: HEIC typically produces smaller file sizes while maintaining high image quality. This is particularly beneficial for devices with limited storage capacity and for transmitting images over the internet.
- Support for Advanced Features: HEIC supports features such as high dynamic range (HDR) images and multiple images in a single file (such as burst photos or live photos). This allows for more advanced and flexible image capabilities.
- Lossless Compression: HEIC supports both lossy and lossless compression, giving users the option to choose the level of compression based on their preferences and requirements.
- Better Color Representation: HEIC supports a wider range of colors, which can result in more accurate and vibrant color representation in images.
HEIC files are commonly used on Apple devices, such as iPhones and iPads, as these devices often capture and store images in this format by default. However, it's worth noting that not all devices and software applications support HEIC natively, and users may need to convert HEIC files to more widely supported formats like JPEG in some cases.
You May Need:
- [Guide] How to Convert HEIC to PDF Online or PC/Mac Computer
- Check the 10 Best HEIC Viewers/Readers for Windows 11/10/8/7/macOS Here
Part 2: How to Convert HEIC to JPG on Mac with Preview
Converting a HEIC file to a JPG file on a Mac can be effortlessly accomplished using the native Preview app. Follow these steps:
- Launch Preview and open your HEIC file. If needed, you can open multiple files for batch conversion to JPG.
- Navigate to the top menu and select "File" > "Export".
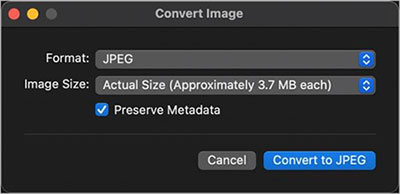
- In the "Format" dropdown menu, opt for "JPEG". Adjust the compression level using the Quality slider; note that higher quality results in larger file sizes.
- Optionally, rename your newly converted file and specify a destination using the Where dropdown menu. Click "Save" to complete the process. Your photo is now saved in JPG format.
Part 3: How to Change HEIC to JPG on Mac Using Photos
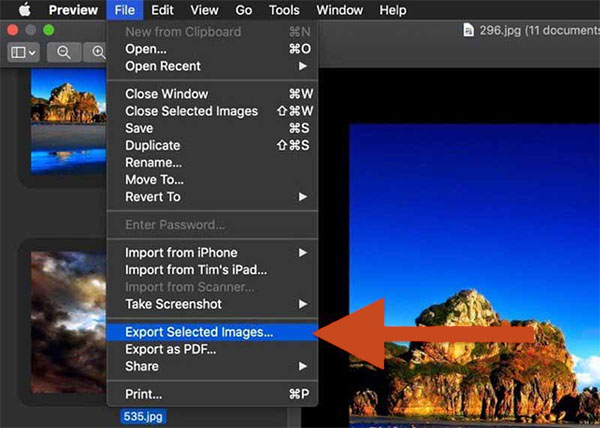
If you have HEIC images stored in the Photos app, you can utilize the app itself to turn HEIC/HEIF image to JPG on Mac using the Export function. Here's the process:
- If your HEIC image is not already in Photos, open "Photos," navigate to the "File" menu, and choose "Import" to add your HEIC photo to the app.
- Once your image is selected in the app, go to the "File" menu at the top, click "Export," and then choose "Export X Photos" (where X represents the number of photos you've selected).
- From the Photo Kind dropdown menu, select "JPEG," review other available options, and then click "Export."
- Choose a folder to save your converted image. Now, you can view HEIC files on Mac directly.
Learn More:
Part 4: How to Turn HEIC to JPG on Mac with Automator
If you have a considerable number of pictures to convert, Automator can streamline the process for you. Begin by organizing all your photos into a single folder for efficiency, and then follow these steps to change photos from HEIC to JPG on Mac:
- Launch Automator.
- Click on "New Document" > "Quick Action" > "Choose."
- In the Search field, enter "Get Specified Finder Items."
- Drag and drop this module into the workflow window.
- Click "Add" in the module and include the pictures you wish to convert.
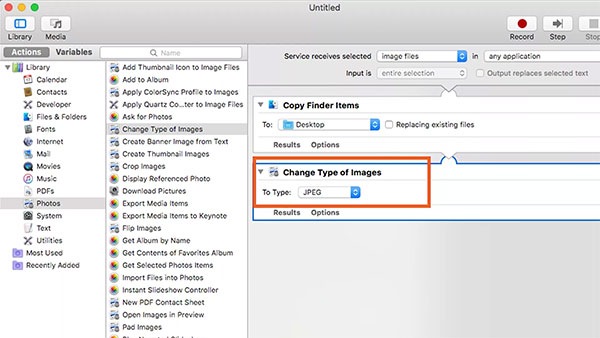
- Next, search for the "Change Type of Images" module and place it in the workflow.
- From the drop-down menu, choose "JPG."
- In the top-right corner, click "Run" to initiate the workflow.
Part 5: How to Save HEIC as JPG on Mac with 3rd-party Software
For Mac users seeking flexibility in converting HEIC to JPG, the HEIC Converter stands out. This application offers additional control over conversion settings, allowing users to tailor the process to their preferences. After installing the HEIC Converter on your Mac, simply follow the intuitive steps to efficiently transform HEIC files. It enables conversion by effortlessly dragging and dropping photos onto the application interface, providing a convenient solution for converting image formats.
Key highlights of HEIC Converter:
- Convert HEIC to JPG/JPEG/PNG on Mac and PC in no time.
- Let you keep Exif data during the conversion.
- Won't compress the quality of the images.
- Upload multiple pictures for batch conversion efficiently.
- Allow you to set image quality at your will before converting.
- Easy to use, fast, free trial, etc.
- It won't divulge your privacy.
How to convert .heic to JPG on Mac via HEIC Converter?
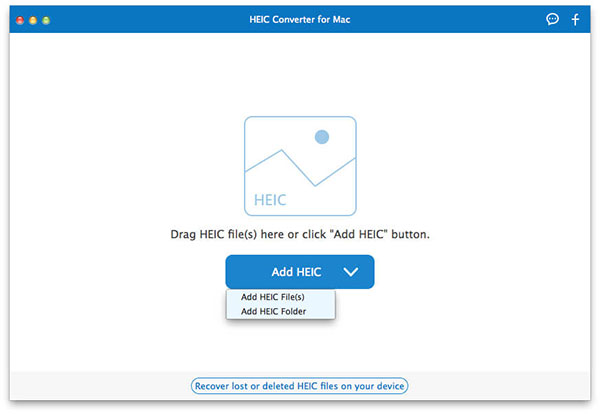
Step 1. Download and install the HEIC Converter on your Mac. Either click the "Add HEIC" button to import HEIC photos or drag them directly from your Mac to the program. (Windows users can go to: how to convert HEIC to JPG on Windows?)
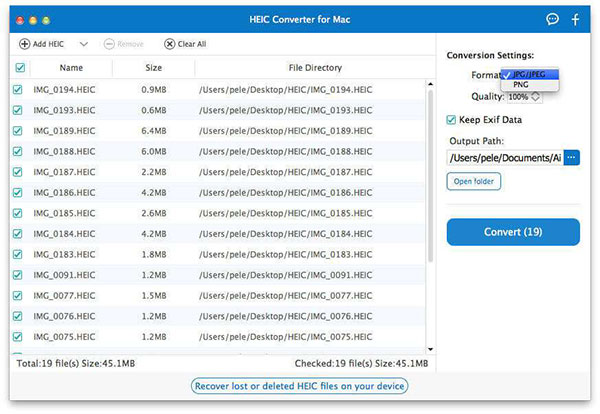
Step 2. The program interface will display the HEIC photos. Select the images for conversion to JPG or PNG. Specify the desired output format as JPG/JPEG or PNG. Optionally, choose to "Keep Exif Data" and customize the output path.
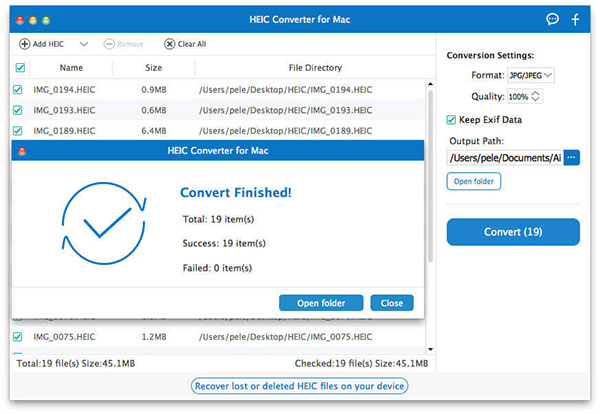
Step 3. Click the "Convert" button to initiate the HEIC to JPG/JPEG or PNG conversion. Once completed, use the "Open folder" button to access your converted JPG or PNG photos on your Mac.
Make Your Photos More Accessible
In summary, while HEIC offers numerous advantages, including superior quality and space efficiency, compatibility issues with older devices and certain websites may arise. Fortunately, converting HEIC to JPG on Mac is straightforward, whether using dedicated tools like heic converter or native applications such as Photos and Preview. The seamless methods demonstrated ensure a smooth transition without compromising image quality. Given HEIC's limited compatibility, converting to JPG becomes essential for sharing images across diverse devices, making these conversion options valuable for a broader audience.
Related Articles:
HEIC/HEIF vs. JPEG/JPG: What Is the Difference [2023 Up-to-date]
Complete Guide on How to Connect iPhone to PC and Transfer Files?
Different Ways to Download HEIF Images from iPhone to Mac/PC
[Solved] How to Permanently Delete HEIC Photos on iPhone or iPad?
How to Transfer Photos from iPhone to External Hard Drive? [6 Ways]


