iTunes Backup Session Failed? 6 Proven Fixes to Solve It
"I'm tying to back up my iPhone 14 to my Windows 11 PC, but whenever I do, it tells me the iTunes backup session failed. This is a relatively new computer, and I have not backed it up to this computer before. Both my phone and my iTunes software are up to date. I need to get this done because I have a battery replacement appointment tomorrow."
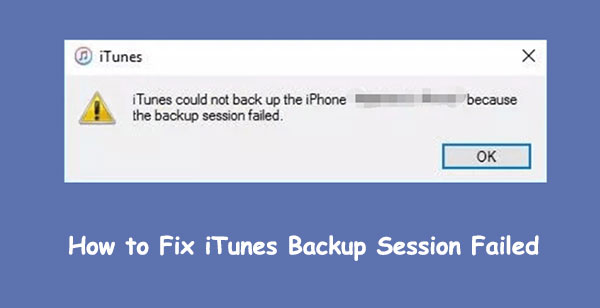
iTunes is an excellent tool for backing up and restoring iOS devices, but it can sometimes disappoint. When you use iTunes to back up or restore an iPhone, you may encounter an error message "iTunes could not backup the iPhone (name)". In this article, we will share the top 6 methods to fix the iTunes backup session failure. If you are experiencing iTunes backup issues, please continue reading.
- Part 1: Why is the Backup Session Failed on iTunes?
- Part 2: How to Fix iTunes Backup Session Failed
> Fix 1: Restart Computer and iPhone
> Fix 2: Update iTunes
> Fix 3: Check Windows Security Settings
> Fix 4: Manage Old Backups
> Fix 5: Reset Lockdown Folder - Bonus: Use iTunes Alternative When Backup Session Failed
Part 1: Why is the Backup Session Failed on iTunes?
Why does iTunes keeps on saying backup session failed? The reasons for this issue can be traced back to various factors such as hardware-related issues or malware attacks. Here are a few potential reasons:
- iTunes corruption: If the configuration file is missing on your PC, it may corrupt the iTunes application, resulting in data backup failure.
- Insufficient iCloud storage: iCloud only provides 5GB of free storage. Once the free storage is full, you need to purchase additional storage or clean up iCloud storage.
- Computer Error: Hardware-related issues can also cause the "iTunes backup session failed" error.
- Antivirus software: Some antivirus programs are configured to automatically interrupt the backup and restore process.
- Outdated iTunes version: Running an outdated version of iTunes can also cause backup session failure.
Now that you know the reasons, here are some solutions to help you troubleshoot and fix the issue that backup session failed on iTunes and let you resume the data backup process again.
Part 2: How to Fix iTunes Backup Session Failed
Fix 1: Restart Computer and iPhone
When you encounter any software problem, restarting your device is always a tried and tested solution. To fix the problem of iTunes backup failure, you can restart your computer first. Similarly, if your iPhone is running slowly or apps are not working, restarting it can also help.
How to restart a PC:
- Go to the Start menu and click the Power button.
- Select Restart. This will close all apps (including iTunes), shut down the PC, and then restart automatically.

How to restart a Mac:
Method 1:
- Go to the Apple menu in the upper-left corner of the screen.
- Click Restart. The computer will shut down and restart after a few moments.
Method 2:
- Press the Control + Command + Eject keys at the same time.
How to restart an iPhone:
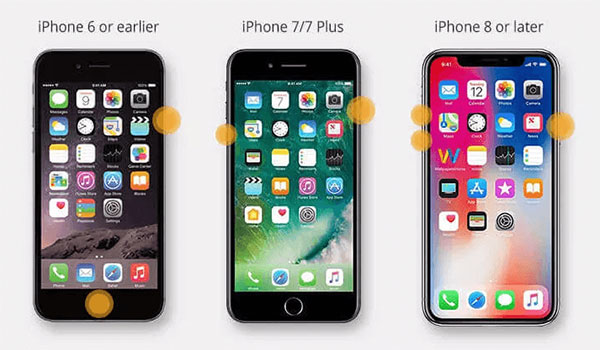
For iPhone X or later:
- Press and hold the Volume Down button and the Side button until the power off slider appears.
- Drag the slider to turn off your iPhone.
- After a few moments, press and hold the Side button until the Apple logo appears.
For iPhone 8 or earlier:
- Press and hold the Side or Top button until the power off slider appears.
- Drag the slider to turn off your iPhone.
- After a moment, press and hold the Side or Top button until the Apple logo appears.
Fix 2: Update iTunes
Older versions of iTunes can cause compatibility issues during the backup process. Therefore, making sure your iTunes software is up to date is crucial to resolving a failed backup session. Here's how to update iTunes:
For iTunes from the Microsoft Store
If you downloaded iTunes from the Microsoft Store, it will usually update automatically. To check and update manually:
- Open the Microsoft Store on your computer.
- Click Downloads and Updates to see when iTunes was last updated.
For iTunes from the Apple website
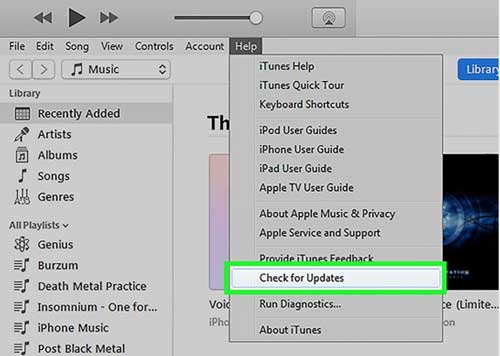
- Open iTunes on your computer.
- Go to the Help menu.
- Select Check for Updates.
- If an update is available, download and install the latest version of iTunes.
Fix 3: Check Windows Security Settings
Occasionally, antivirus software on your PC or Mac can interfere with the iTunes backup process, causing it to fail. To troubleshoot this issue, try temporarily disabling your antivirus and firewall programs before attempting the backup again.
Fix 4: Manage Old Backups
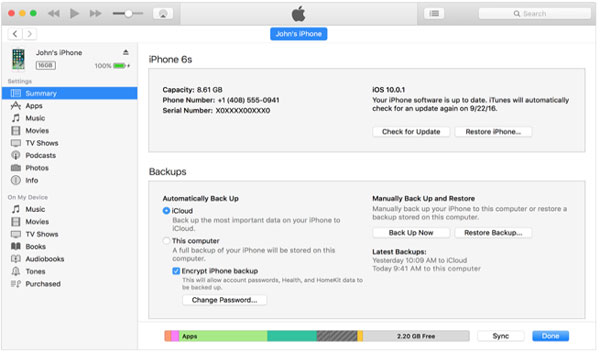
iTunes backup session failures can often be attributed to an out-of-date backup stored on your computer. This usually happens when iTunes references data from a previous backup, including encryption settings. To resolve this issue, verify that you had previously selected "Encrypt local backup" and make sure to do the same for the current backup to maintain privacy settings. Follow these steps to manage old backups:
- Locate the iTunes backup folder:
- If "Encrypt local backup" was enabled in the previous backup, make sure to select it again during the current backup to keep the privacy settings consistent.
- Navigate to the backup folder you identified and view the contents of the old backup.
- Delete any expired backups that may cause conflicts during the backup process. (How to delete iTunes backup?)
- Utilize the iTunes backup browser to examine the contents of the backup for better management and troubleshooting.
For iTunes installed from the Microsoft Store:
Path: C:\Users\YourUserName\Apple\MobileSync\Backup.
For iTunes downloaded from the Apple website:
Path: C:\Users\YourUserName\AppData\Roaming\Apple Computer\MobileSync\Backup.
Fix 5: Reset Lockdown Folder
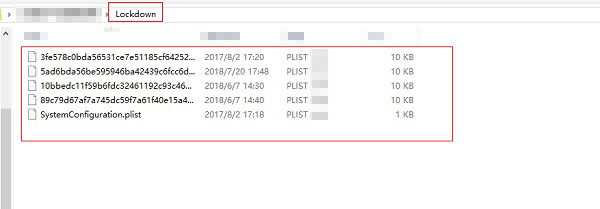
Compatibility and violation issues are often the root cause of many problems with iTunes backup files. Resetting the lockdown folder can help resolve privacy issues. iTunes may access your iPhone since this folder contains the certificate for your device. Resetting it gives your computer permission to operate once more. Take these actions:
- Close iTunes and unplug your iPhone from your laptop.
- Locate the C:\ProgramData\Apple\Lockdown folder in iTunes Lockdown. By default, the ProgramData folder is hidden. To make it visible, click View in the top menu bar and select Hidden Items.
- Close the window after deleting all files from the Lockdown folder.
- Launch iTunes, connect your iPhone to your computer using a USB cable, and select Trust from the menu.
- Try backing up your iPhone using iTunes again.
Bonus: Use iTunes Alternative When Backup Session Failed
If you've tried all the solutions above and still can't resolve the issue, it might be time to consider using an iTunes alternative to back up your iPhone. MobiKin Assistant for iOS is a powerful software that allows you to back up and restore iOS data either in one click or selectively. With this tool, you don't have to worry about data loss or iTunes errors.
Key Features of MobiKin Assistant for iOS:
- Transfer data between your iPhone/iPad/iPod and computer, either in full or selectively.
- Back up iPhone data without limitations and restore it whenever needed.
- Preview iOS data and select specific files to back up.
- Support backup of contacts, messages, notes, calendars, photos, videos, music, and more.
- Easily manage files on your iPhone/iPad/iPod and iTunes library on your computer.
- Be compatible with overall iOS devices and iOS versions, including iPhone 4 to iPhone 15, iOS 5 to iOS 17.
Just get Assistant for iOS and back up your iPhone without iTunes now:
Selective backup:
Step 1: Connect your iPhone to your PC using a USB cable and launch Assistant for iOS on your computer. Once your iPhone is detected, tap "Trust" on your iPhone to authorize the connection.

Step 2: Navigate to the file folders displayed on the left sidebar of the software. Select the types of data you wish to back up. The software will scan and display the contents of the selected folders. Preview the data and check the boxes next to the items you want to include in the backup.

Step 3: After selecting all the files you want to back up, click the "Export" button located in the top menu bar to initiate the backup process.

One-click backup:
Step 1: Once your iPhone is connected to your computer, navigate to the "Super Toolkit" section in the software interface.
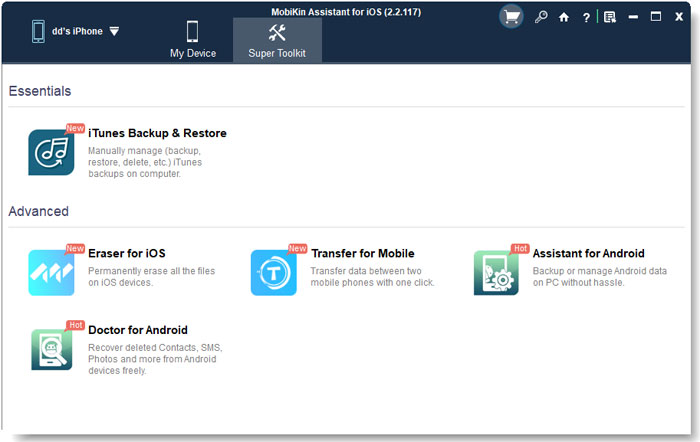
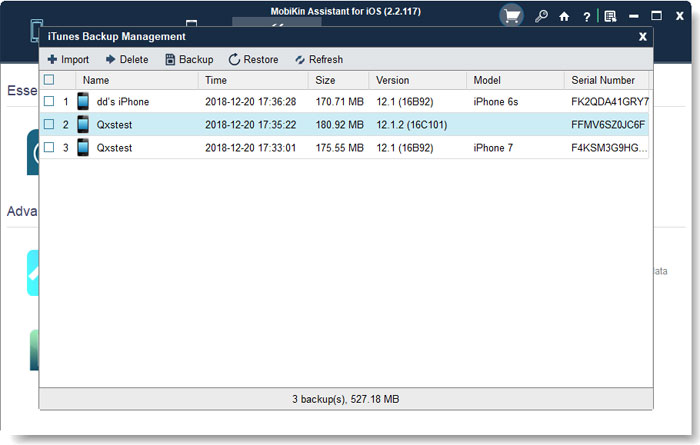
Step 2: Select "iTunes Backup & Restore". A pop-up window will appear on your computer screen listing all detected iOS devices eligible for backup.
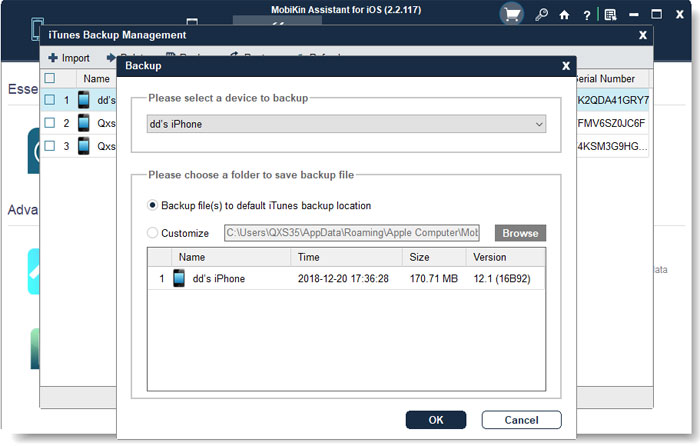
Step 3: Click on the "Backup" button to choose the device you want to back up and designate the location where you want to store the backup files. Then, initiate the backup process by clicking "Backup".
Video guide:
Concluding Remarks
By understanding the potential reasons for the "iTunes could not backup because backup session failed" error and implementing solutions, you should be able to easily resolve iPhone backup issues. If using iTunes to back up your iPhone consistently fails, you can turn to the excellent iPhone backup software - MobiKin Assistant for iOS - to effortlessly and securely create iPhone backups. If this article has helped solve your problem, feel free to share it to help more people.
Related Articles:
How to Access WhatsApp Backup on Local, Google Drive, iCloud, etc.?
[3 Tips] How to Access and Download iCloud Backup Files Easily?
iTunes Could Not Restore the iPhone because Not Enough Free Space is Available
How to Fix iTunes/iPhone Error 4005? [10 Great Tricks Included]


