[Top 7 Ways] How to Transfer Photos from iPad to Flash Drive?
Table of content
It is common for Apple users to use iPads to take photos or store items from other sources. This makes pictures big occupiers of an iPad. To speed up your iPad, you may need to upgrade the system, reset the device to factory settings, delete some content, etc. Before that, you would probably like to transfer photos to another independent memory like a USB flash drive. Do you know how to transfer photos from iPad to flash drive? We will set out the top 7 ways for you in this passage. Now, let's get right to the point.
Way 1: Transfer Photos from iPad to Flash Drive with Assistant for iOS
If you want to transfer photos from iPad to external hard drive quickly and safely, MobiKin Assistant for iOS is your best choice. It is a one-click way to solve iOS data transfer problems, and can transfer photos, videos, contacts, etc. to computers, flash drives and other storage devices. It supports iOS devices with iOS 5 and above and Windows 7/8/10/11.
Main features of MobiKin Assistant for iOS:
- Transfer all sorts of photos from an iPad to any flash drive without iTunes.
- Transfer photos stored in your Camera Roll or any other custom albums you've created.
- Preserve the original quality of the pictures without any loss.
- Transfer more file types like contacts, messages, music, videos, photos, notes and more.
- Manage iOS content on your computer in a direct manner.
- Work well with all iPad models, including iPad 10/9/8, iPad Pro, iPad Air, iPad 4, iPad mini, the new iPad, iPad 2, etc.
- It never intrudes on its users' privacy.
3 easy steps on how to transfer photos from iPad to flash drive with Assistant for iOS:
Step 1. Install and launch Assistant for iOS on a computer. Connect your iPad to the computer via a USB cable. Hit "Trust" on your iPad to trust the computer and press "Continue" to have the iPad connected.

Step 2. Select the "Photos" section to preview and mark the pictures you're to transfer. Next, click "Export" to save them on any location of your computer.
Step 3. Finally, insert your USB flash drive into this computer. Select your required photos from your computer and transfer them to the flash drive.
If your photos are saved in HEIC format, you can use the MobiKin HEIC to JPG Converter to convert HEIC photos to JPG, JPEG, or PNG formats.
Video guide on how to transfer photos from iPad to computer:
Way 2: Transfer Photos from iPad to Thumb Drive via Windows Explorer
Windows users can draw support from Windows Explorer to transfer photos from the Camera Roll on their iPad to a thumb drive. Below is a comprehensive guide on how to accomplish this:
- Connect your iPad to a PC with a USB cable and insert your flash drive into the USB port on this PC.
- Unlock your iPad and trust this computer as prompted.
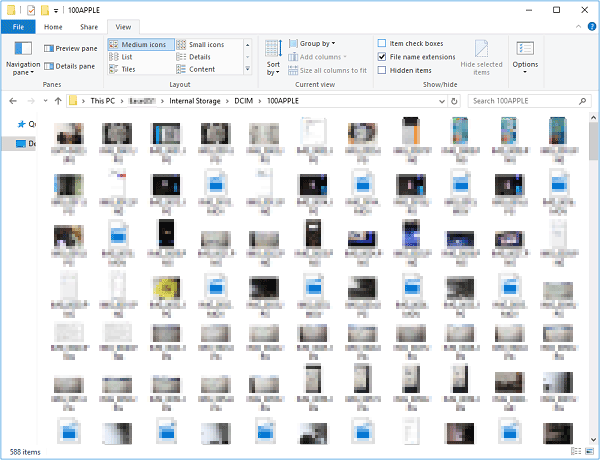
- On your computer, head to "This PC" > "Internal Storage" > "DCIM" > "100APPLE".
- You will see all the photos from your iPad Camera Roll.
- Copy the photos you want to move and paste them from the folder onto your USB flash drive.
Way 3: How to Download Pictures from iPad to Flash Drive Using Photos App
Windows 10 and Mac users can use the Photos app to move pictures from iPad to flash drive. However, this method also only supports transferring photos from the camera roll. Please follow the steps below:
- Connect the USB flash drive and iPad to the PC. Launch the Photos app and select "Import". Select "From USB Device" and allow the iPad to recognize your photos.
- Select the pictures you want to import and press "Import Selected".
- Copy and paste the pictures to the USB flash drive.
You May Also Like:
- How to Transfer Files from iPad to PC with or without iTunes?
- [Easy Guide] How to Transfer Files from Mac/Macbook/iMac to iPad?
Way 4: How to Import Photos from iPad to Flash Drive via Mac Image Capture
Image Capture plays the role of File Explorer on Mac in a great measure. It works to transfer photos from an iPad to a Mac or a memory device linked to the Mac. Let's see how to transfer photos from iPad to USB stick with Image Capture:
- Connect your iPad and flash drive to the same Mac.
- Wake up your iPad and trust this computer when asked.
- Open Image Capture and click your device from the pop-up screen.
- Click the box nearby "Import To" and set your USB flash drive as the destination.
- Select the photos you want to copy or click "Import All"/"Import" to move the items from your iPad to the flash disk.

Way 5: How to Transfer Photos from iPad to Memory Stick with iCloud
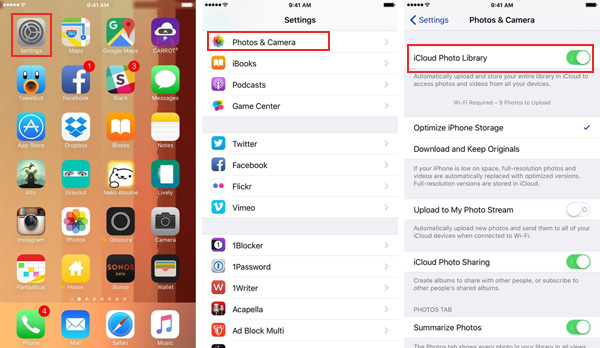
Can I transfer photos from iPad to USB stick using iCloud? Yes. The key to doing the task in this way is to enable the "iCloud Photo Library" on your iPad. After the transfer, if you turn off iCloud photos, the items downloaded to this device would be deleted by default.
- Connect your USB drive to your PC/Mac.
- Go to "Settings > Name/Apple ID" on your iPad.
- Tap iCloud > Photos to enable "iCloud Photo Library".
- This will save your iPad photos to iCloud automatically.
- After that, log in to iCloud on a Web browser and click Photos > Albums > All Photos.
- The pictures from your iPad will turn up in the folder.
- Choose your desired photos and click "Download" to store them in your USB flash drive.
Way 6: How to Transfer Photos from iPad to USB Drive via Email
We all know that email allows us to upload pictures. Therefore, we can transfer photos from iPad to flash drive by using Email. However, the number of photos that can be transferred using email is limited, usually the total size does not exceed 25MB.
- Run the Photos app on your iPad.
- Open the album and handpick the photos you wish to transfer to your flash drive.
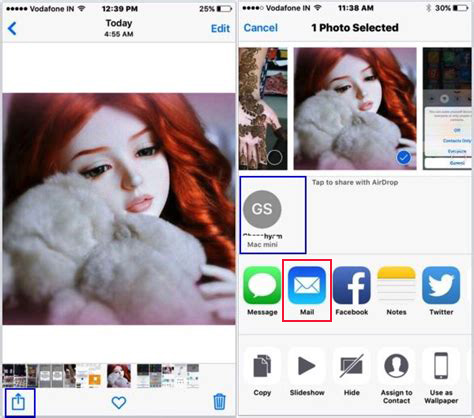
- Tap the "Share" button and choose "Mail".
- Input an email account for receiving the pictures and tap "Send".
- Visit the mailbox you use to receive the email on your computer.
- Plug your flash drive into this computer.
- Check the photos in the mailbox and download them to your PC.
- Send the pictures from your computer to this flash drive.
"iPhone photos appeared from Camera Roll" occasionally happens, especially if you're not prepared for it. At this point, you find that the lost pictures are of great significance. Get the solutions for fixing iPhone photos disappeared from Camera Roll.
Way 7: How to Transfer Photos from iPad to USB Stick without Computer
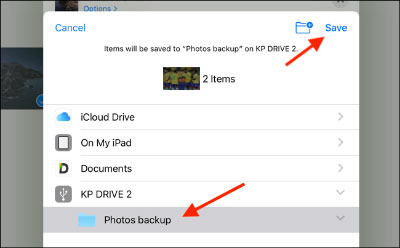
If you don't have a computer nearby or your device is not connected to the internet, none of the above options will work. At this point, if you have iPadOS 13 or later installed on your device, you can refer to the following steps to transfer photos from iPad to flash drive without computer:
1: Connect your iPad directly to the USB stick.
- Use a Lightning to USB adapter to connect any USB flash drive to older iPad models.
- If you have an iPad Pro from 2018 or newer, just plug in a USB-C flash drive.
2: Open the Photos app and select the pictures you want to transfer to the USB stick. After tapping the share icon, select "Save to Files".
3: After selecting the USB stick from the destination list, choose a folder to save the images.
Verdict
After reading this article, you probably have learned about all the available options for transferring photos from iPad to flash drive. As you can see, the easiest and quickest way to get the task done is usually the first one. With MobiKin Assistant for iOS, you can transfer different types of data and files between your iOS device and your computer. It can also transfer other types of data, such as contacts, videos, etc., without losing quality. You can email us or leave a comment if you have any queries regarding Assistant for iOS or this post.
Related Articles:
Easy Way to Transfer Non-Camera-roll Photos from iPhone to PC/Mac
[5 Ways] How to Transfer Pictures from iPhone to Flash Drive Quickly?
[Marvelous] Top 8 iCloud Alternatives for Backing Up iPhone, iPad & iPod
The Ultimate Solution to Transfer Data from iPad to External Hard Drive


