How to Fix iTunes Error 8003? Check the 12 Practical Tips Here
iTunes error 8003 is a frustrating issue that many users encounter while using the tool, especially when working with a Mac computer. This error can prevent you from carrying out essential tasks, such as downloading or updating apps, managing your media library, or syncing your iDevices. (How to sync iPhone to a new computer without erasing?) However, the good news is that there are several reasons behind this error, and in this post, we will explore quick and ultimate solutions to help you resolve it with minimum effort.
Part 1: Why iTunes Error 8003 Arises?
iTunes error 8003 can occur in certain situations when using the iTunes software. This issue typically indicates a problem with iTunes or its associated files. Here are some common reasons why iTunes error 8003 may happen:
- Network issues.
- Downloading or updating issues.
- Firewall or security software.
- Corrupted iTunes files.
- File security errors.
- 3rd-party software conflicts.
- Outdated iTunes version.
You Could Potentially Like:
- 9 Fixes to iTunes Could Not Back Up iPhone Because an Error Occurred
- Tired of iTunes? Here're Top 11 Alternatives to iTunes for Windows
Part 2: How to Fix Unknown Error 8003 in 11 Ways
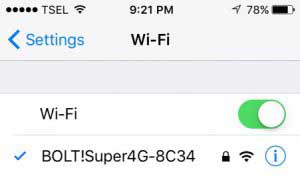
Way 1: Check the network connection
- Verify your Internet connection.
- Restart your router/modem.
- Check network cables and Wi-Fi signals.
- Test network connectivity on other devices.
- Disable VPN or proxy settings.
- Contact your Internet service provider (ISP).
Way 2: Quit iTunes and reboot your computer
- If you're using a Mac, click on the iTunes menu in the top-left corner of the screen and select "Quit iTunes". On Windows, click on the "X" button in the top-right corner of the iTunes window.
- Once iTunes is closed, proceed to restart your computer. Allow it to fully shut down and restart. (What if iTunes keeps crashing?)
Way 3: Update iTunes
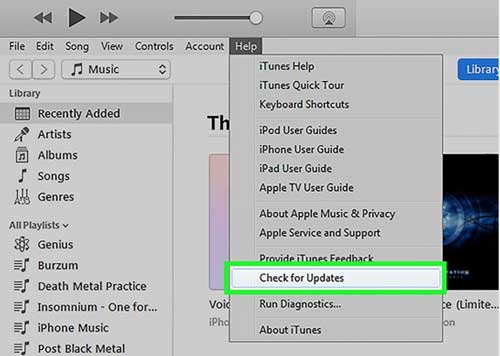
Go to the "Help" menu in iTunes and select "Check for Updates". Alternatively, you can visit the Apple website and download the latest version of iTunes from there. By keeping your iTunes software up to date, chances are that you can address the occurrence of error 8003.
Way 4: Re-install iTunes
Sometimes, during the installation process, certain files necessary for iTunes can get corrupted, resulting in unknown error 8003. To resolve this, uninstall iTunes from your computer as follows:
- On Windows, go to "Control Panel" > Uninstall a program and locate iTunes.
- On macOS, go to "Finder" > "Applications" and remove iTunes.
- After uninstalling, download iTunes again from the official Apple website. This will replace any corrupted files and restore their functionality.
Way 5: Restart Your Mac in safe mode
- Power off your Mac.
- Press and hold the "Power" button until you hear a beep sound.
- While starting up, hold down the "Shift" key until the Apple logo appears.
- On the screen, select "Safe Boot".
- Press "Enter" to start your device in safe mode. Finally, empty the "Trash".
You Might Have a Preference for:
- 8 Productive Ways to Fix iTunes Stuck on Preparing iPhone for Restore
- 3 Methods to Update iPhone without iTunes [iOS 16 Supported]
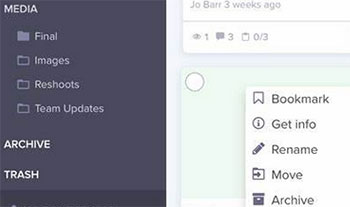
Way 6: Inspect file security errors
- Get into the "Trash" folder on your computer.
- Right-click on the file you wish to delete.
- From the contextual menu, select "Get Info" under the "File" menu.
- Once the file info dialog appears, click on the "Sharing and Permissions" section.
- Enable "Read/Write Permissions" to allow modifications to the file.
Way 7: Use shortcut keys
- Open the "Trash" folder on your Mac. (Where is the trash on your iPhone?)
- Simultaneously press the "Command + Option + Right Arrow" keys using your keyboard.
- Press "Command + A" to select all the items in the "Trash".
- Repeat step 2 and right-click on an empty area of your screen.
- Choose the "Empty Trash" option.
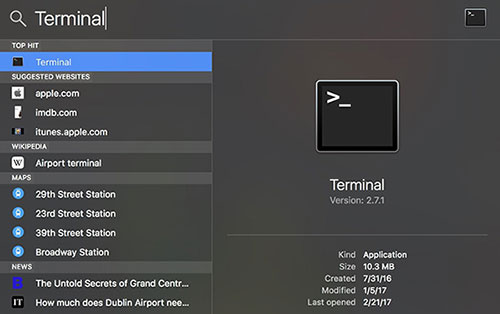
Way 8: Execute command with terminal
- Open the "Terminal" application, which is a built-in tool on Mac OS X, by navigating to "Applications" > "Utilities" > "Terminal".
- In the "Terminal" window that appears, enter the following command: sudo rm -rf
- Press the "Enter" key. If prompted, enter your password.
- Next, drag the files from the "Trash" folder into the "Terminal" window.
- Press the "Enter" key once again to fix iTunes error 8003.
Way 9: Re-install Runtime Libraries
The error you're encountering might be due to an incomplete or improper installation of the MS Visual C++ package. To resolve it, you can:
- Uninstall the current package from "Programs and Features", specifically the Microsoft Visual C++ Redistributable Package.
- After uninstalling, reboot your computer.
- Download the latest redistributable package from Microsoft and install it.
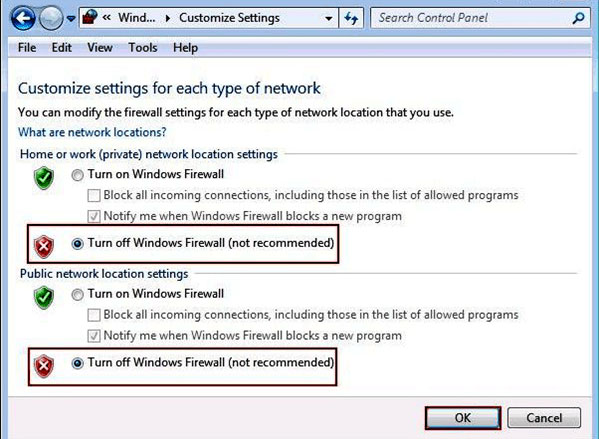
Way 10: Check the Firewall and Anti-virus on your computer
- Access your computer's anti-virus software.
- Verify if it has blocked iTunes.
- Navigate to the firewall settings (such as Windows Firewall).
- Make sure that iTunes is listed as an exception.
- Disable or close any virtualization programs to resolve issues between iTunes and 3rd-party security software.
Way 11: Restart your computer
Restarting your device or computer can be a standalone solution or complement other methods, like uninstalling and reinstalling iTunes. It closes interfering programs and clears the system cache, potentially resolving the 8003 error. After restarting, try launching iTunes again to check if the error persists.
Part 3: Fix iTunes Error 8003 with iOS System Recovery [100% Work]
If the iTunes error 8003 persists despite attempted fixes and you are unable to use iTunes, the recommended solution is to utilize iOS System Recovery. This trustworthy repair utility is compatible with all iDevices and has been specifically developed to address various issues associated with iTunes, iOS modes, devices, and screens. Renowned as a leading tool in the industry, it offers comprehensive solutions for fixing various iOS problems.
Main highlights of iOS System Recovery:
- Promptly resolve iTunes error 8003 without any data loss.
- Troubleshoot 50+ iOS problems, including various iTunes errors, the bottom of the iPhone screen not working, screen issues (grey/black/white/red/pink/purple), error 0xe8000015 iPhone, iPhone stuck on emergency SOS, and more.
- Easily fix iOS system problems using two repair modes.
- Enhanced functionality for smooth iOS upgrades/downgrades.
- Work well with virtually all iOS devices, including iPhone 14/14 Plus/14 Pro (Max), iPhone 13/13 Pro (Max)/13 mini/12/12 Pro (Max)/12 mini, iPhone 11/11 Pro/11 Pro Max, iPhone X/XR/Xs/Xs Max, iPhone 8/8 Plus, iPhone 7/7 Plus, iPhone 6/6S/6 Plus, iPod touch, iPad, etc.
- It won't let out your privacy.
Check out the most effective method to fix iTunes error 8003 with iOS System Recovery:
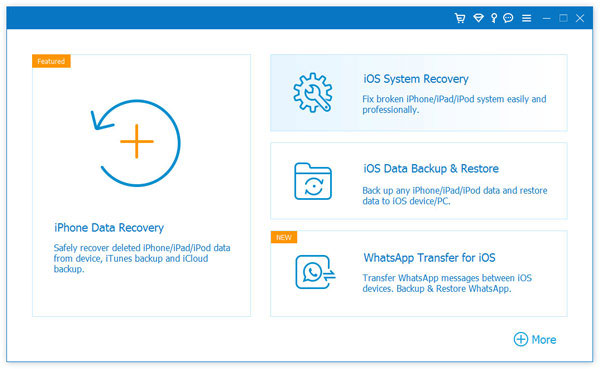
Step 1. Choose the "iOS System Recovery" module
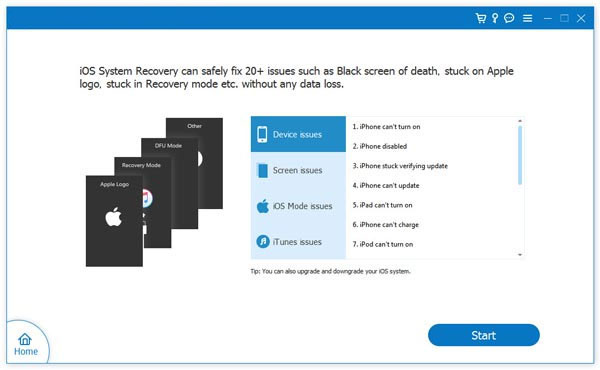
Begin by downloading and installing the software on your computer. Launch it and navigate to "More Tools" > "iOS System Recovery".
Step 2. Connect your iOS device to the computer
Use a USB cable to connect your iPhone or iPad to the computer. Tap on "Start" and follow the on-screen instructions to proceed.
Step 3. Resolve iTunes error 8003
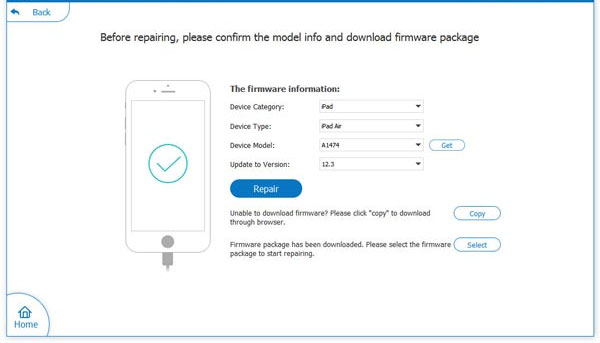
The tool will automatically detect your iPhone's information. Review the details and click "Repair" to download the necessary firmware for your device. (If the detected info is incorrect, select the correct one and click "Repair" again.) Once completed, restart your iPhone.
Completion
While these solutions can effectively address the iTunes error 8003 in many cases, some instances may require a more comprehensive approach. For such complex situations, we shall attach greater importance to iOS System Recovery, a reliable repair tool designed to fix various iTunes, iOS mode, device, and screen-related problems. By using this software, you can always effectively tackle the iTunes error 8003 and enjoy uninterrupted use of your iTunes and iDevices.
Related Articles:
How to Fix iPhone Not Syncing with iTunes/Computer [11 Methods & 1 Alternative]
6 Easy Ways to Transfer Music from PC to iPad without iTunes
How to Troubleshoot Error 9006 on iTunes Efficaciously? Here's the Real Fix
How to Transfer Ringtones from iPhone to iTunes Library? [Way 1 Is the Best]


