How to Back Up iPhone to Windows 10/11/8/7? [Way 1 Is the Quickest]
An iPhone integrates photo shooting, electronic reading, music playing, file viewing, chatting, making phone calls, etc.; the data stored on the device is almost related to all respects of our life. As you know, we can't afford data loss in many cases. As a result, it is essential to regularly create backups on a Windows computer for iPhone.
Do you know how to back up iPhone to Windows 10 seamlessly? OK, good question! We shall take you through some great methods to make a copy of your iOS device without trouble.

Part 1: How to Back Up iPhone to Windows 10 with Assistant for iOS
In terms of flexibility, efficiency, compatibility, and comprehensive performance, third-party software is the first choice for many Apple users to back up iPhones. Software like MobiKin Assistant for iOS (Win and Mac) can deftly back up an iPhone in two convenient ways. Further, this product is also a one-stop troubleshooter helping you transfer and manage iOS content to meet your various personalized needs.
Assistant for iOS - Back up, restore, transfer, and manage iPhone:
- Selectively back up iPhone to Windows 11/10/8/7 or macOS.
- Batch back up and restore iPhone with one click.
- Play functions on various iOS files, covering Contacts, Text Messages, Video, Photo, Music, eBook, Notes, Safari Bookmarks, Voice Memo, Podcast, Ringtone, Playlist, etc.
- Transfer data between iOS devices and iTunes/computers.
- Manage iOS data on a computer intelligently.
- Compatible with almost all iDevices, including iPhone 13/13 Pro (Max)/13 mini/12/12 Pro (Max)/12 mini, iPhone 11/11 Pro/11 Pro Max, iPhone X/XR/Xs/Xs Max, iPhone 8/8 Plus, iPhone 7/7 Plus, iPhone 6/6S/6 Plus, iPod touch, iPad, etc
- It won't disclose your privacy.
How to back up your iPhone to Windows 10 with MobiKin Assistant for iOS?
Step 1. Get your iPhone recognized
First, install and launch this program on Windows 10 computer after the free download. Use a USB cable available to connect your iPhone to this computer. Next, please have your device identified by the tool by following the on-screen prompts.

Step 2. Determine what you want to back up
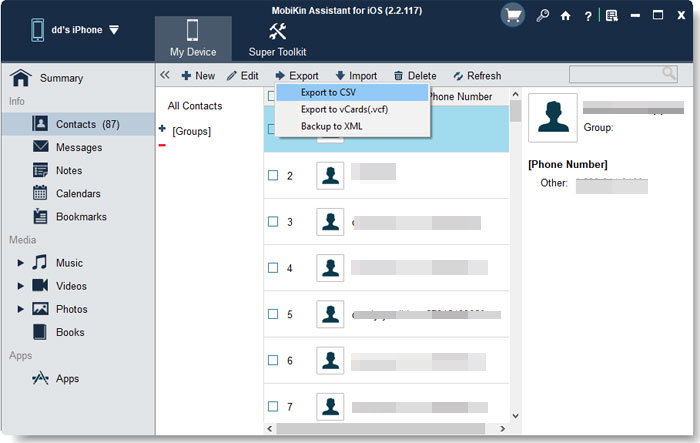
Once recognized, please choose any data types from the left sidebar and preview the specific files on the right. Then select whatever you need to back up to this computer.
Step 3. Back up iPhone to Windows 10
Finally, click on the "Export" button from the top screen to transfer the chosen files from your iPhone to Windows 10. Once completed, you can check the backup files on the computer.
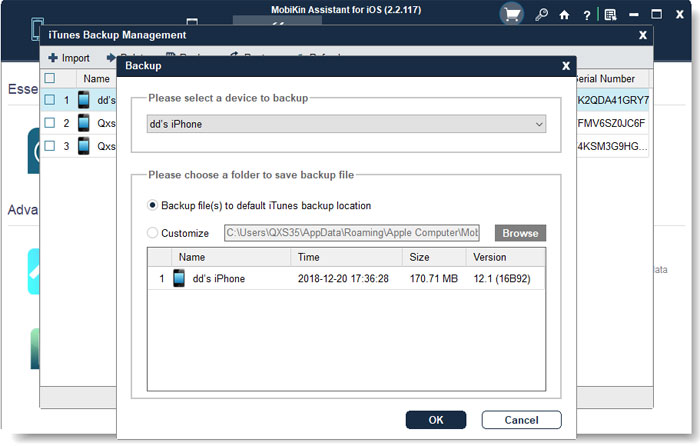
MobiKin Assistant for iOS is embedded with a 1-click backup and restore feature, through which you can back up your iPhone to Windows 10 in batches. To do so, please go to its "Super Toolkit" > "iTunes Backup & Restore" > "Backup" > choose your iPhone > pick a location to store the backup > tap "OK". After that, you'll be allowed to restore your iPhone from the backup anytime.
You May Want to Know:
- Not Enough Space to Back Up iPhone on Mac/PC? 10 Solutions for You
- A Quick Start Guide on How to Extract Photos from iPhone
Part 2: How to Back Up iPhone to Windows 10 Computer via iCloud
By syncing an iPhone to iCloud, you can then download the backup content from the iCloud web on your PC Windows 10 computer. Before the backup, please first check the following requirements:
- There's enough storage space on iCloud for backup.
- Make sure your iPhone is connected to a stable Wi-Fi network.
- Your iPhone has enough power.
Next, let's see how to use iCloud to make an iPhone backup on Windows 10:
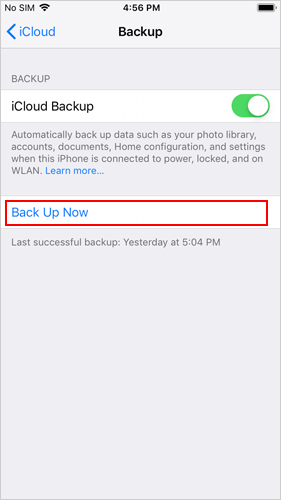
- Go to iPhone "Settings" > [your name] > "iCloud" > "iCloud Backup". (iCloud backup vs. iTunes backup)
- Go for "Back Up Now" to back up your iPhone to iCloud.
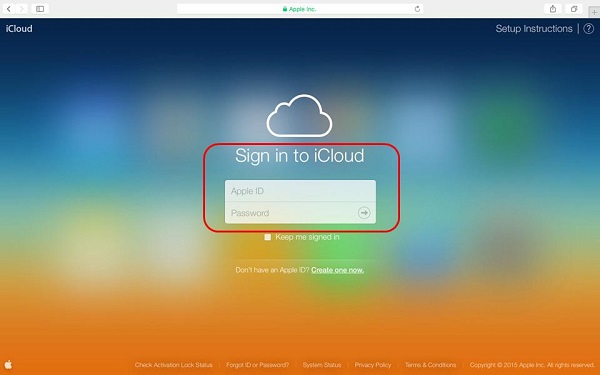
- When it's done, visit icloud.com on Windows 10.
- Log in with your iCloud account and check the backup files.
- Choose the items you want and tap the "Download" icon to get them onto this computer.
Know More:
- [Easy Guide] How to Transfer Data from iPhone to iPhone without iCloud?
- How to Fix iPhone/iCloud Photos Not Showing Up on Mac? [Ways Most People Don't Know]
Part 3: How to Back Up iPhone on Windows 10 Using iTunes
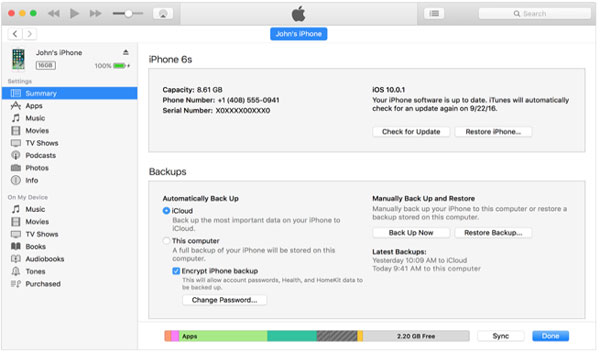
To make an iPhone backup on Windows in this way, please ensure you are working with the most recent version of iTunes. Before the data syncing, you can enable or disable encrypted backups as per your needs. (Disabling encrypted backups means your passwords, Health, and HomeKit data won't be backed up to iTunes.)
After the backup, iTunes backup is unreadable on your Windows 10 computer. And the backup content will overwrite the current iOS data when restoring it to an iDevice.
How to back up iPhone 13/12/11/X/8/7 to a Windows computer with iTunes?
- Open iTunes on your Windows 10 computer.
- Connect your iPhone to the computer via the Lightning cable.
- When iTunes recognizes your iPhone, tap the "device" sign from the phone-management screen.
- Go to "Summary" > "This Computer" to back up your iPhone to iTunes on your computer.
- Go for "Back Up Now" to initiate the backup. (Where does iTunes store backups & how to change iTunes backup location?)
Extra Tips: How to Move iPhone Backup File to an External Hard Drive
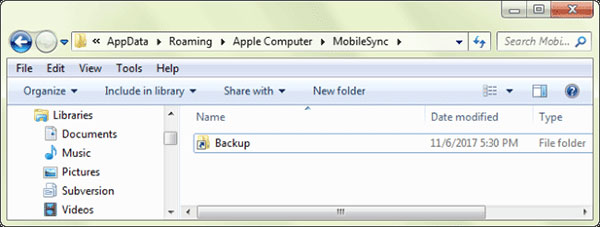
If you fear that the backup directory might be insecure or just want to create a copy of the backup in a separate space, consider copying the iPhone backup from Windows 10 to an external hard drive. Here are the steps:
- Open and go to your external hard drive to create a backup directory - "MobileSync".
- Go to "File Explorer".
- Proceed to C:\Users\[PC name]\AppData\Roaming\Apple Computer\MobileSync.
- Right-click on the backup folder of your iPhone.
- Choose "Copy".
- Navigate to the new "MobileSync" folder you just made in your drive.
- Paste your iPhone backup folder there.
- Open the default MobileSync folder.
- Rename the existing folder as "Backup (Old)".
The Bottom Line
Admittedly, iCloud and iTunes were the two most commonly used Apple backup services/tools before the advent of professional programs.
However, as you might know, the former's disadvantage is that it is slow to back up an iPhone and prone to privacy leakage or management confusion, especially when an Apple ID is associated with several iDevices. The latter may cause you inconvenience if you restore your iPhone from the backup files, as we just mentioned. So try MobiKin Assistant for iOS for an enjoyable backup trip.
Related Articles:
How to Transfer Photos from iPhone/iPad to PC Windows 10?
iPhone Internal Storage Is Empty on Windows 11/10/8/7? 10 Solutions Offered
5 Popular Ways to Mirror iPhone/iPad to Windows 10 [2022 Latest]
iCloud Not Backing Up on iPhone 11/XS Max/8 Plus/8? Here's the Fix!
4 Practical Tips to Sync iPhone to a New Computer without Erasing
2 Ways to Recover Deleted Text Messages on iPhone without Backup


