iTunes Could Not Connect to This iPhone? Here's the Full List of Fixes!
"There comes the alert iTunes could not connect to this iPhone. An unknown error occurred 0xe80000a when I try to sync with iTunes. I suspect the problem is I replaced my hard drive on my MBP, but I cannot find the solution anywhere. Help?" -- from Apple Forum
Although iTunes is not an ideal tool for iOS data transfer and control, many folks may use it to copy music and other files on and off iDevices or create backups stored on PCs/Macs. Often, iTunes errors happen from time to time, as stated in the preface.
Well, if you are at a loss about what to do in such circumstances that iTunes could not connect to this iPhone, just check out the solutions in this complete guide.
Part 1: 17 Quick Solutions to Fix "iTunes Could Not Connect to This iPhone"
"iTunes could not connect to the iPhone because an error occurred while reading from the device". The reason for iTunes errors can be complicated. To address it as soon as possible, let's go through the 17 quick fixes below.
Solution 1. Trust the Computer You're Using
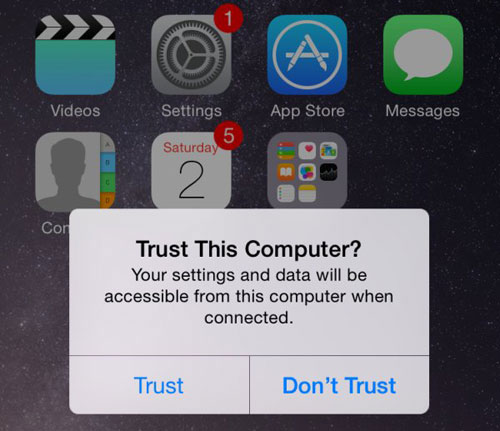
When you connect your iPhone to the computer through a USB cable, your phone should shortly prompt you to trust the computer. Just do this to see whether it works or not.
Related Passages:
- Finding Methods to Connect iPhone to iTunes? Here!
- iPhone Won't Connect to Wi-fi, How to Fix It? [Solved]
Solution 2. Restart Your Computer
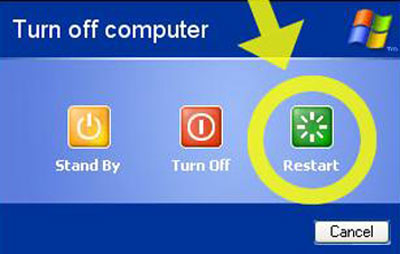
If your iPhone has trusted your computer but to no avail, just try to restart your computer.
Solution 3. Check the USB Cable and Ports
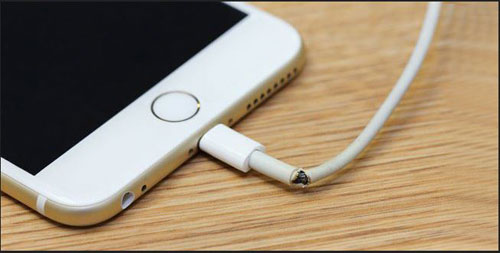
If your device doesn't cue you to trust your computer, you need to check your USB cable and ports. Chances are that it isn't up to the job. Here, you can insert another USB cable or use a different port instead on your computer.
Solution 4. Make Sure Your iPhone Is Turned on
iTunes doesn't recognize your iPhone all through? One of the reasons easy to overlook is your phone is powered off at that time. All you need to do is to start it by pressing the Power button.
Solution 5. Update iOS
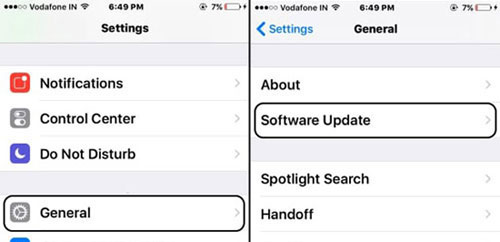
Some users from Apple Forum said that updating iOS to the latest version can solve iTunes not connecting to iPhone issue. To do it, on your iPhone, go to Settings > General > Software Update to check for updates available. Then tap Download and Install.
Solution 6. Update iTunes
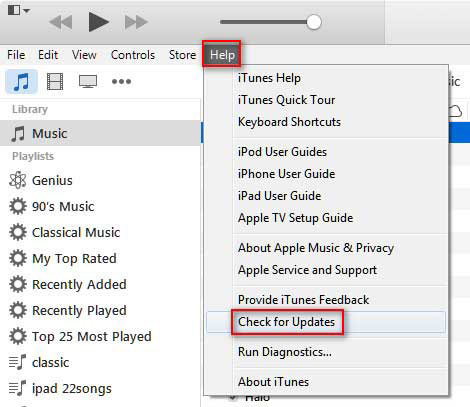
You can also try to use the latest version of iTunes. To do this, on Windows, open iTunes, go to its menu to find and click Help > Check for Updates. On Mac, click the Apple icon > System Preferences > Software Update.
Solution 7. Ensure Your Computer Has iTunes Compatible OS
The latest iTunes is compatible with Windows 7/Win 8/Win 10 (Windows Vista and XP excluded). And on Mac, iTunes requires to work with macOS X 10.5.8 and later.
Solution 8. Check Device Manager
If you got iTunes from the Microsoft Store, you could check Device Manager on your PC.
Here's the tutorial:
- Disconnect your iPhone from your computer.
- Unlock your device and go to the Home screen.
- Reconnect your device.
- If iTunes opens, close it.
- Click and hold the Start button > choose Device Manager.
- Find and expand the Portable Devices section.
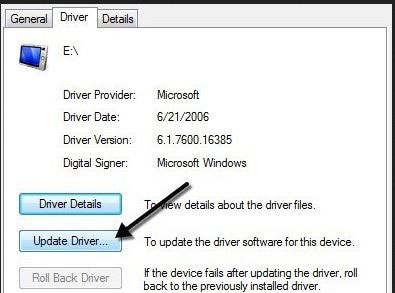
- Look for your connected iPhone > right-click the device name > choose Update driver.
- Choose "Search automatically for updated driver software".
- After the software is installed, go to Settings > Update & Security > Windows Update.
- Verify that there are no other updates are available.
- Open iTunes.
Solution 9. Check the Status of the Internet
If you encounter iTunes error 9006, you can check the status of the Internet. Here are the specifics:
Use an Internet browser to connect to a website. Nothing loads? Use another device on the same network to see whether it can connect to any website or not.
If the going gets tough, turn off your Wi-Fi router and turn it on again to reset it. If it still fails, do remember to contact your Internet provider for help.
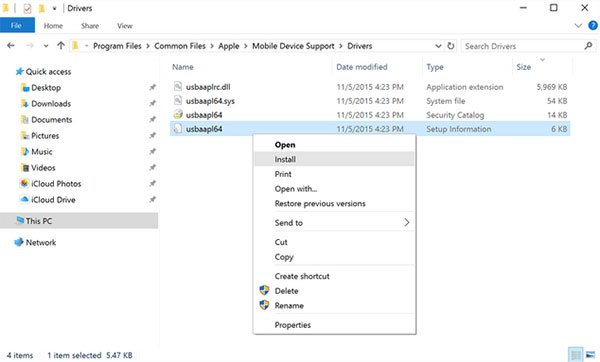
Solution 10. Reinstall the Apple Mobile Device USB Driver
If you downloaded iTunes from Apple, reinstalling the Apple Mobile Device USB driver might work.
Here's how:
- Disconnect your iPhone from your PC.
- Reconnect your device to your computer.
- Close iTunes if it opens automatically.
- Press the key combination: Windows + R to open the Run command.
- Enter the string: %ProgramFiles%\Common Files\Apple\Mobile Device Support\Drivers
- Click OK.
- Right-click the usbaapl64.inf or usbaapl.inf file and select Install. (Ensure the filename extension is .inf.)
- Unplug your device from your PC and reboot your computer.
- Reconnect your iPhone to your computer and launch iTunes.
You May Be Interested in:
- What to Do If My iDevice Fails to Connect?
- Can't Add Songs to iPhone with iTunes? Here're Best Solutions
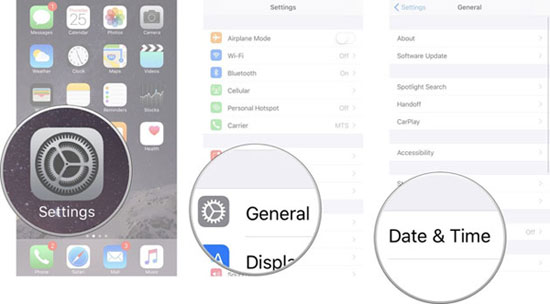
Solution 11. Check the Date and Time
To fulfill this:
- On your iPhone, run the Settings app, hit General > Date & Time. Get more help with the date and time.
- On your Mac: go to System Preferences > choose Date & Time.
- If the data and time are wrong, update them or enable the option to set the date and time automatically.
Solution 12. Disable Restrictions
iTunes could not connect to the iPhone because an error occurred while reading from the device. Sometimes, this is caused by the restrictions that you applied to your iPhone. You can remove it by going to your iPhone Settings > Screen Time > Content & Privacy Restrictions > Disable Restriction.
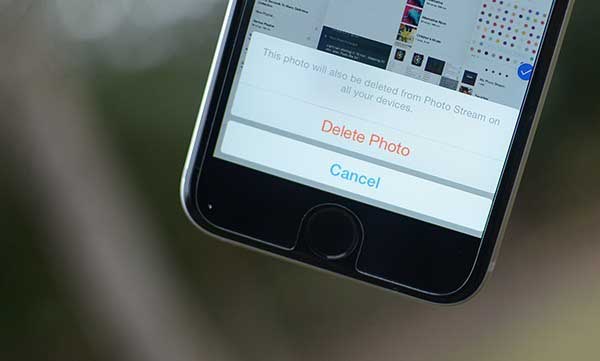
Solution 13. Free Up Storage on iPhone
Freeing up memory on your iPhone might be one viable way to rule out unknown errors. Here are some measures:
- Delete photos, music, videos you don't need.
- Transfer data from one phone to another.
- Clean the storage of apps on which you downloaded the content.
- Uninstall useless apps on your iPhone.
Solution 14. Delete the "Lockdown" Folder
Deleting the "Lockdown" folder may help remove corrupt files that may cause errors on iTunes.
To find the folder and delete it, you can:
- Press and hold the Windows + R keys on the keyboard.
- In the Running window of your PC, type %ProgramData%.
- Click OK.
- Find the Apple folder and click it.
- Delete the Lockdown folder.
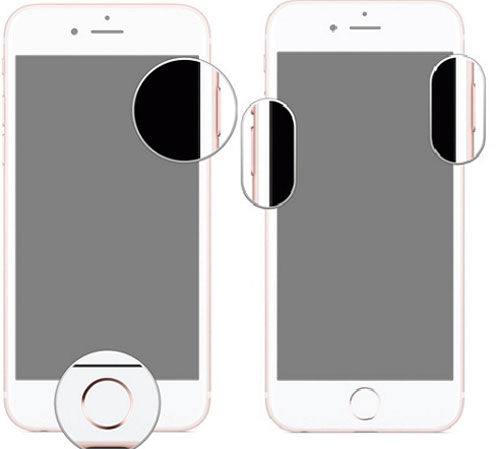
Solution 15. Restart Your iPhone
- Press and hold either the volume button and the side button till the power-off slider appears.
- Drag the slider and wait 30 seconds for your iPhone to turn off.
- To turn your iPhone back on, press and hold the side button until you see the Apple logo.
Solution 16. Connect Your iPhone to Another Computer
Still cannot fix the issue? If so, it's a rare case that your computer won't "accept" your iDevice. Try to connect your iPhone to another computer. And if iTunes error 0xe8000015 doesn't appear, the previous computer could be the culprit for the problem.
Solution 17. Contact Apple Support
If the same issue occurs on another computer, the last fix is to contact Apple Support Team. You can reach out to the team by going to getsupport.apple.com.
Part 2: Use the Best iTunes Alternative to Transfer and Manager Your iPhone Data
If nothing proves successful or you are fed up with iTunes, don't hesitate to take a glance at MobiKin Assistant for iOS (Win and Mac). This professional software runs on your computer independently, enabling you to transfer and manage your iOS data/iTunes backups on any PC/Mac flexibly and efficiently.
Key Highlights of MobiKin Assistant for iOS:
- Transfer files from iDevices to computers, and download data from computer to iPhone/iPad/iPod.
- Work for various data types, including Video, Photo, Music, eBook, Contacts, SMS, Notes, Safari Bookmarks, Voice Memo, Podcast, Ringtone, Playlist, and others.
- Take control of iOS data and iTunes backups on a computer directly.
- Back up and restore data between iOS devices directly and copy iTunes backups from PCs/Macs to iDevices.
- Run smoothly without iTunes.
- Keep original data quality.
- Work well on various iDevices, such as iPhone 12/12 Pro (Max)/12 mini, iPhone 11/11 Pro/11 Pro Max, iPhone X/XR/Xs/Xs Max, iPhone 8/8 Plus, iPhone 7/7 Plus, iPhone 6/6S/6 Plus, iPod, iPad, etc.
- It never records any privacy of its users.
Now, download the best iTunes alternative on your computer and experience the flexible iOS data management brought by this top-notch program.
* Connect Your iPhone to Your Computer
- Install and launch MobiKin Assistant for iOS on your computer.
- Attach your iPhone to the computer through a USB cable.
- This tool will identify your device soon, and its main interface will appear like below.

Tips: Before the recognition, you may need to press "Trust" on your iPhone and tap "Continue" on the software as prompted.
* Transfer and Manage Your iPhone info and Media Files
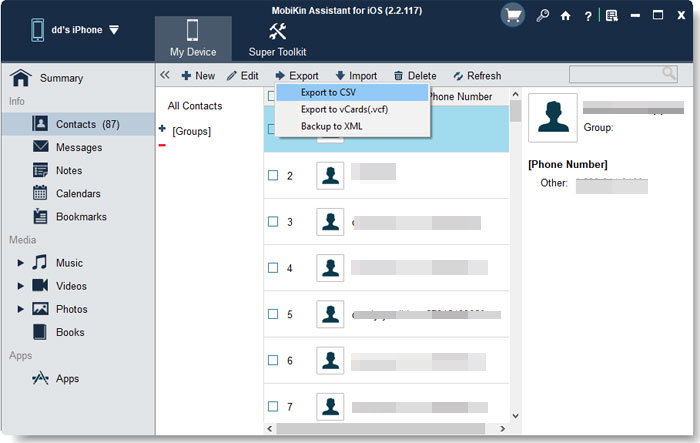
You'll now see a list of data types at the left menu on the main screen. Next, you can:
- Click "Export" to transfer data from iPhone/iPad/iPod to a computer.
- Hit "Import" to copy files from the computer to the iOS device.
- Press "Delete" to remove useless files from an iPhone, iPad, or iPod.
- Tap "Edit" to modify the info of the existing iOS data.
* Offload Applications from Your iOS Device
You can click "Uninstall" from the top of the interface to remove unnecessary applications from your iDevice.

* Manage iTunes Backups on Your Computer
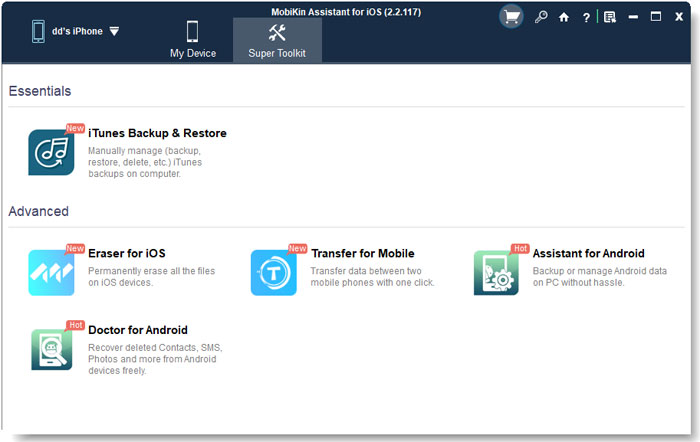
Click "Super Toolkit" from the program screen and select "iTunes Backup & Restore". Next, you can proceed with the iTunes backups management:
- Hit "Backup" to back up your iDevice to iTunes default location or any customized folder as you like.
- Highlight "Restore" to get data from iTunes backup onto your iDevice.
- Press "Delete" to remove iTunes backup records from your PC/Mac.
Ending Words
Overall, the 17 fixes we introduced above are not complicated, though, it is a lot of work to try all out. So, rather than trying the solutions above one by one that may or may not work out, wouldn't it make more sense to save your precious time by forgoing the annoying iTunes? In this connection, simply choose the best replacement for iTunes - MobiKin Assistant for iOS to please yourself.
How do you fix iTunes could not connect to this iPhone because an unknown error occurred? Please leave your thoughts below, if any. Chances are your idea is of great help for more folks.
Related Articles:
What Does iTunes Backup Include - 5 Things About iTunes Backup
How to Fix iPhone "Cannot Connect to iTunes"?
[Solved] iPhone Cannot Connect to App Store? Here are Solutions!
iCloud Backup vs iTunes Backup: Which One Should We Choose?
Can I Delete Songs from iPhone But Keep Them on iTunes? Of Course, You Can!
What to Do If the Computer Does Not Recognize Your Android Phone


