Best Way to Transfer Music from iPhone 14/13/12/11/Xs/XR to Computer
How to transfer songs from iPhone Xs, iPhone Xs Max and iPhone XR to computer? You might have experienced a troublesome situation that it is hard to transfer non-purchased music from iPhone to computer with iTunes. Since Apple's iTunes does not allow to copy music from an iPhone to a Windows PC or Mac, how do you transmit music from iPhone Xs/Xs Max/XR to computer as easily as possible? So this guide is here going to show you a simple way to transfer music from iPhone Xs/Xs Max/XR to computer, or copy songs from iPhone Xs/Xs Max/XR to PC.
Best Tool You'll Need:
To effectively export music from iPhone Xs, iPhone Xs Max and iPhone XR to computer, it is highly recommended a professional iPhone Music Transfer tool for you - MobiKin Assistant for iOS (Windows/Mac), which is a all-in-one iOS Data Manager tool for iPhone, iPad and iPod users.
With this powerful software, you are allowed to manage iDevice data on desktop computer directly. For example, you are able to export or backup various kinds of files from iPhone to computer with one click, of course including the iPhone Xs/Xs Max/XR songs. Besides, you can also import different contents from computer to iOS device without hassle, or delete, add and edit iPhone data with the software directly.
Below are the free trail of the software in Mac and Windows version, you might download the right version on your computer and then follow the steps to transfer music from iPhone Xs, iPhone Xs Max and iPhone XR to PC in the following part.
How to Transfer Music from iPhone Xs/Xs Max/XR to PC?
Let's check the detailed tutorial on transferring music from iPhone to computer step by step.
Step 1. Connect iPhone to PC
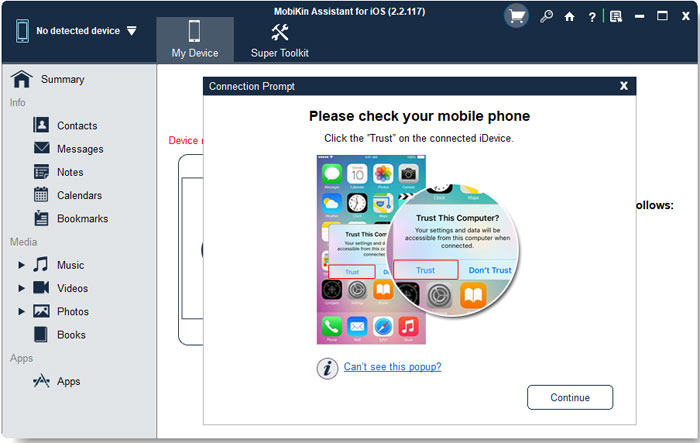
Connect your iPhone to computer with a USB cable, and run the recommended iPhone Music Transfer on your PC. Then the software will ask you to trust this computer on your connected iPhone in order to detect your device successfully.

Step 2. Make the program detect your iPhone
Just tap the "Trust" option on your iPhone Xs, iPhone Xs Max and iPhone XR and click "Continue" button in the program. Thus the software will be able to recognize your iPhone and show the main interface with your iPhone's information as below.

Step 3. Start to transfer music to computer
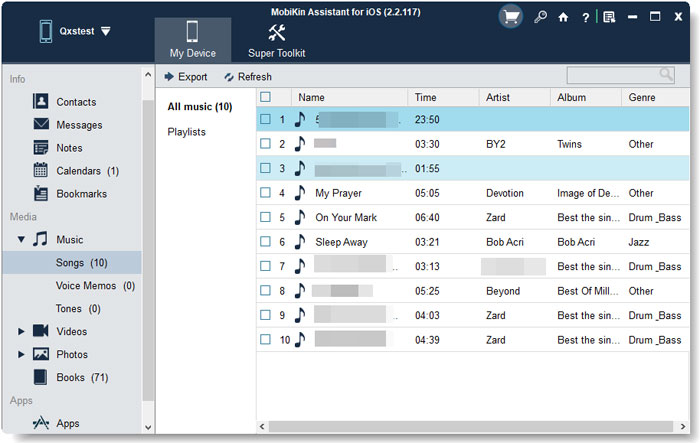
Click "Music" category and choose "Songs" in the sub-menu on the left panel to bring out all music files on your iPhone on the right panel. Tick the songs you want to export in the program, then click "Export" button to begin the process.

Thus all the selected music files will be exported to your computer immediately.
Related Articles:
Computer Won't Recognize Your iPhone, How to Fix It?
How to Transfer Music from Computer to iPhone Easily?
6 Ways to Transfer Photos from Computer to iPhone Effectively
Easy Ways to Transfer Files from Lenovo to iPhone


