The Simple Method to Transfer Photo from iPhotos to iPhone
iPhoto was a digital photos manipulation application that developed by Apple and designed for Mac OS X originally. And now the app can be applied to iOS devices including iPhone and iPad. The software enables iOS users to manage, edit and share the photos with others and at same time the photos can be displayed as different categories as you like. I believe iPhone users are familiar with these functions.
Sometimes you will need to transfer the photos that you took by iPhone to Mac computer if you want to edit the pictures with iPhoto. After that, the photos need to be transferred back to the iPhone. Then do you know how to transfer pictures from iPhoto to iPhone? The problem will be solved in this article. We will provide you the simple method to perform the transferring process.
Guide to Transfer Pictures from iPhotos to iPhone
Step 1. Connect your iPhone to the computer with its USB cable just like the picture shows.

Step 2. iTunes will be launched automatically after you connect the device to the PC. Start the iTunes if it didn't run. Head to the main interface of iTunes and select your iPhone. Then click the Photos option on the left panel.

Step 3. After that, you will see the photos in your device being displayed on the window.

Step 4. Click the "Choose folder..." option and find your wanted folder. Then select the wanted pictures.

Step 5. Finally just start the transferring process after you select the wanted photos.
Bonus: Use Assistant for iOS to Perform the Transferring Process from iPhone to iPhoto
MobiKin Assistant for iOS (Mac Version) is a professional transferring software that designed for Mac users. It can help the users to transfer files including videos, music, books, voice memo, playlist as well as photos from iOS devices to Mac computer. It will enable you to manage all the files in iPhone, iPad and iPod touch as you like. By the way, the Windows Version is available, too. Here we will offer you the steps to sync photos from iPhone to iPhoto.
Step 1. Download the software by clicking icons below. Here we also offer you the Window Version so you can transfer photos from iPhone to Windows computer. Link the iPhone to the Mac computer.
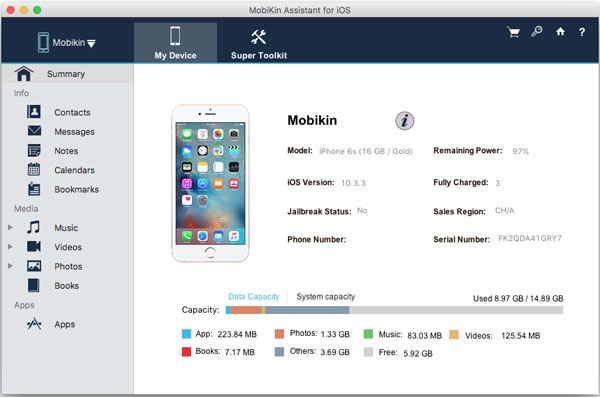
Step 2. The software will detect your device and display them on the interface.

Step 3. Click the Photos option on the left panel to preview the thumbnails on the right panel. Mark those you want to transfer and hit the Export button to tranfer photos from iPhone to Mac computer.

Step 4. Start the iPhoto and select the wanted photos on the Mac computer. Finally click the Import button on the top right corner to transfer the photos from Mac to iPhoto.
Related Articles:
Move Music or Songs from iPhone to Mac
How to Transfer Music from iPad to Computer
Transfer SMS from iPhone to Computer
How to Backup Text Messages on iPhone Effectively?


