How to Put iPhone 14/13/12/11 Pro (Max) & iPad into DFU Mode? Check Here
At times, your iPhone or iPad may go into technical errors when an iOS beta persistently hangs your iDevice, the firmware malfunctions, or a jailbreak goes awry. So, you will need a restore or reset your iPad or iPhone. Next, you probably wonder how to put iPhone in DFU mode in a quick manner.
OK, this tutorial is mainly about what is DFU mode and how to enter or exit DFU mode for various iPhones/iPads. Just read on and see the details.
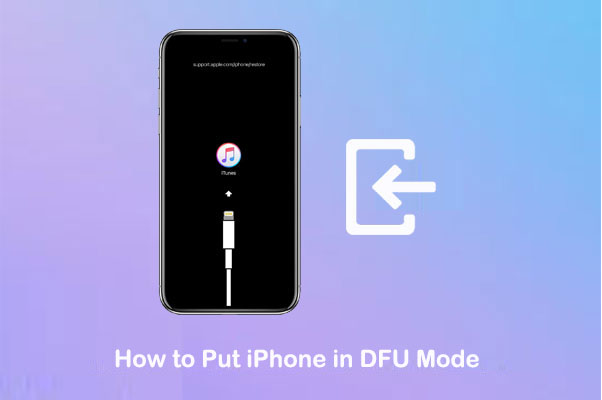
- Part 1: What Is DFU Mode on iPhone/iPad?
- Part 2: How to Put iPhone 8/8 Plus/X/11/XR/Xs or Newer in DFU Mode
- Part 3: How to Put iPhone 7/7 Plus in DFU Mode
- Part 4: How to Get iPhone 6/6S/6 Plus or Earlier to DFU Mode
- Part 5: How to Put iPhone/iPad with Face ID into DFU Mode
- Bonus Tip: How to Exit DFU Mode
Part 1: What Is DFU Mode on iPhone/iPad?
iPhone/iPad DFU (Device Firmware Update) mode is similar to the BIOS on a PC or Recovery Mode on a Mac. This mode is a state that an iPad or iPhone can be put in to get it back into working order. It lets the device interface with iTunes, restore the OS, and update the firmware without automatically installing the last downloaded version.
Unfortunately, if you use this mode to install apps or restore your device, all of your iDevice files will be wiped out. This works similarly to the iTunes restore method, which erases all your iOS data, as well.
Differing from recovery mode, where iTunes restores your iDevice to its factory settings but with the latest OS and firmware, DFU mode lets you change and select the firmware you want to install on an iPhone/iPad.
Next, please follow the rest of this article to learn how to go into DFU mode for iPhone/iPad and exit the mode afterward.
You May Want to Know:
- How to Fix iPhone/iPad Stuck in Headphone Mode?
- Android Safe Mode - A Complete Guide about the Safe Mode in Android Phone
Part 2: How to Put iPhone 8/8 Plus/X/11/XR/Xs or Newer in DFU Mode
The operation instructions vary, depending on your iPhone models. But they have one thing in common when it comes to a device firmware update on iPhone or iPad: PCs and Macs running macOS Mojave or older need iTunes, and Macs running macOS Catalina and newer will use Finder. (Similarly hereinafter)
How to force iPhone 8/8 Plus/SE 2/X/11/XR/Xs or newer into DFU mode?
- Launch the latest version of iTunes or Finder on your computer.
- Keep your iPhone 8/8 Plus/X/11/XR/Xs/12/13/14 connected to the computer via USB.
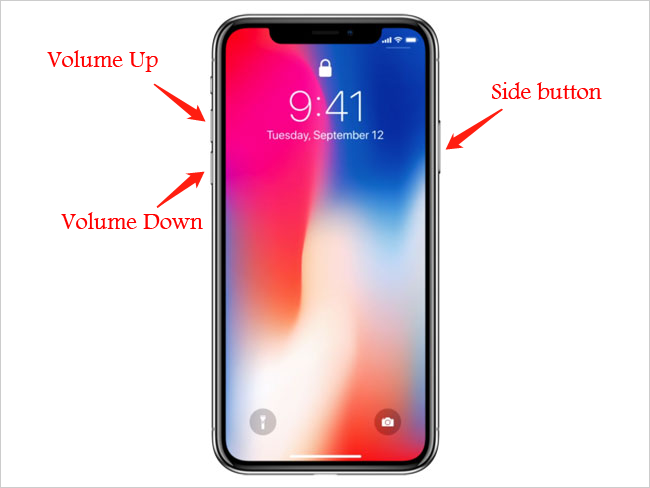
- Quickly press and release the "Volume Up" button.
- Quickly Press and release the "Volume Down" button.
- Press and hold the "Side" button until the screen goes black.
- Press and hold the "Volume Down" button while keeping holding the "Side" button.
- After 5 seconds, release the "Side" but continue holding the "Volume Down" until your iPhone appears in iTunes.
- Finally, release the "Volume" button.
Note: If the Apple logo is turning up on the screen (iPhone is stuck on Apple logo?), it means you held down the "Volume Down" button for too long. Please start the process over from the beginning.
Part 3: How to Put iPhone 7/7 Plus in DFU Mode
Likewise, the iPhone 7 and iPhone 7 Plus have different operations for entering DFU mode than other iPhone models. Here's how to boot/get iPhone 7/7 Plus into DFU mode:
- Connect your iPhone 7/7 Plus to a computer using a USB cable.
- Run iTunes or Finder on this computer.
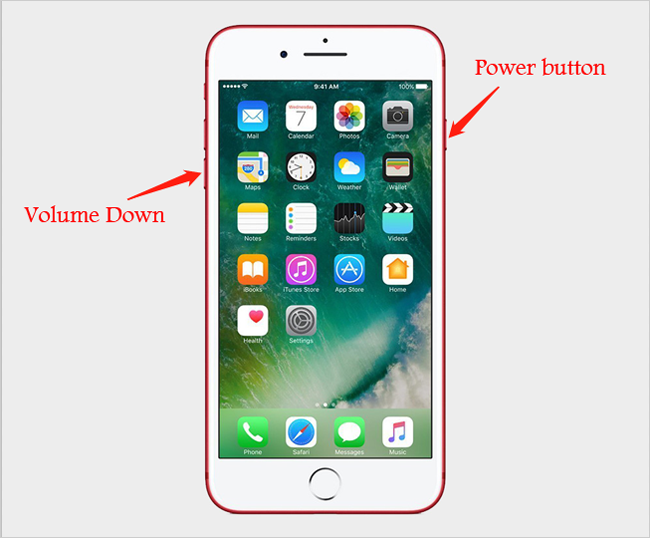
- Hold down both the "Side" and "Volume Down" buttons.
- After 8 seconds, release the "Side" while continuing to hold down the "Volume Down". (If the Apple logo appears, the "Side" button was held down for too long)
- Nothing will be displayed on the screen if the device is in DFU mode. (If open, iTunes should alert you that your device was detected in recovery mode)
- If your device shows a screen prompting you to connect your iPhone to iTunes, retry these steps to get into iOS DFU mode.
See Also:
- [Guide] How to Reset iPhone 14/13/12/11/11 Pro/XS Max/8 Plus without iTunes?
- How to Recover Lost Data from iPhone 14/13/12/11/XR/Xs/X/8
Part 4: How to Get iPhone 6/6S/6 Plus or Earlier to DFU Mode
If you are still using an iPhone 6/6S/6 Plus, check the detailed content to learn how to enter DFU mode for iPhone 6/6S/6 Plus or earlier:
- Connect your iPhone 6/6S/6 Plus to a computer via a USB cable.
- Launch iTunes or Finder on this computer.
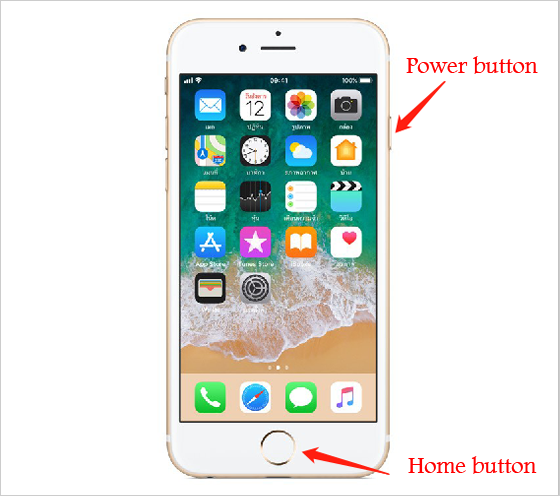
- Hold down both the "Home" button and "Lock" button.
- After 8 seconds, release the "Lock" button while continuing to hold down the "Home" button. (If the Apple logo appears, the "Lock" button was held down for too long)
- Nothing will appear on the screen while the device is in DFU mode. (If open, iTunes will remind you that your iPhone was detected in recovery mode)
- If your iDevice shows a screen telling you to link the device to iTunes, retry these steps.
Part 5: How to Put iPhone/iPad with Face ID into DFU Mode
Some Apple users may own an iPad Pro, iPhones X/XR/Xs/Xs Max, iPhone 11 Pro generation/12/13, which supports Face ID. Here's another way to force iPad/iPhone into DFU mode. To learn how to enter DFU mode for iPad or iPhone with facial recognition, you can:
- Plug your iPhone or iPad with Face ID into your computer via USB.
- Make sure that iTunes/Finder is running.
- Press and hold the "Side" button on your device for 3 seconds.
- While continuing to hold the "Side" button, please press and hold "Volume Down".
- Hold both buttons for 10 seconds.
- Release the "Side" button but continue holding "Volume Down" for another five seconds.
- Your iPhone or iPad will now enter the DFU mode if its screen is illuminated but blank.
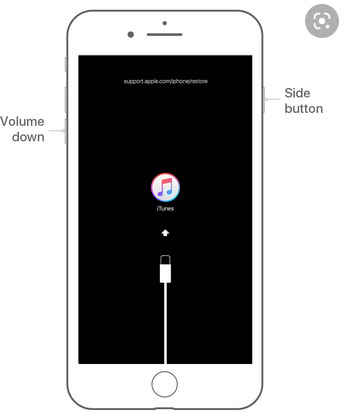
Bonus Tip: How to Exit DFU Mode
If you change your mind and intend to exit DFU mode halfway (How to undo a restore on iPhone?), here is how to get iPhone or iPad out of DFU mode:
- For iPhone 13/12/SE 2nd generation/11/X series/8 series and iPads with Face ID: Press and release the "Volume Up" button. Immediately, press and release the "Volume Down" button. Finally, press and hold the "Power"/"Side" button (The "Top" button for iPad) until the Apple logo appears on the screen.
- For iPhone 7/7 Plus: Press and hold the "Side" button and the "Volume Down" button together. Let go of both the buttons when you see the "Apple" logo on the screen.
- For iPhone 6/6S or earlier or iPads with Home button: Press and hold the "Home" button at the front of the device and the "Side" button (The "Top" button for iPad) together. Leave the buttons when you find the Apple logo.
Ending Words
We detailed how to put your device in DFU mode differently. Frankly, some websites give complicated or misleading instructions when explaining how to put your iPhone 14/13/12/11/XR/Xs/SE/8 Plus/X/7/6 into this mode. Let's say that they would tell you to power off your iPhone first, which is totally unnecessary. By contrast, this post offers comprehensive and concise steps with pictures. So, please share this post on social media if you find it useful.
Related Articles:
iPhone Stuck in DFU Mode? 6 Ways to Get iPhone/iPad out of DFU Mode
How to Back up iPhone/iPad in DFU Mode?
Things You Should Know about iPhone Recovery Mode
iPhone/iPad Stuck on Preparing Update to iOS 15? 9 Methods for You
[Easy Guide] How to Transfer Data from iPhone to iPhone without iCloud?

