Can't Connect to iCloud Server? 10 Tricks to Fix iCloud Connection to Server Failed
iCloud is a popular cloud storage service by Apple, but users often face issues connecting to it. (Not enough iCloud storage?) One common error is the "iCloud connection to server failed". This message occurs when the service on your iOS device cannot establish a connection with Apple's servers due to problems with your Apple ID or other situations. In this article, we'll discuss the possible causes of this issue and 10 quick methods to fix the iCloud server error lightly.
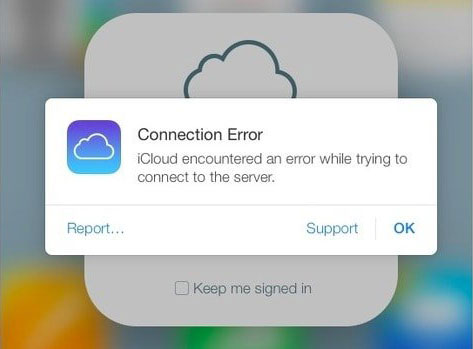
Part 1: Why Can't I Connect to iCloud Server?
There could be an array of reasons why you are unable to connect to the iCloud server. Some of the common courses include:
- Firewall or antivirus software.
- Outdated software/browser.
- Wrong login credentials.
- Poor Internet connection.
- Incorrect iPhone/computer time setting.
- Outdated iOS version.
- iCloud server outage.
- Inappropriate Date and Time Setting.
Click to Know:
- iCloud Link Not Working/Uploading? Here're 10 Solutions [Updated]
- 6 Common Methods to Access iCloud from Android Phones/Tablets
Part 2: Fix iCloud Connection to Server Failed in 10 Quick Tricks
Trick 1: Check Network Connection
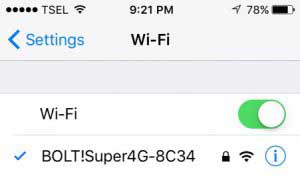
Check your Internet connection first to avoid the iCloud error connecting to server with the iCloud server on your iPhone. Use stable Wi-Fi or cellular data, and switch to Wi-Fi if using mobile data. If unable to log in to the Apple ID server, check your wireless status and try toggling Airplane mode. (Can't sign in to your Apple ID?)
Trick 2: Reenter iCloud Logins
If you encounter an iCloud server status error while signing in, log out of your account on your device by going to "Settings", tapping on [your name], and choosing "Sign Out" to sign out of your iCloud account. Then, log back in using your credentials to resolve the issue.
Trick 3: Boot Mac into Safe Mode
Safe Mode is a troubleshooting mode on Mac that limits your computer to basic services and prevents third-party apps from launching. To enter Safe Mode, restart your Mac and press "Shift". If successful, the label will appear on the desktop. Test your iCloud account while in Safe Mode to identify if a third-party app is causing "the iCloud can't connect to server".

Trick 4: Uninstall Recently Installed Apps
If iCloud encountered an error after installing a program on your Mac, uninstall the app and check if the problem disappears. However, there may be leftover files. Use a Mac cleaner to remove junk items and ensure the app is entirely deleted. Try connecting to the iCloud server again after that.
Read Also:
- Google Photos vs. iCloud: What Are the Differences Between Them? [2023]
- 5 Brilliant Ways to Recover iCloud Password? [Must-read]
Trick 5: Update Data & Time on iPhone
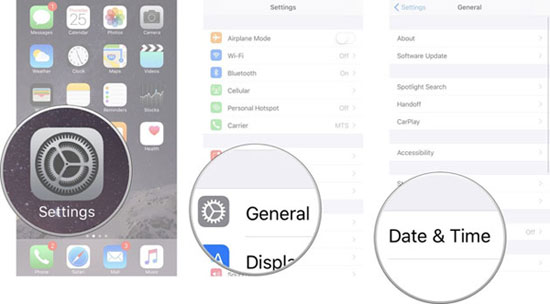
Inaccurate date and time settings on your phone can cause the iCloud error connecting to server with your Apple ID, particularly when using iCloud. By default, your device's date and time are automatically set through an online service. However, if you previously set the time manually, this could be the reason for the problem.
- To verify, access the "Settings" app and select "General", then tap on "Date & Time".
- Confirm that "Set Automatically" is turned on by sliding the button to the right.
Trick 6: Reset Network Settings
- Go to your iPhone "Settings" > "General" > "Reset" > "Reset Network Settings".
- Enter your passcode and choose to reset the network settings.
- Finally, restart your iPhone to reset all of your device's network settings.
Trick 7: Update iOS & macOS
Update iOS system:
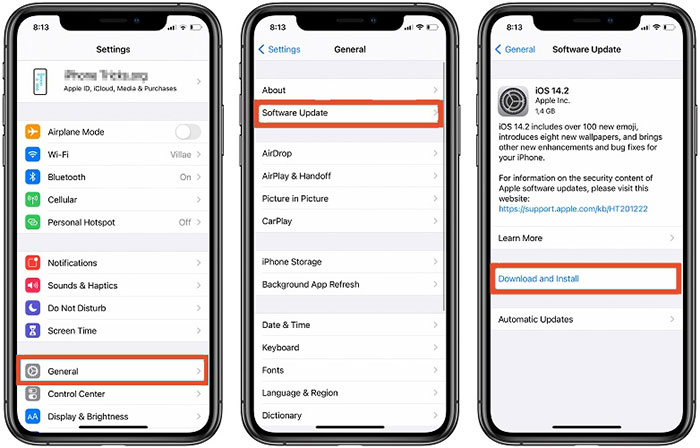
- Open the "Settings" app on your device.
- Tap on "General" > "Software Update".
- If an update is available, you will see a notification prompting you to download and install it.
- Tap on "Download and Install" to proceed.
- Follow the on-screen instructions to complete the update to potentially fix "couldn't connect; there may be a problem with the server".
Note: Make sure to back up your iDevice before performing the update to avoid losing any important data. Also, ensure that your device has a stable Internet connection and enough battery life to complete the iOS update.
Update macOS:
- Click on the Apple menu in the top-left corner of the screen.
- Select "System Preferences" from the dropdown menu.
- Click on "Software Update".
- If there is an update available, click "Update Now".
- Follow the prompts to download and install the update.
Trick 8: Use the Verification Code
Obtaining a verification code from a different Apple device that is connected to the same Apple ID might help fix the "iCloud could not communicate with the server" error.
- To get a verification code on an iPhone, navigate to "Settings" > "Apple ID" > "Password & Security" > tap on "Get Verification Code".
- To obtain a verification code on a Mac, go to "System Preferences" > "Apple ID" > "Password & Security" > click on Get Verification Code.
Trick 9: Check Apple System Status
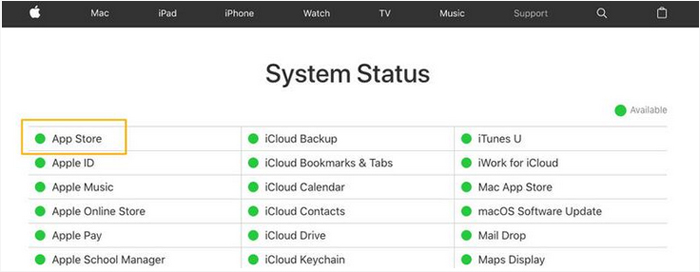
Navigate to Apple's System Status page using a web browser and look for the specific service you were attempting to access. If a red dot appears next to the service, it is currently unavailable, and you will need to wait until it is operational again to access it.
Trick 10: Restart Your iPhone
Rebooting your iPhone is the last resort to fix the iCloud connection to server failed. Here's the detailed guide:
- To restart an iPhone, press and hold the "Power" button and the "Home" button simultaneously until the Apple logo appears on the screen. Then release the buttons and wait for the device to restart.
- On newer models without a Home button, press and quickly release the "Volume Up" button, then press and quickly release the "Volume Down" button, followed by holding down the "Power" button until the Apple logo appears.
Part 3: Use the Best iCloud Alternative to Back Up iOS Data Smoothly
There was still an error connecting to iCloud after the quick fixes? Try MobiKin Assistant for iOS (Win and Mac). This software makes it simple and convenient to back up iPhone/iPad data to a computer. It also allows for easy transfer and management of iOS files on a PC or Mac. All in all, this all-inclusive tool serves as a powerful iCloud alternative, enabling users to back up, transfer, edit, and manage their device's content. So, experience a seamless connection between your phone and your computer to go on a fun trip with this utility.
Main features of MobiKin Assistant for iOS:
- Safely back up iOS files to your computer without losing any info or compromising quality.
- Easily restore your iPhone from the backup with a single tap.
- Seamlessly transfer data between your iDevice and computer/iTunes.
- Optimize your file management by directly managing your iOS devices on your PC/Mac.
- Enjoy comprehensive support for various data types, including Contacts, Videos, Photos, Songs, eBooks, Text Messages, Notes, Safari Bookmarks, Voice Memos, Podcasts, Ringtones, Playlists, and more.
- Work well with virtually all iOS devices, including iPhone 14/14 Plus/14 Pro (Max), iPhone 13/13 Pro (Max)/13 mini/12/12 Pro (Max)/12 mini, iPhone 11/11 Pro/11 Pro Max, iPhone X/XR/Xs/Xs Max, iPhone 8/8 Plus, iPhone 7/7 Plus, iPhone 6/6S/6 Plus, iPod touch, iPad, etc.
- It won't let out your privacy.
Next, let's see how to back up your iOS devices to a computer via MobiKin Assistant for iOS:
Step 1. Install Assistant for iOS on your computer and connect your iPhone to your computer with a USB cable. Once the software has been launched, follow the instructions to enable it to detect your phone. This will result in a display similar to the one shown below.

Step 2. Next, select the data types you want to back up from the menu on the left-hand side. You can then preview and choose the specific items you wish to back up from the options on the right-hand side.
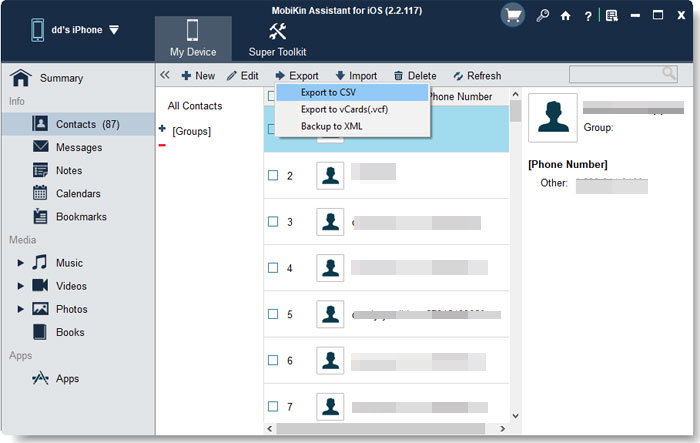
Step 3. To save the selected iPhone or iPad files to your computer, click the "Export" option located on the top screen.
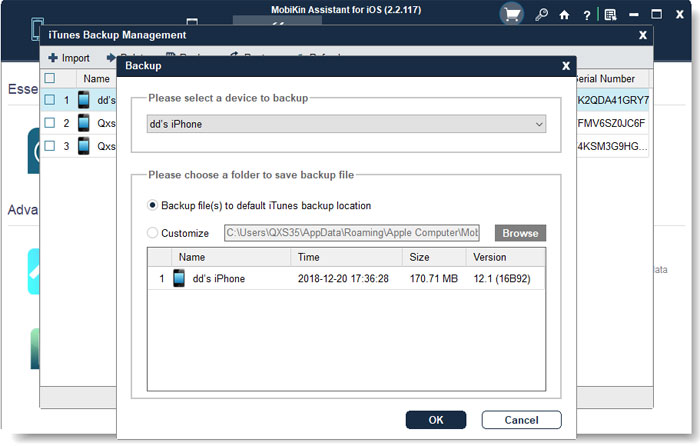
If you wish to back up your iPhone in bulk to your PC/Mac, you may use the optional feature available in the software. To do it, click "Super Toolkit" from the program interface and select "iTunes Backup & Restore". Then choose "Backup". Pick the device you wish to back up and choose a location to save the items. Finally, click "OK" to initiate the backup procedure.
Final Words
On the whole, this passage offers several reasons and some solutions to ease or fix the iCloud server error issues. Frankly, MobiKin Assistant for iOS is a recommended program for data backup, restore, and management, which can help you bypass the error associated with iCloud promptly. Thus, it's a decent idea to try this substitute when needed. Finally, if you have any queries, please share your thoughts and experiences in the comments.
Related Articles:
6 Flexible Methods to Connect iPhone to iPad Pro/Air/4/mini
4 Marvelous Ways to Delete Messages from iCloud Storage [Quick Guide]
How to See What Is on My iCloud Storage? 6 Methods Most People Don't Know.
How to Fix iPad Not Backing Up to iCloud or iTunes? Here're 12 Simple Methods
4 Hot Tips to Upload Photos to iCloud from iPhone/PC/Mac/iCloud.com
iCloud Backup for Android: 4 Ways to Restore iCloud Backup to Android


